44
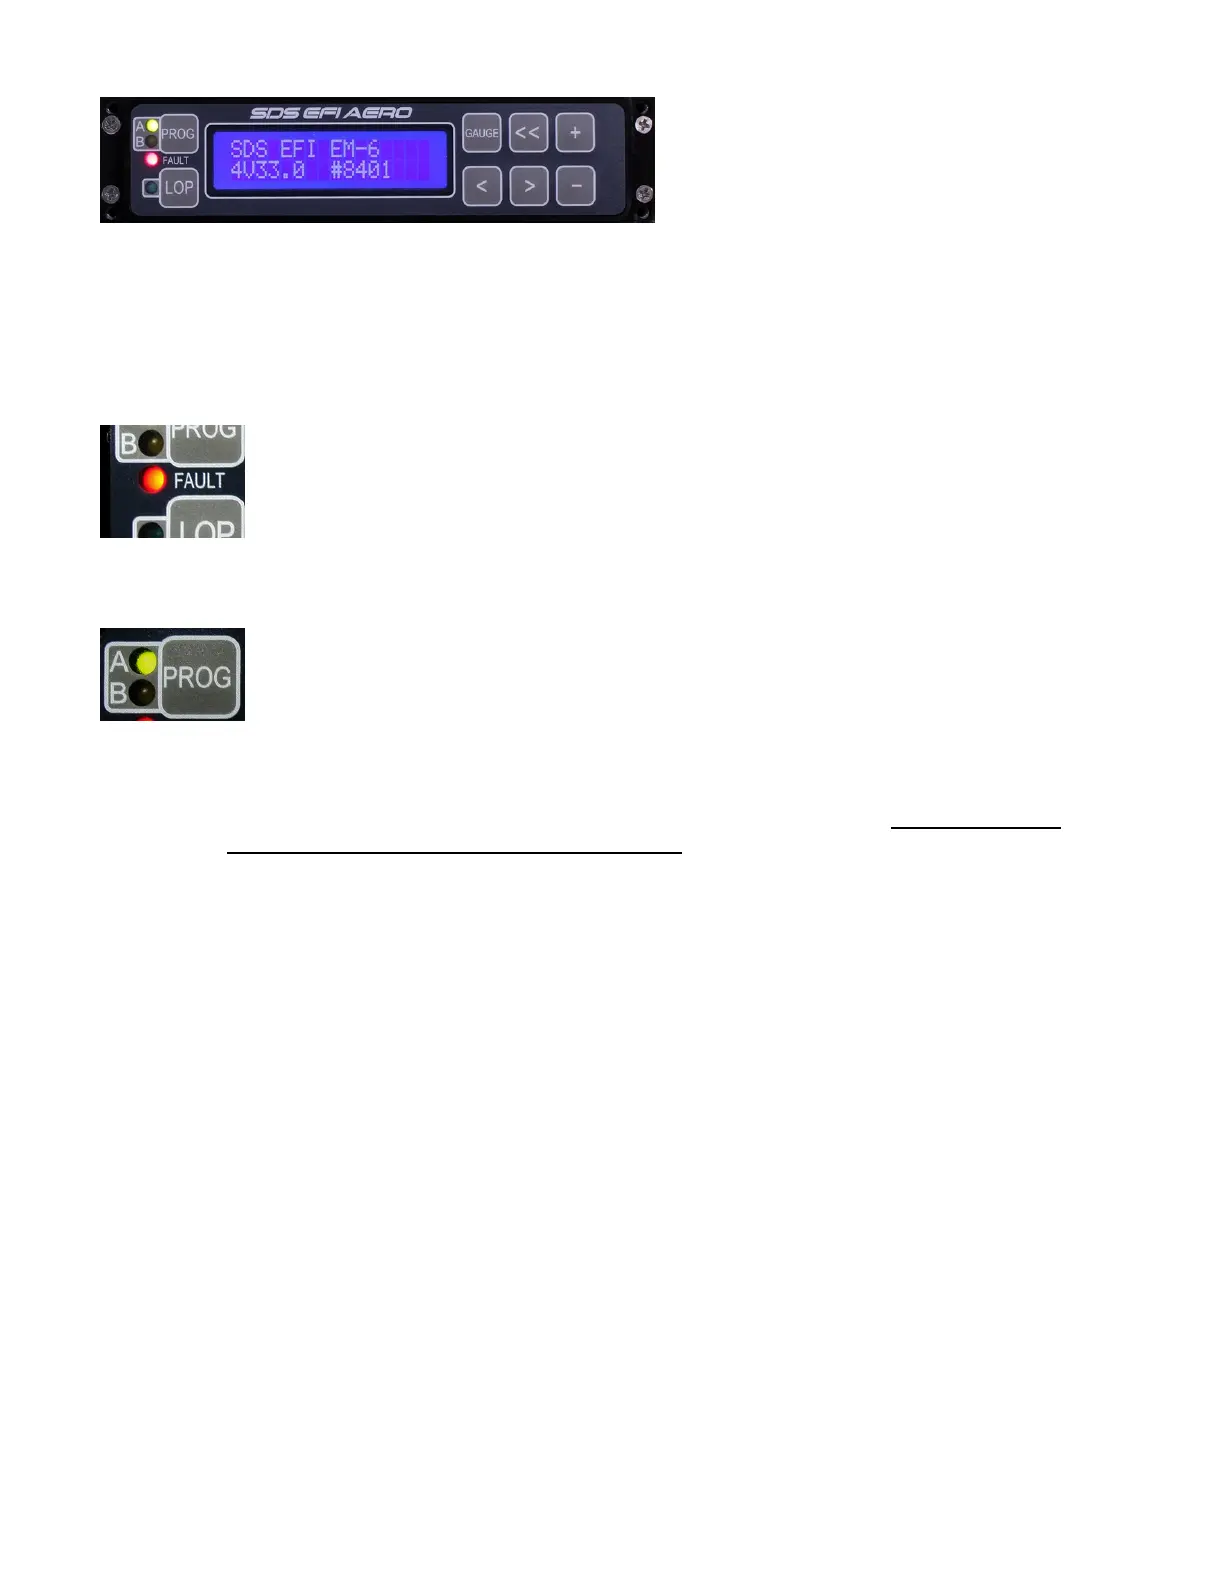
LCD Programmer
The programmer allows you to access all points within each parameter and change values to program
the system. When powered up, SDS EFI should appear in the LCD window along with the system type,
software version and burn#. From here, parameters may be called up by pressing the right or left
parameter select buttons (< or >). LOP activates Lean of Peak function, blue LED illuminates when
active.
Fault LED
If this red LED is flashing, then check Gauge1 screen RPM, MAP and Temperature
readings to see if any display ERR. If none do, then the fault is likely low main voltage
which may be common if electronics are powered up but the engine is not running. In
Gauge screens you can press the plus key to attempt to clear and faults (ERR) if the
fault is still lit, check voltage in gauge3 mode, if below 12.5 V then voltage is the cause
of the fault LED flashing
A B Prog key
On Dual board EM-6 systems, this key is used to access and program each ecu
separately. LED’s indicate which ecu is being accessed. For systems using the older 3-
1/8” round style dual programmer, a toggle switch is used to select which ecu is
accessed. A message will appear when the switch it changed stating Primary ECU or
Backup ECU for about 1.5 seconds.
Dual ECU’s: You will need to remember if you change a value in the A-Primary ECU you will need
to also change the same value in the B-Backup ECU with a few exceptions: Magnet Position, this
value will be different in the Backup ecu vs. the Primary ecu.. Programming can take a lot of time
because of having to duplicate values and must be done carefully.
Do not duplicate certain Setup Mode settings such as Config values. These are different in the Backup
vs Primary ECU best to never change Config numbers unless you consult with SDS first. For most
people entering Setup Mode may only be needed if using the Fuel flow output option. Best advice here is
stay out of Setup Mode, more details on Setup Mode further into the manual.
As each parameter is gone through using the <<,< and > keys, the next parameter will appear in the
window. The + and – buttons are used to either increase or decrease the value of each parameter or
command other functions when prompted in the screen. Gauge button returns you to either Gauge 1 or
Gauge 4 screen (selectable).
The parameters will automatically loop back to the opposite end upon reaching one of the end
selections. By holding down either the right or left parameter select buttons for more than 2 seconds,
ranges will advance at the rate of 8 per second until the button is released at the desired location. The
<< button advances left at 20 frames per touch and can be held down for extremely fast scrolling.
Within each parameter, there are a number of ranges with a corresponding value number beside it. This
value number is the one that will be changed to alter the injector pulse width. ie. RPM FUEL 2500, 157.
RPM FUEL is the parameter, 2500 is the range and 157 is the value. The value number may be any
number between 0 and 255 on most parameters, (350 on RPM Fuel) however some parameters have
limits. The larger the number, the more fuel will be injected at that parameter and range.
To change a value, use one of the 2 buttons labeled +1 or-1. Each button will change the value in the
window each time it is depressed by that amount. IE. With a 148 in the window, Pressing the –1 button
 Loading...