111
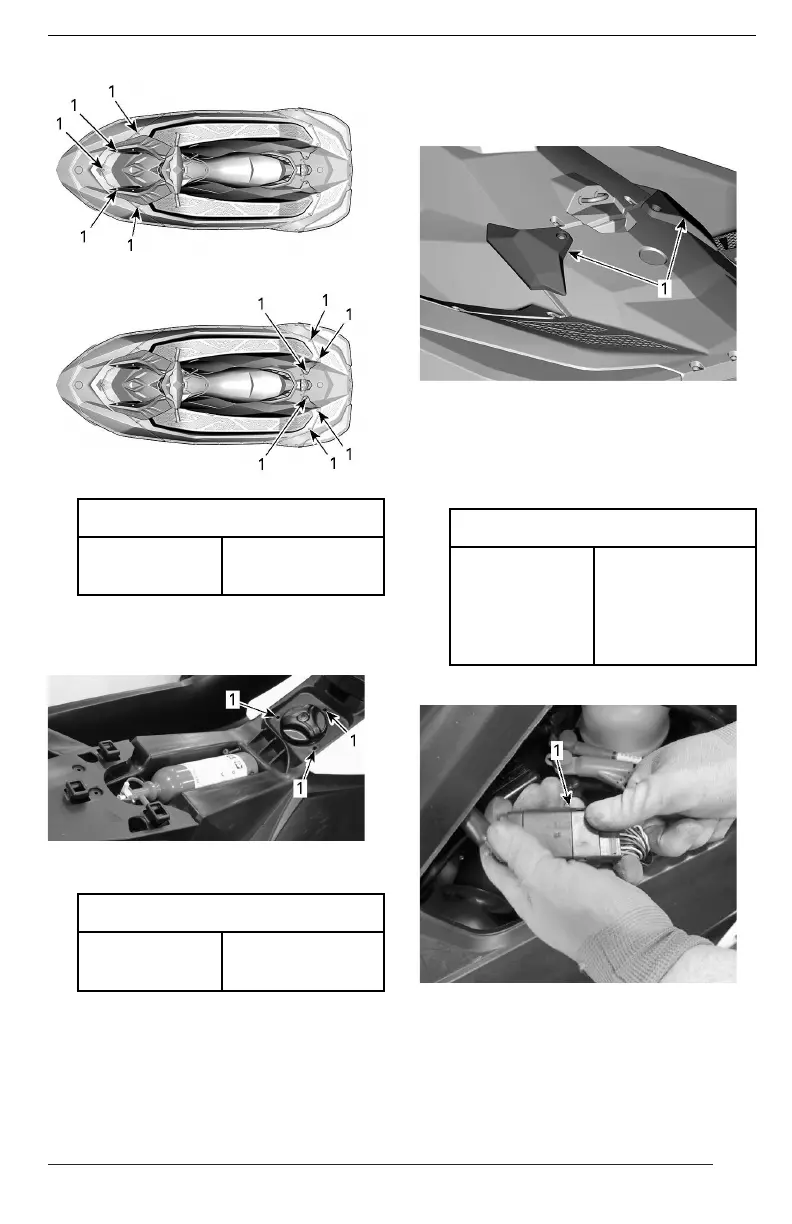
1. Self-tapping screws
1. Self-tapping screws
TTiigghhtteenniinngg TToorrqquuee
Self-tapping
screw
5.5 ± 0.5 Nm
(49 ± 4 lbf-in)
6. Install and tighten self-tapping
screws around the fuel cap to the
recommended torque.
1. Screws
TTiigghhtteenniinngg TToorrqquuee
Self-tapping
screw
4.5 ± 0.5 Nm
(40 ± 4 lbf-in)
7. Reinstall the seat. Refer to
Seat
in
Equipment
.
AAllll MMooddeellss EExxcceepptt TTrriixxxx MMooddeellss
8. Position rear panel trims in place
by sliding towards the inside of
PWC and install self-tapping
screws. Tighten to the recom-
mended torque.
TTYYPPIICCAALL
1. Rear panel trims
TTrriixxxx MMooddeellss
9. Install the rear footrests.
AAllll MMooddeellss
TTiigghhtteenniinngg TToorrqquuee
Self-tapping
screw
(footrests or
rear panel
trims)
5.5 ± 0.5 Nm
(49 ± 4 lbf-in)
10.Connect the steering connector.
1. Connector
11.Connect steering cable in reverse
of removal procedure.
12.Close the LH access cover and
lock the knob by turning it 1/4 turn
counterclockwise.
MAINTENANCE PROCEDURES
 Loading...