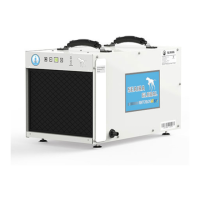
The WatchDog NXT85C is a dehumidifier designed for residential and commercial applications, featuring an integrated humidistat to monitor and control humidity levels in a conditioned space. When the relative humidity exceeds the selected setpoint, the unit activates, drawing air across an evaporator coil to condense moisture, then reheating the air through a condenser coil before returning it to the room.
Important Notes for Operation and Safety:
- Always connect the dehumidifier using a grounded electrical connection; non-grounded wiring will void the warranty.
- Repairs should only be performed by a qualified technician.
- Do not operate the dehumidifier in standing water. If flooded, unplug the unit, remove the cover, and allow it to dry completely before use.
- Avoid inserting objects or fingers into the inlet or discharge.
- Clean the exterior by unplugging the unit and wiping with a damp cloth; do not use water directly on the exterior.
- Do not stand on or place objects on the unit.
- Do not use with an extension cord or plug adapter.
- All maintenance should be performed with the unit powered off, unless otherwise specified.
Key Technical Specifications:
- Capacity @ 80°F/60%RH: 85 Pints Per Day
- Airflow @ 0.0” SP: 190CFM
- Operating Temperature Range: 33-105°F
- Operating Relative Humidity Range: 36%-90%
- COP: 2.7 L/kWh
- Refrigerant: R410A
- Amperage Usage: 5.3 Amps
- Power Supply: 115V/60Hz/Single Phase
- Outlet Requirement: 15 Amp
- Sound Level: 56 dBa
- Dimensions (LxWxH): 21.7" x 12" x 12"
- Certifications: ETL Listed, ENERGY STAR® Rated
Installation Requirements:
- The area where the dehumidifier is located should be sealed with a vapor barrier.
- If installed in a crawl space, all vents must be sealed.
- Ensure proper ventilation by not positioning the inlet or discharge against a wall. The inlet requires a minimum of 12" clearance, and the discharge requires a minimum of 36" clearance.
- For optimal air diffusion, install the unit with a side panel facing the wall.
- The dehumidifier is designed for operation only when upright and level, with its feet on the ground.
- When placing the unit, avoid direct contact with the vapor barrier; use blocks or pavers to create a level surface.
- If the unit has been turned or flipped, allow it to sit on a level surface for a minimum of 2 hours before operation to ensure the compressor has settled.
- Drain Line Setup: Remove the compression nut, slide it over the hose end, then slide the hose with the nut over the compression fitting insert completely. Tighten the compression nut.
- Plug the dehumidifier into a grounded 15 amp circuit.
Usage Features:
The WatchDog NXT85C features a control panel with several key functions:
- Power Key: Turns the dehumidifier on (two beeps, green light solid or flashing) and off (one beep, 1-minute fan delay).
- Arrow Buttons (Up/Down): Used to set the desired humidity setpoint between 36% and 90% on the display screen. The unit operates when indoor humidity exceeds the setpoint. Displayed humidity levels are approximate (+/-5%).
- Continuous Mode: To run continuously regardless of humidity, set the humidity below 36% using the down arrow key. The continuous light will illuminate green, and the display will show "CO". To return to normal humidistat operation, set the setpoint above 36%.
- Manual Drain Button: Press this button to remove water from the integral pump's reservoir, useful for storage or moving the unit.
- Pump Trouble Warning (E4 Error): If the pump reservoir level becomes too high, the water sensor activates, stopping the compressor and displaying "E4". The fan motor turns off after 1 minute. To resolve, check pump function and unplug the unit for two minutes to reset the error code.
- Auxiliary Terminals (A5/A6): Can be used as a safety switch for an external float switch. Set to N/O (normally open) at the accessory float switch. If an E4 error occurs immediately, switch wiring to N/C (normally closed) and reset the unit.
- Auxiliary Terminals (A7/A8/A9): For an optional outdoor air ventilation system, allowing connection to an outdoor weather station.
- Humidity Display Screen: Shows current space humidity when powered on, and the setpoint when being adjusted.
- Power Indicator Light (Green): Indicates the unit is powered on and ready. Solid green when humidity is above setpoint (operating), flashing when humidity is below setpoint (standby).
- Continuous Mode/Auto Defrost Light: Green indicates continuous operation. Red indicates auto defrost mode, clearing ice buildup from evaporator coils.
- Compressor Light (Red/Green): Red indicates the compressor is initiated but warming up. Green indicates the compressor is in working status.
Remote Control (Optional Accessory):
The WatchDog dehumidifiers can be controlled via an optional remote accessory connected by a 25' CAT 5 cable, featuring an integrated sensor.
- On/Off (Power) Button: Starts (two beeps) and stops the machine.
- Up/Down Buttons: Adjust humidity level.
- Mode Button: Switches between dehumidifier and ducted application modes. A specific symbol indicates if the remote control's sensor or the dehumidifier's sensor is being utilized.
- Temperature Button: Displays current temperature on the screen.
- Continuous Button: Switches the unit to continuous mode, displaying "CONT.".
- Drain Pump Button: Removes water from the pump reservoir, useful for extended storage.
Operating Instructions:
- Start: Press the power key.
- Adjust Settings: Use arrow keys to set desired humidity (typically 50-55%).
- Stop: Press the power button again. The fan will run for 1 minute after shutdown. Do not disconnect power to force stop.
- Water Drainage: The NXT85c has an integrated condensate pump for automatic drainage. For storage or moving, press the drain button to empty the reservoir (15 seconds per push, may require multiple presses).
Maintenance Features:
- Cleaning the Machine Body: Use a soft, damp cloth to clean the exterior. Avoid soap or solvents.
- Coil Maintenance: Annually clean coils with an approved self-rinsing, foaming coil cleaner (e.g., WEB® Coil Cleaner).
- Cleaning the Filter:
- Unplug the unit.
- For the pre-filter: Remove from inlet, vacuum or wash with warm water (no soap).
- For MERV-10/HEPA/Carbon Filters: Replace as needed (recommended at least once per year).
- Electrical Access: Unscrew 9 screws on the side panel, then 2 screws on the control board cover.
- Pump Maintenance (Routine): The integral condensate pump requires routine maintenance not covered by warranty to prevent issues from dirt and slime. This includes cleaning the drain pan, hose to the condensate pump, pump reservoir, pump head assembly, and discharge tubing.
- Basic Pump Cleaning (Annually):
- Remove filter(s) to access drain tray. Press drain button.
- Disconnect power.
- Mix 16 oz solution of bleach (1 oz bleach + 15 oz water) OR vinegar (4 oz white vinegar + 12 oz water).
- Pour solution into drain tray at coil base. Flush coils with water if solution gets on them.
- Soak for 15 minutes.
- Reconnect power.
- Fill reservoir with water (16-32 oz) and flush/cycle pump at least 2x.
- Repeat if drain line is still dirty; proceed to Advanced Cleaning if necessary.
- Advanced Pump Cleaning (As Needed):
- Press drain button to empty reservoir (use wet-dry vacuum or towels for remaining water).
- Unplug unit, remove cover to access pump.
- Remove pump head from reservoir by unscrewing. Wipe reservoir clean with a paper towel.
- Reassemble pump.
- Mix 16 oz solution of bleach (1 oz bleach + 15 oz water) OR vinegar (4 oz white vinegar + 12 oz water).
- Pour solution into drain tray at coil base. Flush coils with water if solution gets on them.
- Soak for 15 minutes.
- Reconnect power.
- Fill reservoir with water (16-32 oz) and flush/cycle pump at least 2x.
- Removing the Pump:
- Remove 9 screws from side panel.
- Remove screw holding pump.
- Undo 3 pump electrical quick connects and 1 drain quick connect.
- Insert flat head screwdriver into notch on pump side to gently lift pump off its reservoir (reservoir remains attached to unit).
Dehumidifier Storage:
For extended storage:
- Turn off and allow to dry.
- Complete steps 1-3 of Advanced Pump Cleaning.
- Wrap and secure the power cord.
- Cover the filter mesh.
- Store in a clean, dry space.
Ducted Applications:
The dehumidifier can be ducted to condition an adjacent room. Both inlet/return and supply grilles are designed for 10" flex ducting.
- Ducting Installation Notes: Secure ducting with tie wraps. Maximum total duct run length is 10'. Inlet and outlet duct adapters are optional accessories.
- Duct Adapter Installation: Screw in the 4 screws on each duct adapter.
- Flex Duct Installation: Slide ducting over adapter and secure with tie wrap or clamps.
Troubleshooting:
- Display is Blank: Poor connection (verify power cord ends are plugged in) or power outage (reset power).
- No Airflow: Filter is dirty (clean filter) or air inlet/outlet is blocked (clear blockage).
- Error Code: E1 (Humidity Sensor or Communication Error): Check sensor wire connections. If no visible issues, sensor may be faulty.
- Error Code: E4 (Problem with Pump): Verify pump installation and function. Unplug unit for two minutes, then restart. Refer to "Pump Alarm- E4 Error Code" section for detailed steps, including checking discharge line for obstruction and cleaning.
- Error Code: LO (Room Temperature below 33°F): Increase room temperature to operating range (above 33°F). If error persists, check sensor.
- Error Code: HI (Room Temperature above 105°F): Decrease room temperature to operating range (below 105°F). If error persists, check sensor.
- E5 Error Code (Refrigerant Leak): Contact your installer for assistance.
- Limited Warranty (5 Years from Purchase Date): Seaira Global warrants the dehumidifier against defects in workmanship and materials. At its discretion, Seaira will repair or replace malfunctioning components free of charge (excluding transportation costs).
- Customer Responsibilities: Normal care and maintenance (including filters, coils, pumps), removal and re-installation of unit, and all freight costs for returning the unit to a certified repair center or Seaira warehouse. Customer is responsible for risk of loss or damage during shipment.
- Warranty Procedure: Mail in warranty registration card. If no card, warranty begins on shipment date. Record serial # and date of installation. Contact Seaira Global Tech Support for a Return Authorization (RA number). Bring unit to certified repair center or arrange shipping to Seaira warehouse (at customer's expense). Unit will be inspected; if invalid claim, repair costs are customer's responsibility. If defective, parts will be repaired/replaced and unit returned (at customer's expense). Original warranty period applies (no extensions).
- Warranty Exclusions: Acts of nature (flooding, fire, water damage, hurricane/storm damage), improper usage (pool/spa/tub applications, misuse, abuse, tampering, improper installation/design, improper voltage, lack of normal care, failure to follow instructions), corrosion, freezing, additional costs due to changes in laws/building codes, freight charges, costs due to lost profit/delay, damage to property, cause beyond control, consumable parts (filters, batteries, power cords, valves, switches, rubber parts), direct/indirect/collateral/inconsequential damages. Dishonesty or fraud voids all warranty policies.