5. MAINTENANCE
N.B. Stop the engine before servicing. Put the engine on a level surface and remove the spark plug cap to prevent engine from
starting.
5.1. The engine must be properly maintained to ensure its operation be safe and economical.
In order to keep the engine in good working condition, it must be periodically serviced. the following maintenance schedule and routine
inspection procedures must be carefully followed:
Items
Each Time Firstmonthorrst
20hrs of operation.
Thereafter every
3 months or every
50hrs of operation
Every year or every
100hrs of operation.
Engine Oil Check-Rell
9
Replace
9 9
Reduction gear
Oil (if equipped)
Oil Level Check
9
Replace
9 9
Airlterelements Check
9
Clean
9
Replace
9
Deposit Cup (if
equipped)
Clean
9
Spark Plug Check-adjust
9*
Spark arrester Clean
9
Idling (if
equipped)**
Check-adjust
9
Valve clearance** Check-adjust
9
Fuel tank & fuel
lter**
Clean
9
Fuel Line Check Every 2 years (change if necessary)
Cylinder head
,piston
Clean up carbon <225cc, Every 125hrs
≤225cc,Every250hrs
* These items should be replaced if replacement is need.
**Theinstallationandmajorrepairworkshallbecarriedoutbyspecicallytrainedpersonnel.
5.2. If the engine frequently works under high temperature or heavy load, change the oil every 25 hours.
5.3. Iftheengineworksinadustyorotherenvironmentcleantheairlterelementevery10hrs,ifnecessary,changetheairlter.
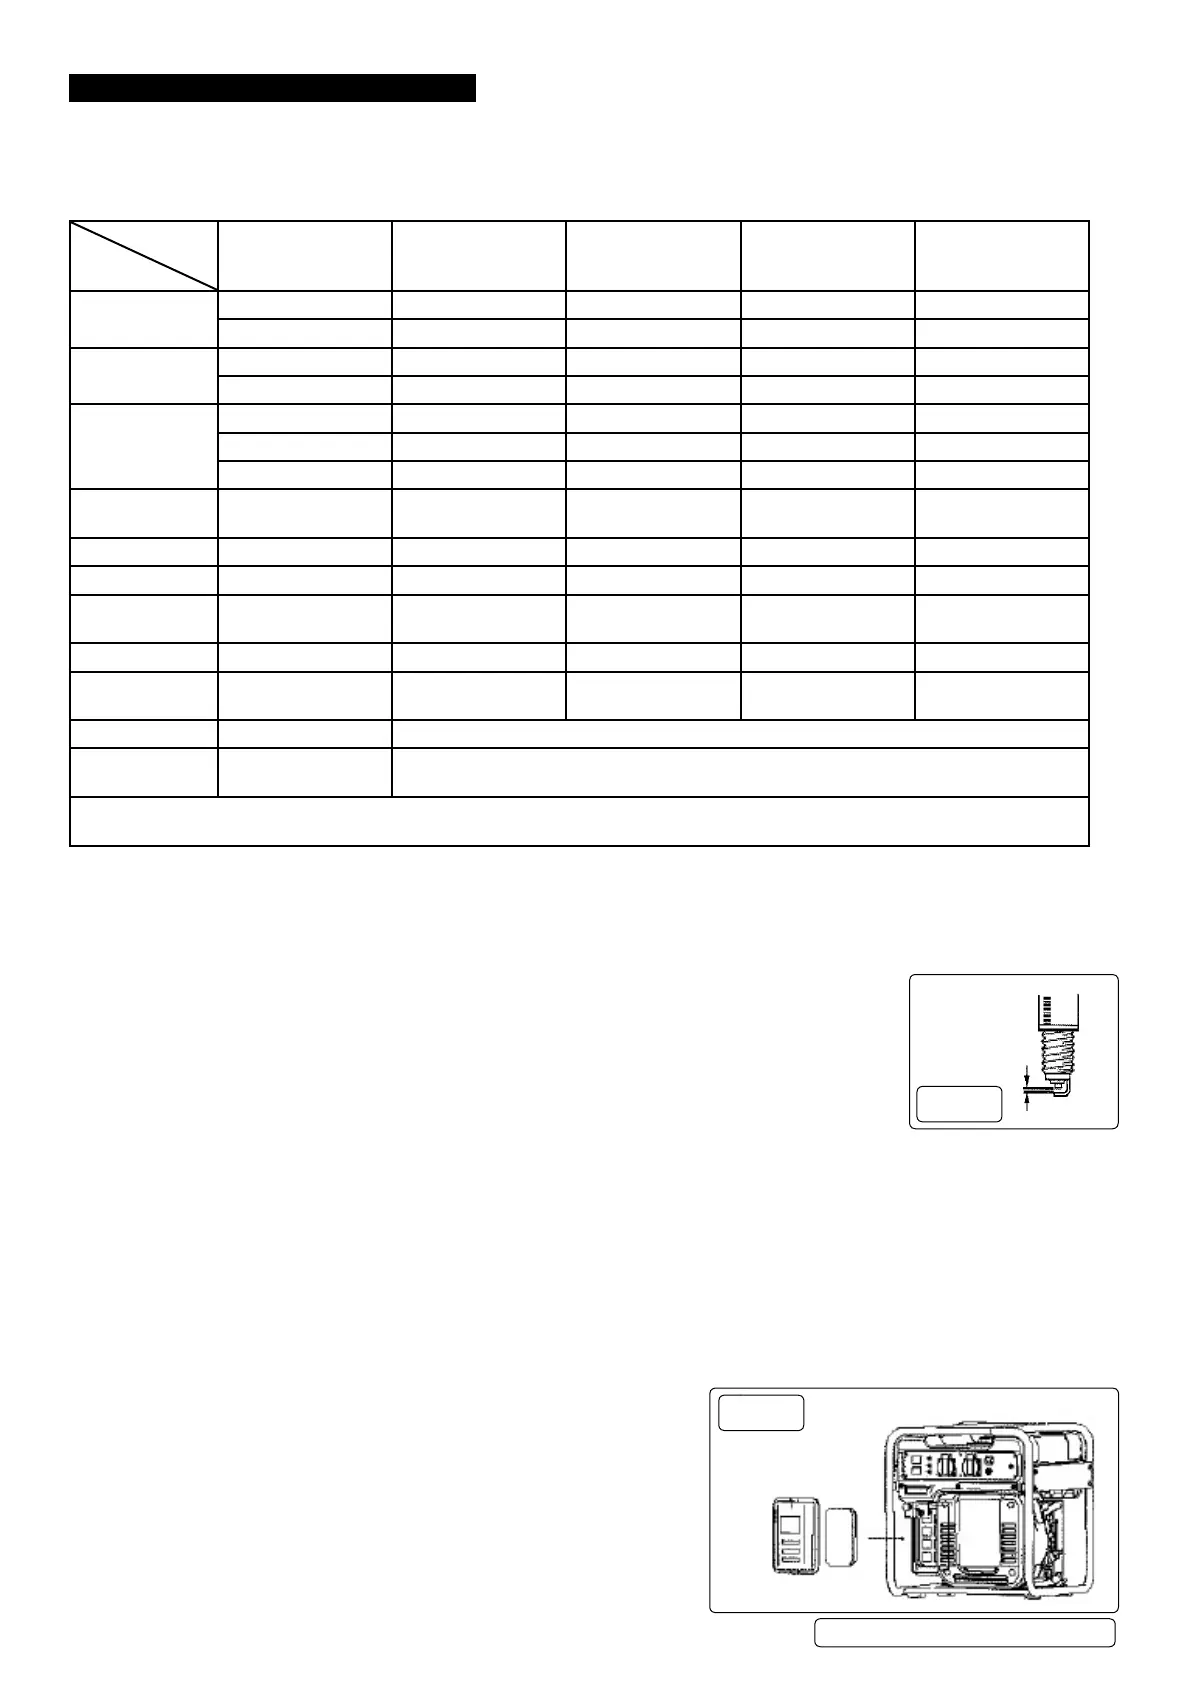
5.4. Spark plug inspection g.16.
5.4.1. Remove the cap and spark plug cap, insert the tool through the hole from the outside of the cover.
5.4.2. Insert the bar into the tool and turn it anti-clockwise to remove the spark plug.
5.4.3. Check for discolouration and remove the carbon. The porcelain insulator around the centre electrode of
the spark plug should be a medium-to-light tan colour.
5.4.4. Check the spark plug type and gap. adjust as required.
Standard Spark Plug: E6TC/E6RTC.
Spark Plug Gap:0.6-0.7mm
Spark Plug Torque: 20Nm
5.5. Carburettor adjustment
Adjustment should be left to authorized stockist with knowledge, data and equipment.
5.6. Engine oil replacement
Do Not drain the engine oil immediately after stopping the engine, the oil will be hot and should be handled with care.
5.6.1. Place the generator on a level surface and warm up the engine for several minutes. Stop the engine and turn off fuel switch knob.
5.6.2. Removetheoilllercap.
5.6.3. Place an oil pan under the engine. Tilt the generator to drain the oil.
5.6.4. Putthegeneratoronaatsurface.
5.6.5. Add engine oil to the top limit level.
Recommendedengineoil:SAESJ15W-40
Recommended engine oil grade: API Service SE type or higher
Engine oil quantity: 0.35L
5.6.6. Wipe away any spilled oil, be sure no foreign material enters the crankcase
5.6.7. Installtheoilllercap/cover
5.7. Air Filter
5.7.1. Removetheairltercover.
5.7.2. Remove the foam element.
5.7.3. Wash the foam element in solvent and dry it.
5.7.4. Oil the foam element and squeeze out excess oil.
5.7.5. The foam element should be wet but not dripping.
5.7.6. Insertthefoamelementintotheairltercase.
5.7.7. Installtheairltercasecoverinpositionandtightenscrews.
g.16
g.17
GI2300,GI3500|Issue1g119/04/18
Original Language Version
© Jack Sealey Limited
 Loading...