OPERATION
• Replace cracked wheel immediately.
• Always use guards and eye shields.
• Do not over-tighten wheel nut.
• Use only flanges furnished with this grinder.
WARNING: ADJUSTMENTS SHOULD BE MADE ONLY
WHEN GRINDER HAS STOPPED TO PROTECT
AGAINST INJURY.
WARNING: BE SAFE! PROTECT YOUR EYES. WEAR
APPROVED SAFETY GLASSES, AND ASSEMBLE
EYE SHIELDS FURNISHED WITH YOUR
GRINDER. STAND AWAY FROM FRONT OF
GRINDER DURING FIRST MINUTE OF
OPERATION.
WEAR YOUR
Foresight is
better than
NO
sight!
THE OPERATION OF ANY POWER TOOL CAN RESULT
IN FOREIGN OBJECTS BEING THROWN INTO THE
EYES, WHICH CAN RESULT IN SEVERE EYE
DAMAGE. ALWAYS WEAR SAFETY GLASSES OR EYE
SHIELDS BEFORE COMMENCING POWER TOOL
OPERATION. We recommend Wide Vision Safety Mask for
use over spectacles or standard safety glasses ... available at
Sears retail or catalog stores.
1. To start, move the toggle switch to "ON" position. If
grinder does not start immediately, disconnect power
and check for voltage at power source.
If voltage is correct but the grinder will not start,
return it to point of purchase for inspection.
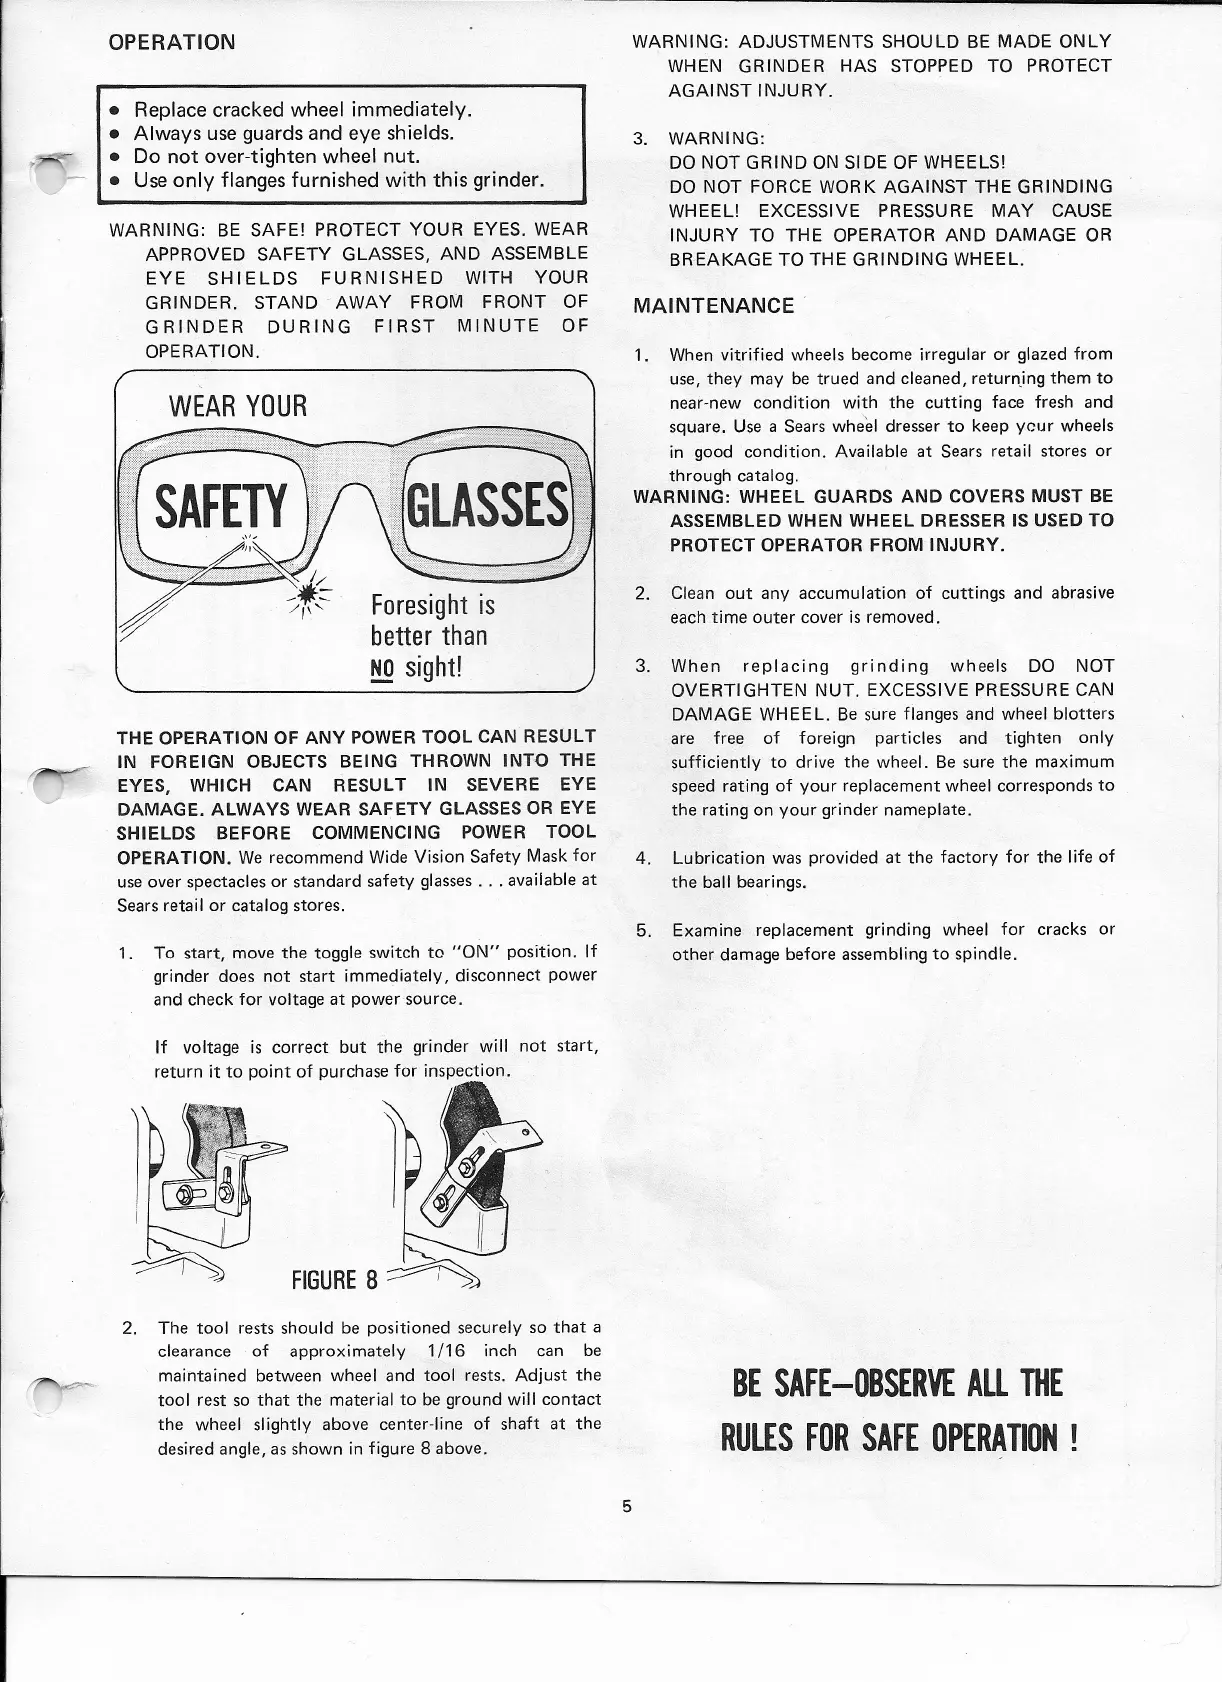
2. The tool rests should be positioned securely so that a
clearance of approximately 1/16 inch can be
maintained between wheel and tool rests. Adjust the
tool rest so that the material to be ground will contact
the wheel slightly above center-line of shaft at the
desired angle, as shown in figure 8 above.
3. WARNING:
DO NOT GRIND ON SIDE OF WHEELS!
DO NOT FORCE WORK AGAINST THE GRINDING
WHEEL! EXCESSIVE PRESSURE MAY CAUSE
INJURY TO THE OPERATOR AND DAMAGE OR
BREAKAGE TO THE GRINDING WHEEL.
MAINTENANCE
1. When vitrified wheels become irregular or glazed from
use, they may be trued and cleaned, returninq them to
near-new condition with the cutting face fresh and
square. Use a Sears wheel dresser to keep your wheels
in good condition. Available at Sears retail stores or
through catalog.
WARNING: WHEEL GUARDS AND COVERS MUST BE
ASSEMBLED WHEN WHEEL DRESSER IS USED TO
PROTECT OPERATOR FROM INJURY.
2. Clean out any accumulation of cuttings and abrasive
each time outer cover is removed.
3. When replacing grinding wheels DO NOT
OVERTIGHTEN NUT. EXCESSIVE PRESSURE CAN
DAMAGE WHEEL. Be sure flanges and wheel blotters
are free of foreign particles and tighten only
sufficiently to drive the wheel. Be sure the maximum
speed rating of your replacement wheel corresponds to
the rating on your grinder nameplate.
4. Lubrication was provided at the factory for the life of
the ball bearings.
5. Examine replacement grinding wheel for cracks or
other damage before assembling to spindle.
BE SAFE-OBSERVE ALL THE
RULES FOR SAFE OPERATION
5
 Loading...