Do you have a question about the Sears 721.80414500 and is the answer not in the manual?
Guidance on precautions to take before and during microwave oven servicing to avoid exposure to microwave energy.
Highlights the importance of reading the manual carefully to avoid exposure to microwave energy.
Details electrical, physical, and component specifications for the microwave oven.
Advises extreme care during repair due to high voltage and details specific safety precautions.
Warns against exposure to microwave energy if the device is improperly used or connected.
Guidance on proper placement, power source, and environmental considerations for installation.
Emphasizes the necessity of grounding the appliance for user safety.
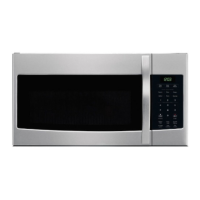
Introduces the control panel layout and its various touch sensor buttons.
Detailed explanation of each button's function and usage on the control panel.
Presents the complete electrical schematic of the microwave oven's internal components.
Illustrates the key matrix circuit for the touch keyboard, showing button connections.
Advises against operating the unit empty and warns about aluminum foil use.
Outlines the steps for performing a trial operation after installation to check functionality.
Lists safety systems and the 10 power output levels selectable via the touch control.
Highlights high-voltage hazards and precautions before and after applying power during service.
Lists conditions under which the unit must not be operated after repair.
Details essential checks to perform after unit repair, including interlock and waveguide integrity.
Emphasizes checking leakage before servicing and informing users about excessive levels.
Step-by-step guide on how to measure microwave energy leakage using specialized equipment.
Specifies leakage limits with and without outer panels, and notes on handling high voltage.
Provides the formula and parameters for calculating microwave power output.
Crucial safety notes before starting disassembly, including capacitor discharge and wiring checks.
Step-by-step guide for removing the power and control circuit board.
Instructions on how to safely remove an FPC connector from its terminal socket.
Instructions on how to correctly insert an FPC connector into its terminal socket.
Detailed steps for removing the main outer case of the microwave oven.
Illustrates the latch board with primary, secondary, and monitor interlock switches.
Procedure for removing the magnetron, including handling precautions and gasket installation notes.
Steps for removing the microwave door and checking interlock switches after replacement.
Instructions for disassembling the door, including removing the dielectric choke and handle screws.
Guidelines for mounting the door assembly to ensure proper alignment and prevent leakage.
Steps for removing the ventilation fan assembly, including mounting plate and fan unit.
Procedure for removing the turntable motor, including turntable shaft and base plate removal.
Explains the door lock mechanism's role in preventing microwave activity when the door is open.
Procedure for adjusting door latches and interlock switches to ensure proper closure and safety.
Steps to test the sequence of primary, secondary, and monitor interlock switches.
Specifies the acceptable limits for microwave energy leakage after servicing.
Procedure to test continuity of the primary interlock switch for correct operation.
Procedure to test continuity of the secondary interlock switch for correct operation.
Procedure to test continuity of the monitor switch for correct operation.
Instructions for measuring magnetron resistance to identify potential faults.
Procedure to measure the resistance of the high-voltage transformer windings.
Steps to test the resistance of the high-voltage capacitor.
Procedure to test the continuity of the high-voltage diode in both directions.
Measures resistance of touch key board terminals when touched and not touched.
Checks the continuity of Relay 2 for proper operation.
Identifies common problems and causes related to the fuse blowing.
Troubleshooting steps for Relay 1 issues causing incorrect oven lamp operation.
Lists symptoms indicating a defective circuit board, such as function failures or display issues.
Diagnoses issues when the 'PLEASE SET TIME OF DAY' message doesn't appear.
Troubleshoots incorrect numbers or indications on the display when programming.
Diagnoses why the unit does not heat up, checking interlocks, thermostat, and high-voltage components.
Addresses issues where the buzzer does not sound during key presses or at end of cooking.
Diagnoses why the ventilation fan does not operate when the fan key is touched.
Diagram showing exploded view and part numbers for the microwave door assembly.
Illustrates the exploded view and part numbers for the controller unit for different models.
Diagram showing exploded view and part numbers for the oven cavity and related components.
Shows the exploded view and part numbers for the latch board and its associated switches.
Diagram illustrating exploded view and part numbers for various interior components.
Diagram showing exploded view and part numbers for additional interior components.
Illustrates the exploded view and part numbers for installation-related parts and manuals.
| Brand | Sears |
|---|---|
| Model | 721.80414500 |
| Category | Microwave Oven |
| Language | English |