Do you have a question about the Sears Craftsman 800 Series and is the answer not in the manual?
Read and understand all instructions on the machine and in the manual before operating.
Inspect the area, remove foreign objects, and prepare the equipment.
Do not put hands/feet near rotating parts, keep area clear.
Follow the schedule for regular service checks and inspections.
Keep lubricated, maintain tire pressure, and keep tires clean.
Check belts for deterioration and wear every 50 hours; replace if necessary.
Two-year limited warranty covers defects from material or workmanship.
Details on gasoline capacity, oil type, oil capacity, and spark plug.
Remove parts and boxes, cut carton, and check for loose parts.
Secure upper handle and install speed/traction drive control rods.
Connect auger rod and install discharge chute assembly.
Reduce tire pressure to 14-17 PSI for optimal performance.
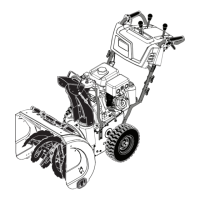
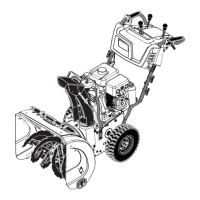
Familiarize yourself with controls, adjustments, and safety symbols.
Understand danger, warning, and caution symbols for safe operation.
Identify and understand the function of each control lever and switch.
Learn how to stop traction drive, auger, engine, and remove safety key.
Operate choke for cold starts and adjust chute for snow direction.
Squeeze auger control lever to engage auger and throw snow.
Use tool to dislodge blockages in discharge chute, not hands.
Control forward/backward movement and adjust skid plate height.
Scraper bar is reversible; check oil and add fuel before starting engine.
Instructions for cold/warm starts using electric or recoil starter.
Advice for operating in different snow conditions and general efficiency.
Operator must maintain unit as instructed for warranty value.
Check oil level, fasteners, and controls for proper function.
Check auger gear case, avoid lubricating drive components, and follow lubrication chart.
Change engine oil and replace spark plug seasonally.
Keep housing clean and free of dirt; avoid using a garden hose.
Refer to 'Adjust Skid Plates' and 'Scraper Bar' in Operation section.
Replace shear bolts and remove belt cover for access.
Replace auger and traction drive belts if damaged or slipping.
Remove wheels for access; do not adjust carburetor or governor.
Clean thoroughly, store in clean, dry area. Inspect and lubricate parts.
Empty fuel system and add oil to cylinder for extended storage.
Remove key, cover unit, do not store gasoline long-term.
Check fuel, ignition, choke, primer, spark plug for starting problems.
Address power loss, rough running, vibration, traction, or discharge problems.
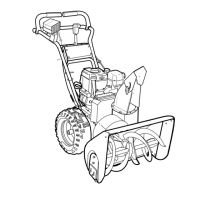
Diagrams and part numbers for auger housing and impeller parts.
Diagrams and part numbers for control panel and discharge chute assembly.
Diagrams and part numbers for handles, grips, and related parts.
Diagrams and part numbers for drive system components.
Diagrams and part numbers for chassis, engine mount, and pulleys.
Diagrams and part numbers for left and right wheel assemblies.
Diagrams and part numbers for items included in the parts bag, like power cord and wrench.
Diagrams and part numbers for various safety, brand, and instruction decals.
Parts diagrams for engine cylinder, crankshaft, and related components.
Parts diagrams for carburetor, fuel tank, and emission controls.
Diagrams for engine gasket sets, valve sets, and seals.
Detailed parts list and diagrams for engine internal components.
Parts for engine accessories like spark plug boot, dipstick, and governor controls.
| Brand | Sears |
|---|---|
| Model | Craftsman 800 Series |
| Category | Snow Blower |
| Language | English |