230 Checking and refilling levels
Changing the front windscreen wiper blades
If the windscreen wiper blades are in perfect condition, you
will benefit from an improved visibility. Damaged wiper
blades should be replaced immediately.
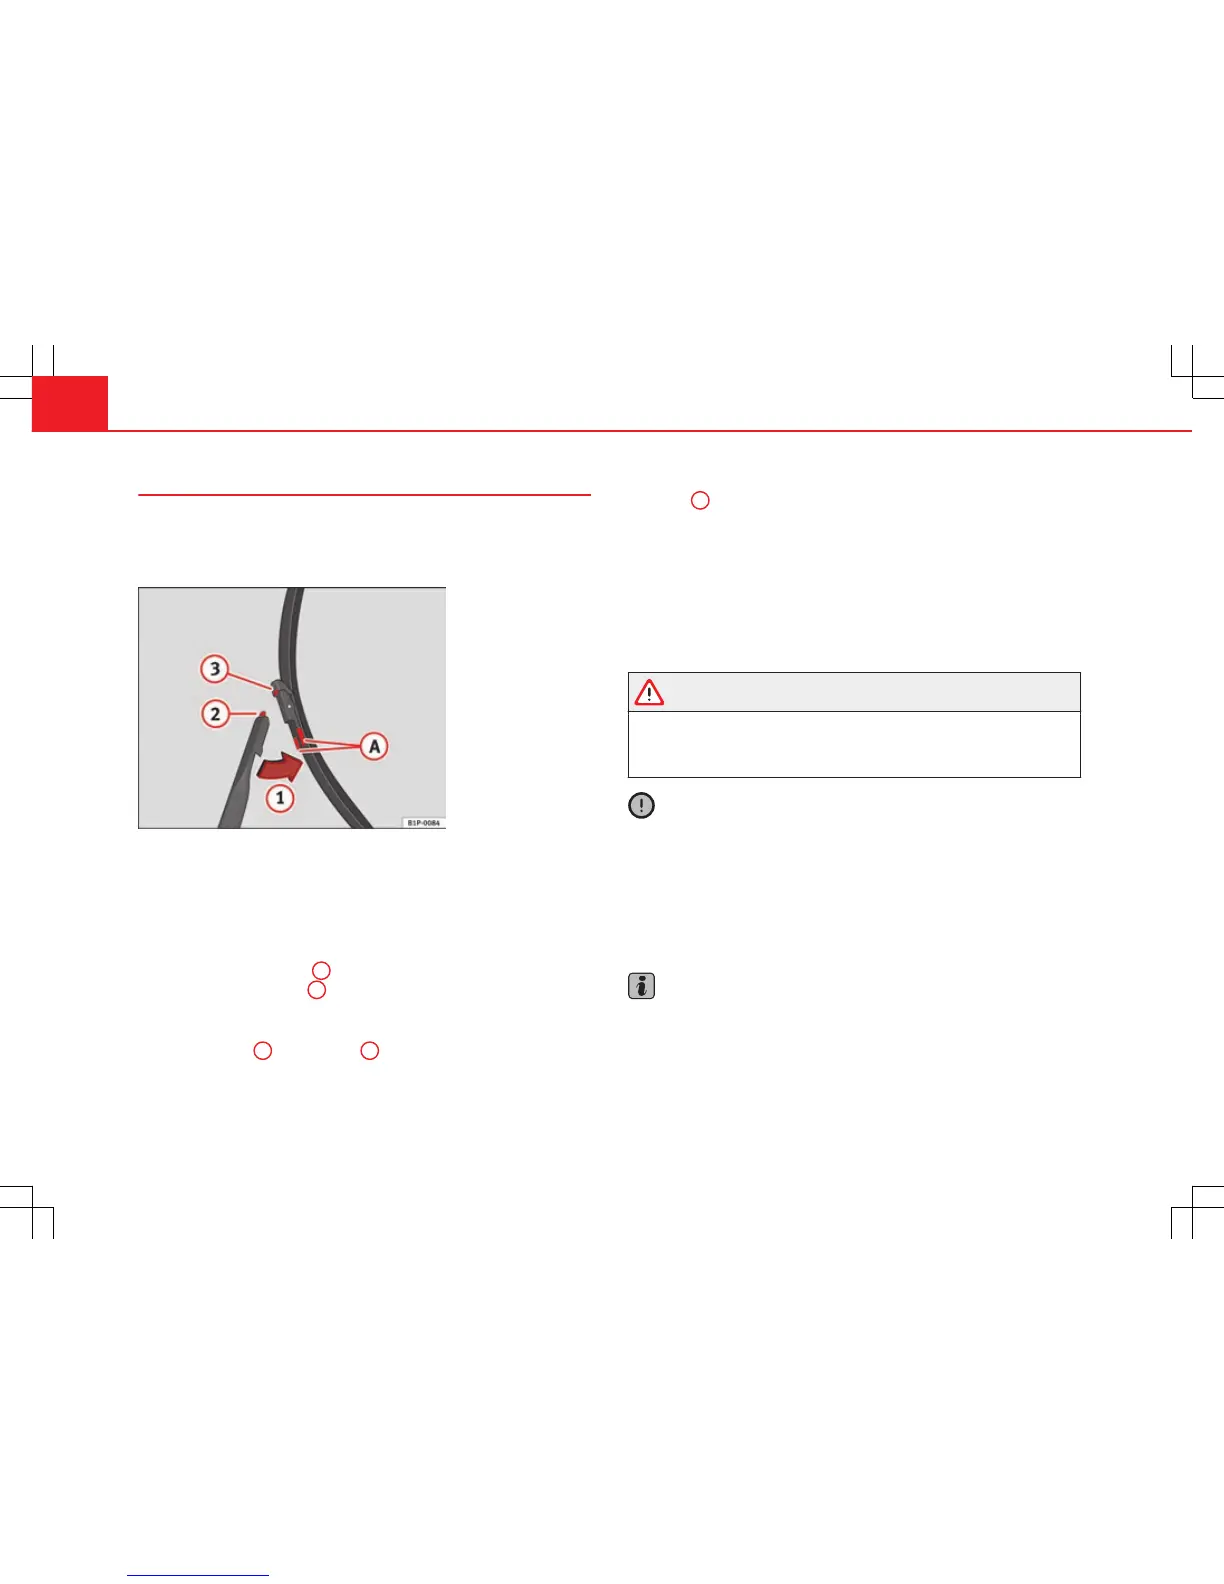
Fig. 148 Changing the
front wiper blades
Changing wiper blades can be done in both the rest and horizontal
positions. Ensure that the wiper blades are not frozen.
Changing the windscreen wiper blades
– Lift the wiper arm away from the windscreen.
– Press on the side tabs
A
and release the blade moving it in the
direction of the arrow
1
⇒ fig. 148.
Fitting the wiper blade
– Insert the tab
2
into the slot
3
of the blade ⇒ fig. 148.
– Move the blade towards the arm in the opposite direction of the
arrow
1
,until it clicks into position ⇒ fig. 148.
– Push the wiper arms back against the windscreen.
If the windscreen wipers smear, they should be replaced if they are dam-
aged, or cleaned if they are soiled.
If this does not produce the desired results, the setting angle of the wind-
screen wiper arms might be incorrect. They should be checked by a special-
ised workshop and corrected if necessary.
WARNING
Do not drive unless you have good visibility through all windows!
● Clean the windscreen wiper blades and all windows regularly.
● The wiper blades should be changed once or twice a year.
CAUTION
● Damaged or dirty windscreen wipers could scratch the windscreen.
● Never use fuel, nail varnish remover, paint thinner or similar products to
clean the windows. This could damage the windscreen wiper blades.
● Never move the windscreen wiper or windscreen wiper arm manually.
This could cause damage.
● Do not pull the windscreen wipers forward unless they are in the service
position. Otherwise the bonnet could be damaged.
Note
● The wiper arms can be moved to the service position only when the bon-
net is properly closed.