EasyManua.ls Logo

SECO-LARM SK-1123-SQ User Manual

SECO-LARM SK-1123-SQ
8 pages
To Next Page IconTo Next Page
Page #1 background imageLoading...
Page #1 background image
Digital Access Keypad Manual
®
PIHAK1
SECO-LARM U.S.A., Inc.
MANUAL
ENFORCER
SK-1123-SQ
Outdoor Digital Access
Keypad with 2 Outputs
ACCESS
®
SECO-LARMSECO-LARM
SECO-LARMSECO-LARM
SECO-LARM
®®
®®
®
MiSK-1123-SQ_0905.pmd
SECO-LARM
®
U.S.A., Inc.
16842 Millikan Avenue, Irvine, CA 92606
Tel: 800-662-0800 / 949-261-2999 Fax: 949-261-7326
Website: www.seco-larm.com
E-mail: sales
@
seco-larm.com
WARRANTY
This SECO-LARM product is warranted against defects in material and workmanship while used in normal
service for a period of one (1) year from the date of sale to the original consumer customer. SECO-LARM’s obligation is
limited to the repair or replacement of any defective part if the unit is returned, transportation prepaid, to SECO-LARM.
This Warranty is void if damage is caused by or attributed to acts of God, physical or electrical misuse or abuse, neglect,
repair, or alteration, improper or abnormal usage, or faulty installation, or if for any other reason SECO-LARM determines
that such equipment is not operating properly as a result of causes other than defects in material and workmanship.
The sole obligation of SECO-LARM, and the purchaser’s exclusive remedy, shall be limited to replacement or repair only, at
SECO-LARM’s option. In no event shall SECO-LARM be liable for any special, collateral, incidental, or consequential
personal or property damages of any kind to the purchaser or anyone else.
NOTICE: The information and specifications printed in this manual are current at the time of publication. However, the
SECO-LARM policy is one of continual development and improvement. For this reason, SECO-LARM reserves the right
to change specifications without notice. SECO-LARM is also not responsible for misprints or typographical errors.
Copyright © 2009 SECO-LARM U.S.A., Inc. All rights reserved. This material may not be reproduced or copied, in
whole or in part, without the written permission of SECO-LARM.
u u u u
X X X X
X X X X
X X X X
*
*
#
#
#
#
1
1
1
#
X X X X
#
2
u u u u
u u u u
u u u u
2
#
u u u u
# 2
X X X X
#
0
*
Note: indicates
the user code.
Note: indicates
the master code.
User Operation for the SK-1123-SQ
1. Using the User Codes:
A. User codes operate the door (4-8 digits long).
Press
B. The key must be pressed also if the keypad is in manual-entry mode.
Press
2. Using the Master Code:
The Master Code can be used to operate the door or program the keypad (4-8 digits long, see pt. 5 below).
Press (Relay output #1)
Press (Relay output #2)
3. Using the Inhibit/Lockout Code:
Please contact your installer for an explanation of inhibit mode and its operation.
4. Using Duress Codes:
For a full explanation of duress codes and their uses, see pg. 12.
5. Delete/Add/Change User and Master Code:
WARNING
--
Press the correct option key. If the option key is not used and a "0" is pressed after
entering the Master Code, it could accidentally reprogram the Master Code.
A. Enter the Master Code first, followed by the key
(If you forgot the master code, see page 15 for more information.
Press
B. Changing/Adding Users:
Press 00-99 (user ID) (user code, 4-8 digits) (for relay output #1)
Press 0-9 (user ID) (user code, 4-8 digits) (for relay output #2)
C. Deleting Individual Users:
Press 00-99 (user ID) (for relay output #1)
Press 0-9 (user ID) (for relay output #2)
D. Changing the Master Code:
Press
E. To exit programming mode, press the key.
Page 16
Question and Answer IconNeed help?

Do you have a question about the SECO-LARM SK-1123-SQ and is the answer not in the manual?

SECO-LARM SK-1123-SQ Specifications

General IconGeneral
BrandSECO-LARM
ModelSK-1123-SQ
CategoryKeypad
LanguageEnglish

Summary

User Operation

Using the User Codes

Explains how to use the keypad with standard user codes for door access.

Using the Master Code

Details on using the master code for door operation or keypad programming.

Using the Inhibit/Lockout Code

Information on inhibit mode and its operation as explained by the installer.

Using Duress Codes

References the explanation of duress codes and their specific uses on page 12.

Delete/Add/Change User and Master Code

Procedure for managing user codes and the master code, with warnings.

Keypad Reprogramming and User Deletion

Reprogram the Keypad (Certain Data)

Instructions for changing specific data within the keypad, like user codes.

Reprogram the Keypad (Complete Data Refresh)

Process for erasing all current data and inputting new data, useful after system sale.

Delete User

Steps to remove a user's access code from the keypad system.

Master Code Bypass (DAP jumper)

Method to override a forgotten master code using a DAP jumper.

Installer Programming Functions

Enter Programming Mode

Procedure to access the installer programming mode using the master code.

Data Refresh

Option to clear all previously stored data in the keypad.

Configure Relay Outputs

Settings for relay outputs, including momentary mode and shunt mode.

Wrong Code Lockout

Configuration for lockout duration and attempts after incorrect code entries.

Door Forced-Open Alarm

Enables or disables an alarm when a door is forced open.

Output Activation Announcer

Configures a beep to announce relay output activation.

User Code Entry Mode

Selects between auto or manual code entry mode for users.

Keypress Beeps

Controls whether the keypad beeps when a key is pressed.

Door Propped Open Alarm Timer

Sets the allowable time a door can be left open before triggering an alarm.

Exit Programming Mode

Procedure to exit programming mode and return to normal operation.

Unique Keypad Features

12-24V AC/DC Universal Power

Power compatibility and lack of jumpers for voltage setup.

Mantrap Feature

Enables interlocking two keypads to ensure only one door is open at a time.

Relay Output #1 Inhibit Control

Allows disabling relay output #1 to increase security during specific times.

Door Forced Open Warning

Provides a warning beep if the door is forced open without a valid code.

Door Propped Open Warning

Warns if a door is left propped open after the allowed open time.

Auto or Manual Code Entry Checking

Option to select automatic code entry or requiring the '#' key.

Keypad Active Output

Output signal for 10 seconds when any key is pressed, for external triggers.

Door Auto Relock

Automatically relocks the door after time expires or upon closing.

Duress Output

Silent alarm trigger activated by a duress code entry.

Backlit Keypad

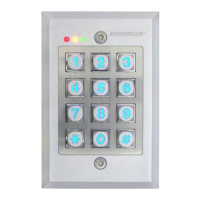
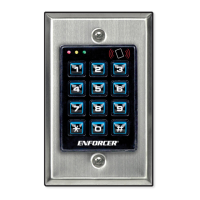
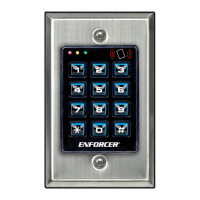
Keypad illumination for improved visibility in low light conditions.

Wiring and Programming Preparation

Wiring, Basic Diagram

Illustrates the fundamental wiring connections for the keypad.

Preparing to Program the Keypad

Information needed before starting keypad programming.

Getting Started

Initial steps and overview for programming the keypad.

User Programming

Details on entering the programming mode and making changes.

Programming Notes, Indicators, and Specifications

Programming Notes

General guidelines and advice for programming the keypad effectively.

LED Indicators

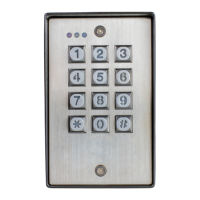
Explanation of the status indicated by the red, amber, and green LEDs.

Buzzer and LED Signals

Defines the meanings of different buzzer tones and amber LED flashes.

Specifications

Technical details including power, outputs, inputs, dimensions, and weight.

Wiring Examples

Wiring: Inhibit Control Authorized

Example wiring for connecting with inhibit control authorization.

Wiring: Auxiliary Accessories

Wiring examples for tamper, duress output, door sensing, and alarm connections.

Advanced Wiring Scenarios

Wiring: 2 Keypads with Mantrap

Example wiring for a mantrap system using two keypads.

Wiring: Lock Device and Alarm Arm/Disarm

Example wiring for connecting to lock devices and alarm control panels.

Related product manuals