Do you have a question about the Secoh EL-60 and is the answer not in the manual?
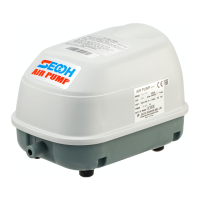
This document provides a comprehensive service and maintenance manual for SECOH Air Pumps, covering models SLL-20, 30, 40 & 50; EL-60, 80-15, 80-17 & 100; and EL-120W, 150 & 200. The manual is intended to guide users through various maintenance procedures to ensure the optimal performance and longevity of their air pumps.
SECOH Air Pumps are designed to provide a reliable and consistent airflow for various applications. These pumps operate by converting electrical energy into mechanical energy to create a reciprocating motion that drives diaphragms, which in turn generate airflow. The design incorporates features to ensure efficient operation and protection against potential damage.
A key protective feature in the EL-series pumps is the "auto stopper" or protective switch. This mechanism is designed to prevent major breakdowns and excessive repair costs in the event of a broken diaphragm. If a diaphragm breaks, the magnet within the pump will reciprocate with an abnormal amplitude. This abnormal movement causes a projection on the magnet to hit the slider of the auto stopper, interrupting the electrical contact and cutting off power to the pump. This immediate shutdown prevents further damage to the pump's internal components, such as the magnet and core, which could otherwise be costly to repair or replace.
The SECOH Air Pumps are designed for straightforward operation, providing consistent airflow once properly installed and connected to a power supply. While the manual primarily focuses on maintenance, the underlying design supports continuous and reliable air output for its intended applications. Users should ensure the pump is positioned in an environment that allows for proper ventilation and prevents contact with surrounding articles, as this can lead to excessive noise or operational issues.
The manual outlines several critical maintenance procedures to keep SECOH Air Pumps in excellent working condition. Adherence to these guidelines is crucial for extending the pump's lifespan and maintaining its performance.
Before undertaking any maintenance or service, it is imperative to read the manual carefully and follow all safety instructions. A critical safety warning emphasizes the need to always disconnect the power supply before servicing to prevent electrical shock, personal injury, or death. Users are also warned not to touch live parts, as this will result in electric shock. Servicing and maintenance should ideally be carried out by an authorized service facility to ensure proper procedures and safety.
Regular "occasional checks" are recommended to identify potential issues early. These include verifying if air is blowing out properly, checking for abnormal noise or vibrations, ensuring the pump's temperature is not abnormally high, and inspecting the power cord or plug for damage or discoloration. Any irregularities found during these checks should prompt a review of the "Diagnosis of Failures" section.
The air filter is a vital component for maintaining air quality and pump efficiency. It should be cleaned every 3 to 4 months to ensure correct operation. The procedure involves:
This is a more involved procedure, recommended annually to ensure long service and operation. The steps include:
If the auto stopper has activated due to a broken diaphragm, it needs to be reset after the diaphragm replacement. The procedure is:
In cases where the magnet itself needs replacement, the procedure is:
A detailed table helps users diagnose common problems:
The manual explains that a decrease in airflow due to clogging can lead to an extraordinary rise in operating temperature, activating a thermal protector that stops the pump. The pump will automatically restart once the temperature reduces. Users are advised to consult their local distributor if in doubt about any service or maintenance procedures.
The manual emphasizes the importance of using only genuine SECOH replacement parts. Non-standard parts can have a detrimental effect on the overall pump life and performance. It is recommended that diaphragms and valve boxes be replaced once a year to ensure long service and operation.
This comprehensive manual ensures that users have the necessary information to maintain their SECOH Air Pumps effectively, promoting safety, efficiency, and longevity of the device.
| Brand | Secoh |
|---|---|
| Model | EL-60 |
| Category | Water Pump |
| Language | English |