Do you have a question about the Secomam UVIKON XL and is the answer not in the manual?
General warnings for instrument operation, including disconnect, maintenance, sample compartment, and UV radiation.
Explains various symbols used on the instrument, including caution, power, and electrical symbols.
Conditions for AQUALABO ANALYSE to accept responsibility for quality, reliability, and safety.
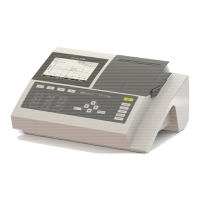
Introduction to the UVIKON ultraviolet-visible spectrophotometers and their technology.
Detailed technical specifications for UVIKON XL and UVIKON XS spectrophotometers.
Description of the UVIKON Xx system concept, PC control, and display layout.
Layout and description of the UVIKON XL status display symbols and indicators.
Details on the electronics, A/D converter, DSP processor, and firmware storage.
Explanation of the basic optical concept, light sources, monochromator, and detectors.
Instructions for unpacking the UVIKON Xx, lifting precautions, and checking contents.
Procedure for checking the instrument's serial number against the delivery note.
Guidelines for installing the instrument, focusing on environmental conditions.
Specifies the required environmental conditions for optimal performance and safety.
Steps for initial installation, including power supply connection and PC setup.
Instructions for connecting the instrument to the power supply and safety warnings.
Guide for connecting the spectrophotometer to a personal computer via RS232.
Lists the minimum hardware and operating system requirements for the PC.
Step-by-step guide for installing the LabPower JUNIOR software.
Requirements and procedures for decontaminating equipment that contacts biological fluids.
Importance of decontamination due to potential contact with hazardous human or animal tissues/fluids.
Details the routes of infection transmission in a laboratory environment.
Instructions for cleaning the instrument and sample compartment, avoiding solvents.
Lists internal accessories connected to the sample compartment, with part numbers and descriptions.
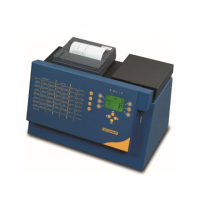
Lists external accessories controlled by PC via RS232, like thermopack and thermosystem.
Describes how to configure and use various accessories like cell holders and sensors.
| Wavelength Range | 190 - 1100 nm |
|---|---|
| Detector Type | Silicon Photodiode |
| Baseline Flatness | ± 0.001 A |
| Photometric Range | -3 - 3 A |
| Photometric Reproducibility | ± 0.001 A (0 - 0.5 A) |
| Detector | Silicon photodiode |
| Stray Light | < 0.05 %T at 220 nm and 340 nm |
| Baseline Stability | < 0.0005 A/h at 500 nm |
| Noise Level | 0.0002 A |
| Display | LCD |
| Power Requirements | 100-240 V, 50/60 Hz |
| Photometric Accuracy | ±0.003 A (0-0.5 A), ±0.5% (0.5-1.0 A) |