1. Ensure that the machine is electrically isolated.
2. Select the correct size of chisel and auger, together with chisel bush, spanners and allen key.
3. Check that the chisel and auger have been correctly sharpened and are in good condition,
i.e. that the chisel is free from cracks and damaged points, and that the auger and cutting
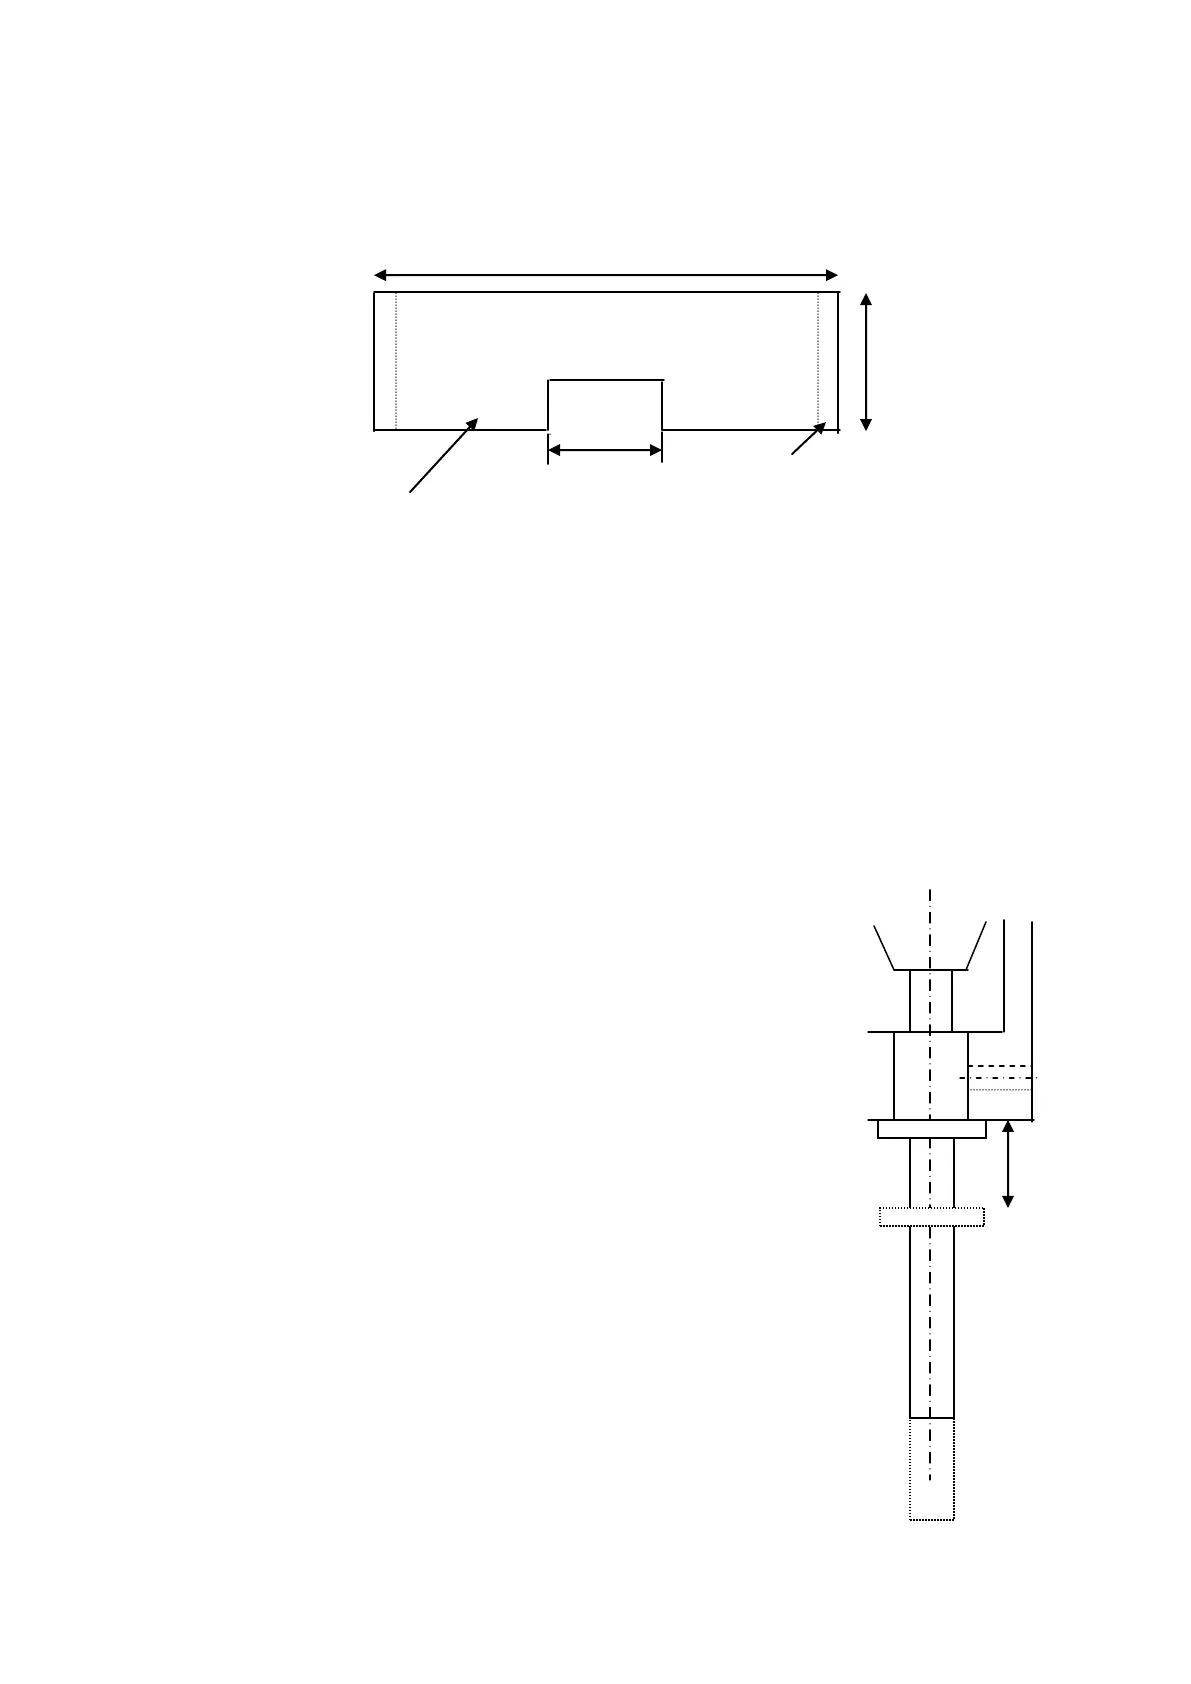
Insert auger (with chisel slotted onto it) into the
adjustable chuck to its uppermost limit and tighten in
place, the chisel will then rest upon the wings of the
auger in position as shown in dotted image.
Measure dimension ‘A’ carefully, then remove the auger
and shorten its shank end by a distance 1mm less than
dimension ‘A’ measured.
Insert chisel into the chisel socket until the chisel
shoulder butts firmly up to the underface of the chisel
socket and lock screw ‘B’.
Insert auger once more to its uppermost limit. Its
scribing wings should be found to clear the chisel
internal cutting bevel by the distance allowed. Finally,
tighten the auger and the machine is then ready for
cutting.
Note: the lower point on the bit must clear the bottom
point of the chisel and not rub against the chamfer. It is
advisable to file a flat on the chisel to enable the
locking screw to grip firmly and not burr the shanks,
making removal difficult. Always ensure the chip relief
in the chisel is left to right and not front to back and
always cut away from the relief to ensure good chip
ejection.
The chisel should be mounted with its chip ejector slots
facing along the workpiece. Rotate the auger by hand to
check that it runs freely without rubbing
 Loading...