571 Operation/Maintenance Instructions Page 13 of 19
5. Clear all tools from the machine and position the clamp as previously described.
Move the headstock down to the workpiece, to check the alignment of the chisel with the
mortice position. Set the depth stop.
6. Return the lever to the rest position. Switch on the isolator.
7. Switch on the machine and cut a trial mortice.
8. Check the mortice for position, depth and finish.
Note. A squirt of oil along the length of the auger will reduce the noise it emits when running.
Morticing Hard and Soft Woods
1. Keep the face side towards the fence.
Edge
2. Position the mortice to be cut opposite the clamp. This prevents the chisel lifting the wood
away from the table, which would occur if the mortise were too far away from the clamp.
3. Turn the workpiece ‘end to end’. This ensures that the face side is kept towards the fence
when cutting through mortise.
4. Work from both sides when cutting through mortises, as breakout on the back-edge could
occur if the chisel was taken right through. Set the chisel depth stop to enable just about a half
of the depth of mortise to be cut from each side.
5. Position the chisel about 25mm above the workpiece when the lever is in the rest position by
positioning the chisel bracket. This avoids unnecessary long movements of the headstock lever,
and reduces the effort required to produce a mortise.
6. The chuck guard must be in position.
7. Make a gradual cut when using the chisel. Remember that on the first cut all four sides of the
chisel are enclosed by the timber, making withdrawal of the chisel from the workpiece difficult.
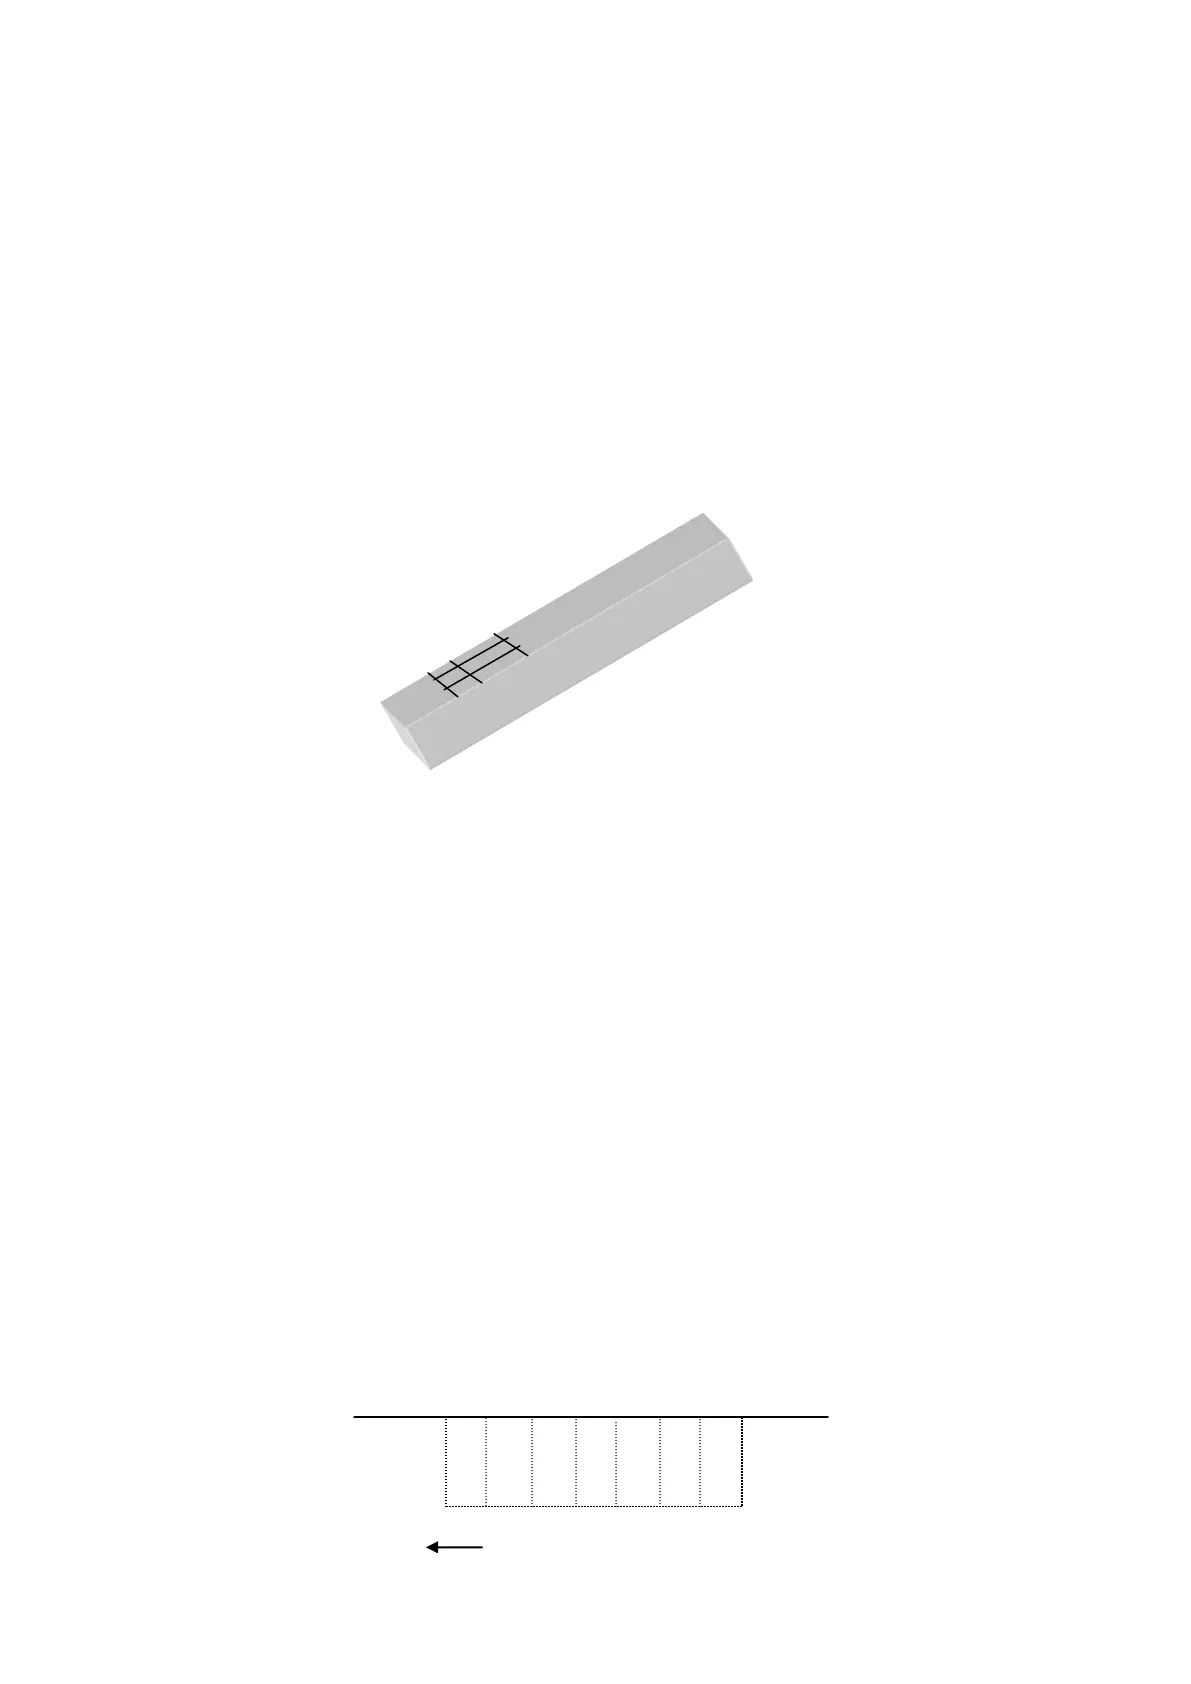
Order of Morticing
1 2 3 4 5 6 7
Chip ejection slot facing
Face side towards
fence, mortice position
opposite cramp.