EasyManua.ls Logo

Sedus quarterback User Manual

Sedus quarterback
26 pages
Go to English
To Next Page IconTo Next Page
Page #1 background imageLoading...
Page #1 background image
Aplicación
Este sillón de oficina giratorio es adecuado para personas con un peso corporal de
hasta 110 kg y debe utilizarse de acuerdo con las instrucciones y siguiendo las normas
generales de cuidado. En caso de utilizarse indebida (p. ej., subiéndose a ella,
sentándose en los apoyabrazos o carga unilateral extrema) existe peligro de accidente.
Desbloquear el respaldo cuando la silla no esté en uso.
Ruedas
Antes del primer uso se debe retirar la protección de color para el transporte. Para su
seguridad y para los diversos recubrimientos de suelo, existen diferentes tipos de ruedas:
ruedas con superficie dura para suelos textiles (de serie), ruedas con super ficie blanda
para todos los suelos no textiles. Cambio de las ruedas: extraiga o inserte sencillamente
las ruedas; antes de ello, engrase ligeramente el perno basculante.
Otras informaciones
Consulte informaciones sobre el montaje o la sustitución de los reposabrazos, así
como la limpieza de los componentes de plástico y los tapizados en Internet en el sitio
www.sedus.com
Indicaciones para el usuario
AD
B C B C
F
E
G
I
H
J K
Höhe des Fußrings (optional für Ausführung mit Counteruntergestell)
® Fußring verstellen:
1. Rändelschraube gegen den Uhrzeigersinn drehen – Fußring
löst sich
2. Fußring in gewünschte Position verschieben 3. Rändelschraube im
Uhrzeigersinn festdrehen
Height of the footring (optional for counter underframe version)
® Adjusting the footring:
1. Turn the knurled screw anticlockwise – the footring loosens
2. Move the footring to the desired position 3. Tighten the knurled screw clockwise
Hauteur du cercle repose-pied (en option pour la version dotée d’un support)
® Régler le cercle repose-pied :
1. Tourner la vis moletée dans le sens anti-horaire –
le cercle repose-pied se détache
2. Placer le cercle repose-pied dans la position désirée
3. Serrer la vis moletée à fond dans le sens des aiguilles d‘une montre
Hoogte van de voetring (optioneel voor uitvoering met balie-onderstel)
® Voetring verstellen:
1. Kartelschroef tegen de wijzers van de klok in draaien –
voetring komt los
2. Voetring in gewenste positie verschuiven 3. Kartelschroef met
de wijzers van de klok mee vastdraaien
Altezza dell‘anello poggiapiedi (su richiesta per la versione con struttura counter)
® Per regolare l‘anello poggiapiedi:
1. Ruotare la vite a testa zigrinata in senso
antiorario – il poggiapiedi si allenta
2. Spostare il poggiapiedi nella posizione desiderata
3. Stringere forte la vite a testa zigrinata in senso orario
Altura del anillo reposapiés (opcional, para modelos con base de mostrador)
® Ajustar el anillo reposapiés:
1. Girar el tornillo de cabeza moleteada en el sentido
contrario a las agujas del reloj: el anillo reposapiés se afloja
2. Deslizar el anillo
reposapiés hasta la posición deseada
3. Apretar el tornillo de cabeza moleteada
girándolo en el sentido de las agujas del reloj
Question and Answer IconNeed help?

Do you have a question about the Sedus quarterback and is the answer not in the manual?

Sedus quarterback Specifications

General IconGeneral
TypeOffice chair
Weight capacity120 kg
Warranty5 years
ArmrestsAdjustable
Base5-star base
Materialplastic
AdjustabilitySeat height

Summary

Height of the Footring

Adjusting the Footring

Turn the knurled screw anticlockwise to loosen, move the footring, then tighten the screw.

User Indications

Application

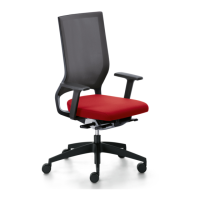
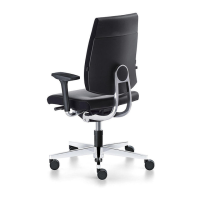
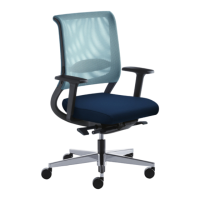
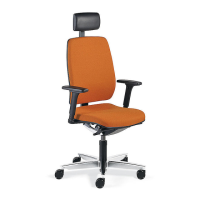
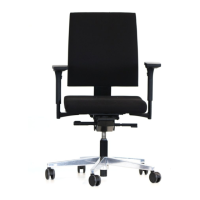
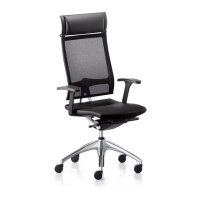
This office swivel chair is suitable for users up to 110 kg and must be used correctly.

Castors

Remove transport protection. Choose castors based on floor type for safety.

Other Information

Find assembly, armrest replacement, and cleaning info at www.sedus.com.

Height of the Seat

Lowering the Seat

Sit down, pull the lever upwards to lower the seat, release to lock.

Raising the Seat

Stand up, pull the lever upwards to raise the seat, release to lock.

Height of Lumbar Support

Adjust Lumbar Support

Disengage backrest, then adjust lumbar support levers up or down.

Depth of Lumbar Support

Adjust Support Depth

Disengage backrest and turn inlay to increase or decrease support depth.

Angle of the Backrest

Adjusting the Backrest Dynamically

Pull lever, lean back; backrest is free-floating.

Locking the Backrest into Position

Lean back to desired angle, press lever down, and release to lock.

Release Backrest Lock

Release the backrest lock when the chair is not in use.

Strength of the Backrest Pressure

Adjusting Backrest Pressure

Crank mechanism downwards for greater pressure, upwards for lesser pressure.

Depth of the Seat

Adjust Seat Depth

Press finger plate, push cushion to desired position, release plate to engage.

Seat Angle

Adjust Seat Angle

Swivel lever backwards to tilt chair 4º forward or downwards to original position.

Adjusting Basic Armrests

Armrest Height Adjustment

Press button under armrest to lift or lower, release to lock.

Adjustable Seat Width

Loosen screws, position armrests, then retighten screws.

Adjusting 4D Armrests

Armrest Height

Press and hold button, lift or lower armrest, release button to engage.

Armrest Depth

Press and hold button, push armrest cover forwards or backwards to engage.

Swivelling Armrest Covers

Adjust covers inwards up to 24° and outwards up to 12°.

Adjustable Seat Width

Slightly loosen lever, position armrests, retighten lever.

Adjustment of the Headrest

Headrest Height Adjustment

Push the headrest to the desired height for continuous adjustment.

Headrest Angle Adjustment

Adjust the tilt of the headrest as desired.

Mounting the Clothes Hanger

Attach Clothes Hanger

Hook the hanger into the tapered position on the neckrest and press down.

User Notes

Correct Use

Use chair as intended for weights up to 110 kg. Avoid misuse to prevent accidents.

Castors Information

Remove transport protection. Different castors are available for floor safety.

Further Information Sources

Find info on fitting armrests, cleaning, and upholstery at www.sedus.com.

Related product manuals