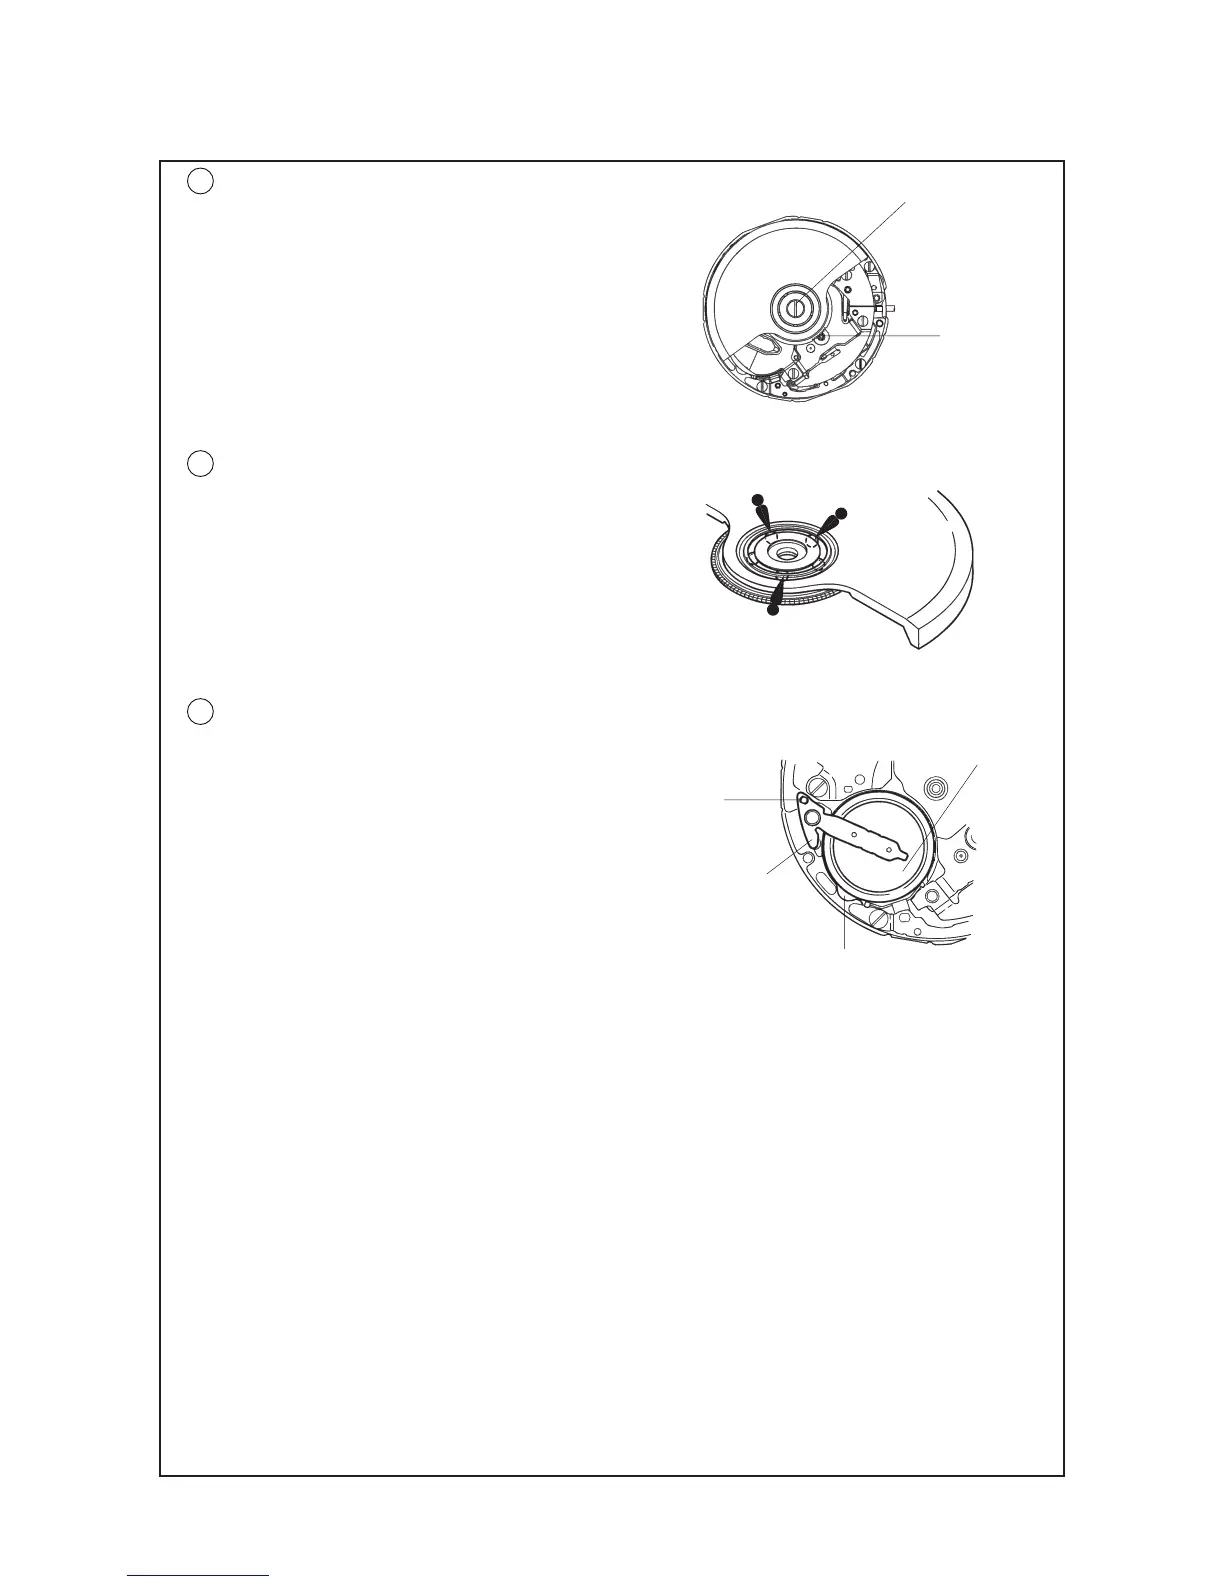
1 OSCILLATING WEIGHT SCREW
· Before tightening the OSCILLATING WEIGHT SCREW,
check that the gear of the OSCILLATING WEIGHT
WHEEL securely engages with the pinion of the
INTERMEDIATE WHEEL FOR GENERATING ROTOR
(“A”portion in the illustration).
· Tighten the OSCILLATING WEIGHT SCREW firmly,
applying more force than usual. If the
OSCILLATING WEIGHT SCREW becomes loose,
electricity generation will be defective.
2 OSCILLATING WEIGHT
• Lubricating
Lubricate the BALL-BEARING of the OSCILLATING
WEIGHT as shown in the illustration at right.
Note: Be sure to lubricate at the position and
in the quantity specified in the
illustration.
• How to remove
Insert the tip of the tweezers into the “A”
portion gap in the illustration, and pry up the
rechargeable battery unit to remove it.
• How to install
Set the minus lead terminal to the guide post
“B” in the illustration, push “C” portion down
vertically so that the rechargeable battery unit
is well seated in position.
Notes:
* Take utmost care not to short-circuit the (+) and (–) terminals, as this will deteriorate the battery unit.
* Never clean the rechargeable battery unit, as it is an electronic part containing an IC.
OSCILLATING WEIGHT SCREW
“A” portion
“C” portion
“A” portion
7 Rechargeable battery unit
“B” portion
Minus lead terminal