Installation Instructions
- Seip electric door operators
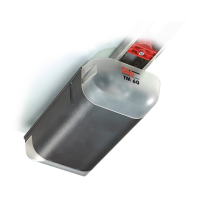
Procedure for fitting a Seip TM80 electric operator to a horizontally tracked one-piece up & over garage door
(the procedure for fitting to sectional type up & over doors is similar)
Tools you will require:
A 13mm spanner, 10mm & 13mm hex sockets & wrench,
pair of side cutters or combination pliers, hammer, pencil,
No.2 Pozidrive screwdriver, electric drill, 5mm HSS drill,
5.5mm masonry drill, a ‘pump action oilcan’ filled with car
engine oil, step ladder.
Before Getting Started
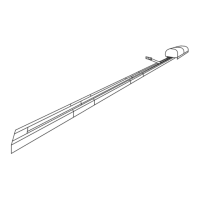
1/ A minimum clearance of 35mm is required between
the top of the door and the ceiling/beams for the C-rail
track.
Note: if you have insufficient clearance for the track, the
operator can be mounted on the ceiling to the rear of the
garage and connected to the door with an extended door
arm as shown on right
(contact us for details)
2/ If the door is higher than 2.4mtrs a C-rail track & chain extension kit may be required
3/ Lubricate all the pivot bearings & both roller spindles on the door support gear with oil and check the operation of the door
with particular attention to correct spring balance, a correctly adjusted door should balance like a pair of weighing scales when
the door is half open, if your door sinks heavily when stopped at this position the spring adjustments (on both sides) should be
increased. The door should move freely through the opening without rubbing on the frame and should close snugly onto the
frame at the bottom corners.
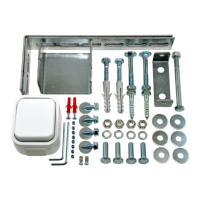
Contents of the installation hardware pack
One pair of motor support brackets, door header bracket & bolt, a
selection of fixing screws, washers & masonry plugs, a small
screwdriver, Allen key, bag containing eight track securing grub-
screws & two emergency-release cable clamps, wall mounted
pushbutton switch & fixing screws. Units supplied by Amourelle
Ltd also include1Mtr of red P.V.C. sleeving for the emergency
manual release cable and a label for the door with instructions
detailing how to operate the door in the event of a power failure.
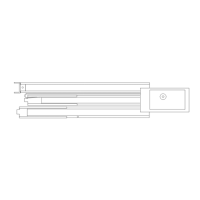
Unpacking and assembling the track
1/ Lay the operator on the floor with the motor head to the right
hand side, slide part (1) out and fully engage it with the C-rail
coupling piece (2)
2/ Slide section (3) out in front of part (1) keeping the chain free of twists
3/ Slide the C-rail coupling piece (4) out 25mm beyond the end of section (1) raise section (3) up at an angle as shown (below
right) and press it down to stretch the chain and engage it with the C-rail coupling piece (4)
and slide the C-rail coupling piece forward to cover the joint
4/ Turn the unit over and fit the M5 grub screws into the eight tapped holes and tighten with the Allen key provided
The chain is pre-tensioned and will not require any adjustment, your Seip operator is now ready for installation.
Page 1 of 4