13 www.selwood.com
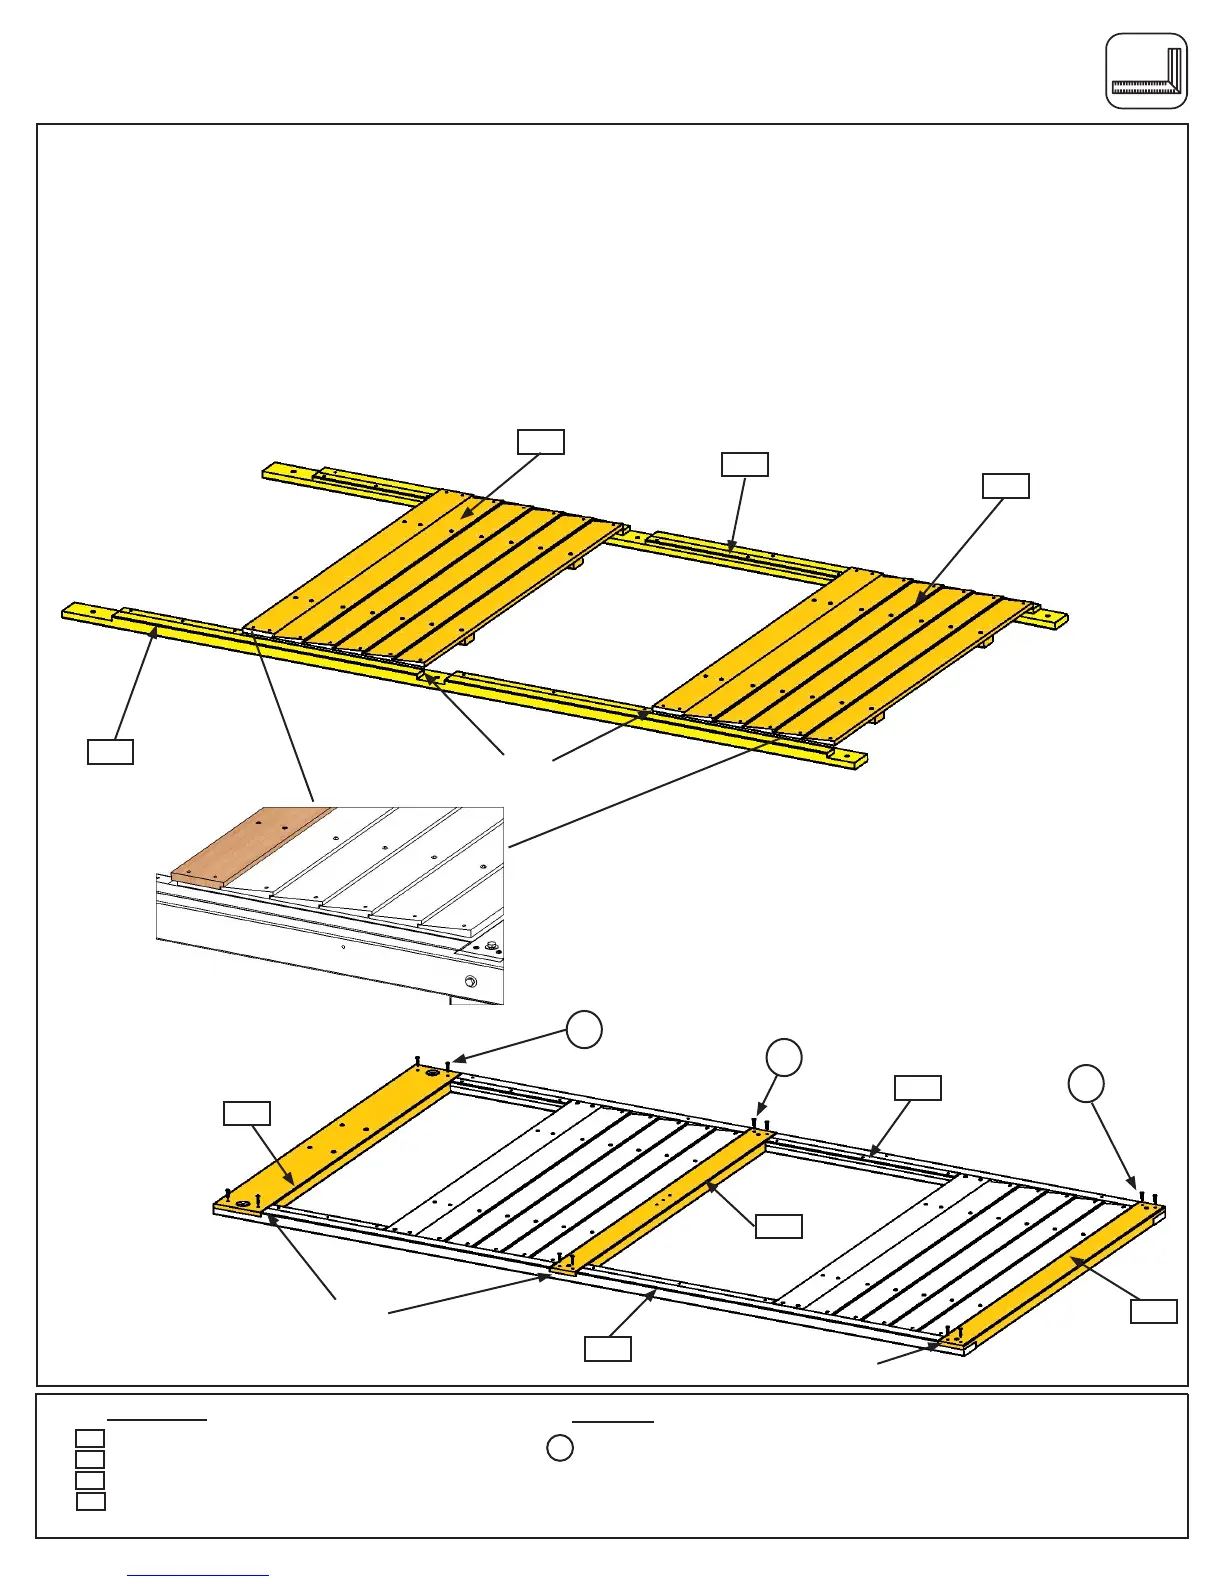
Step 3: Swing Wall Prep
Part 2
It is important to assemble the frame on a at, smooth surface.
C:Turnthe(2757)LTPostAssemblyand(2758)RTPostAssemblyoverandplace2(2756)SidingAssemblies
ontopsoonesitsushwiththetopofthemiddlegrooveandthesecondtsushwiththetopofthebottom
groove.(g.3.2and3.3)
D:Place(2630)SWTopinthetopgrooves,(2768)PanelFloorinthemiddlegroovesand(2769)PanelBT
Frameinthebottomgroovessotheysitushtotheoutsideedgesof(2757)LTPostAssemblyand(2758)RT
PostAssembly.Makesuretheassemblyissquarethenattachwith4(S30)WoodScrewsperboard.(g.3.4).
12 x Wood Screw
2 x Siding Assembly
1 x SW Top
1 x Panel Floor
1 x Panel BT Frame
S30
2756
Wood Parts
Hardware
2768
2769
2630
Fig. 3.2
Bottom
Top
Flush
2758
2756
2757
2756
Fig. 3.3
Flush
Flush
2757
2758
S30
x4
S30
x4
S30
x4
2768
2630
2769
Fig. 3.4
Notice Orientation of both
(2756) Siding Assemblies.
Top
 Loading...