14 www.selwood.com
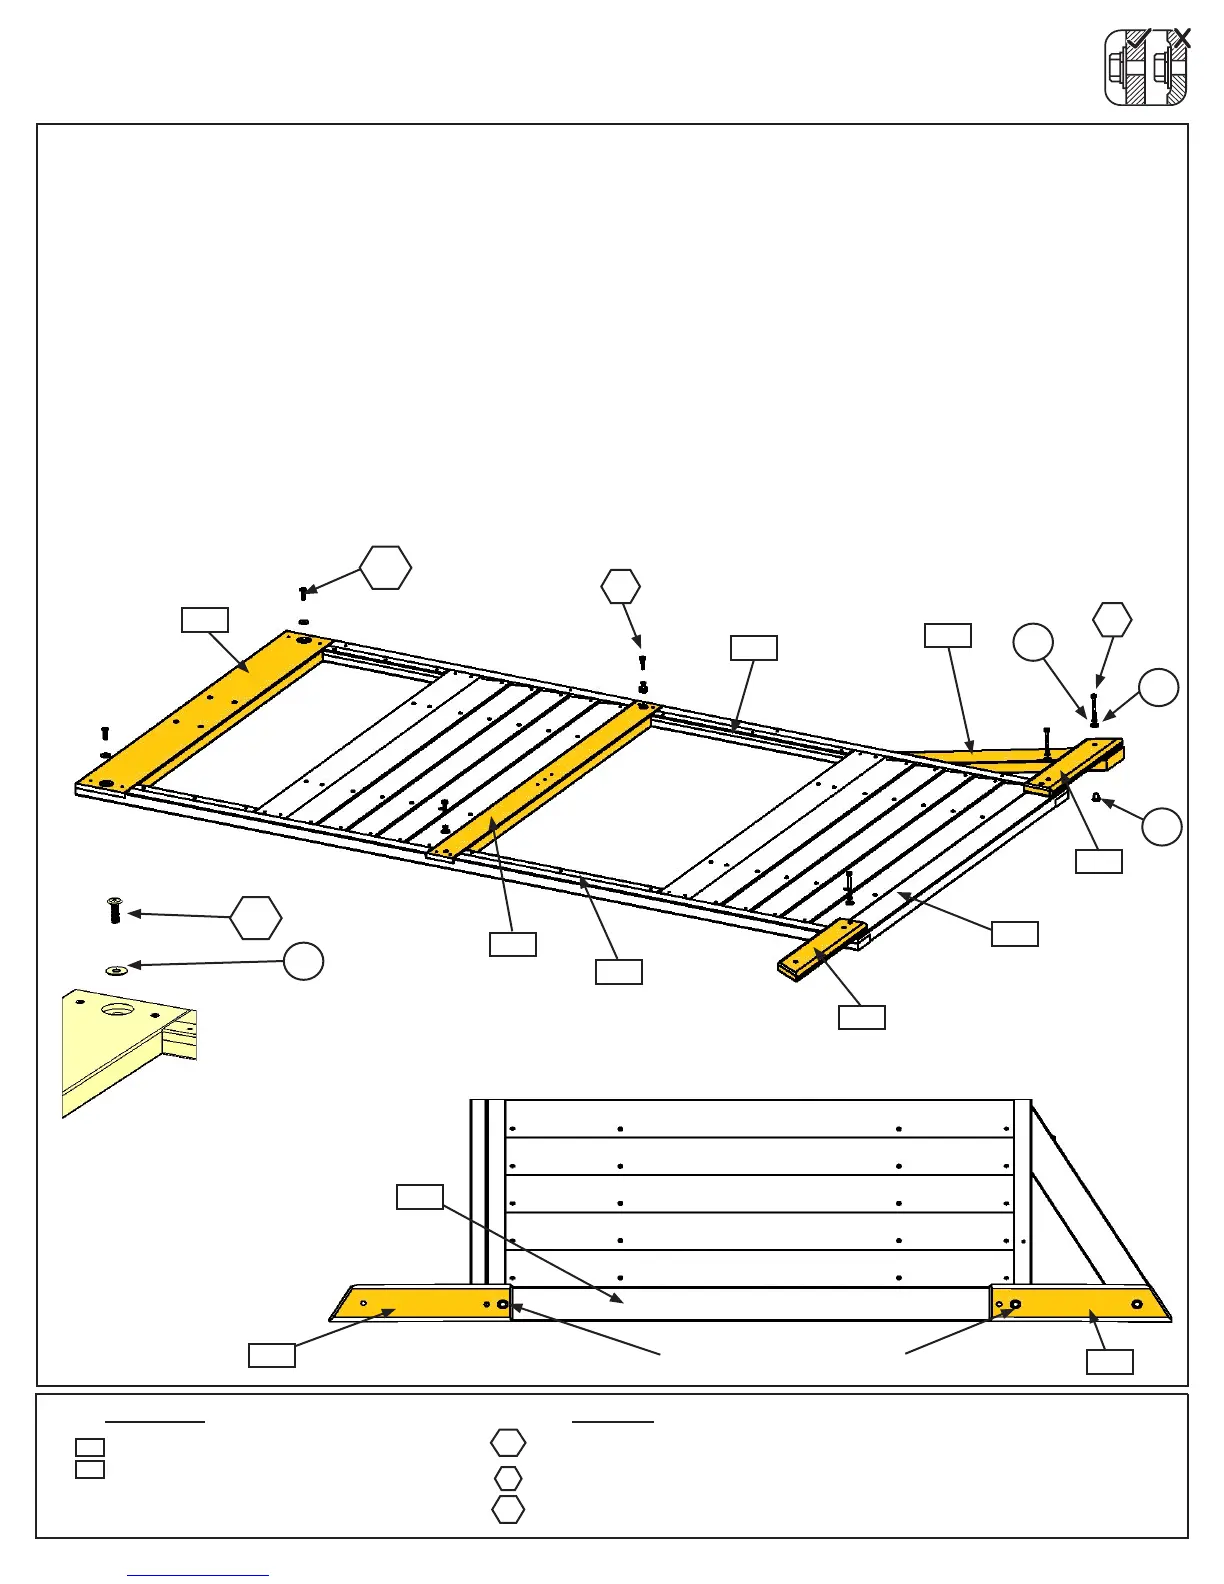
Step 3: Swing Wall Prep
Part 3
It is important to assemble the frame on a at, smooth surface.
E:Attach(2630)SWTopto(2757)LTPostAssemblyand(2758)RTPostAssemblywith2(WB1)WaferBolts
(withatwasher)connectingtopreviouslyinstalledt-nuts.(g.3.5and3.6)
F:Attach(2768)PanelFloorto(2757)LTPostAssemblyand(2758)RTPostAssemblywith2(H9)HexBolts
(withlockwasherandatwasher)connectingtopreviouslyinstalledt-nuts.(g.3.5).
G:Place1(2778)SWGroundMODtoeachsideof(2769)PanelBTFrame,noticetheholelocationsandattach
with1(H10)HexBolt(withlockwasherandatwasher)perboardconnectingtopreviouslyinstalledt-nuts.(g.
3.5and3.7).
H:Place1(2607)Diagonalunder(2778)SWGroundMODontherighthandsidesothetopsitsagainst(2758)
RTPostAssemblyandlooselyattachwith1(H10)HexBolt(withlockwasher,atwasherandt-nut).(g.3.5
and3.7).
2 x Wafer Bolt (at washer)
2 x Hex Bolt (lock washer, at washer)
3 x Hex Bolt (lock washer, at washer and 1 t-nut)
2 x SW Ground MOD
1 x Diagonal
H9
Wood Parts Hardware
2778
Fig. 3.6
Fig. 3.5
2758
2757
Note which bolt holes are used
x2
2607
2630
2768
WB1
2607
H9
x3
WB1
WB1
2778
2778
2769
2769
2778
2778
Fig. 3.7
x2
FW1
LW1
FW2
TN1
H10
H10
 Loading...