8 www.selwood.com
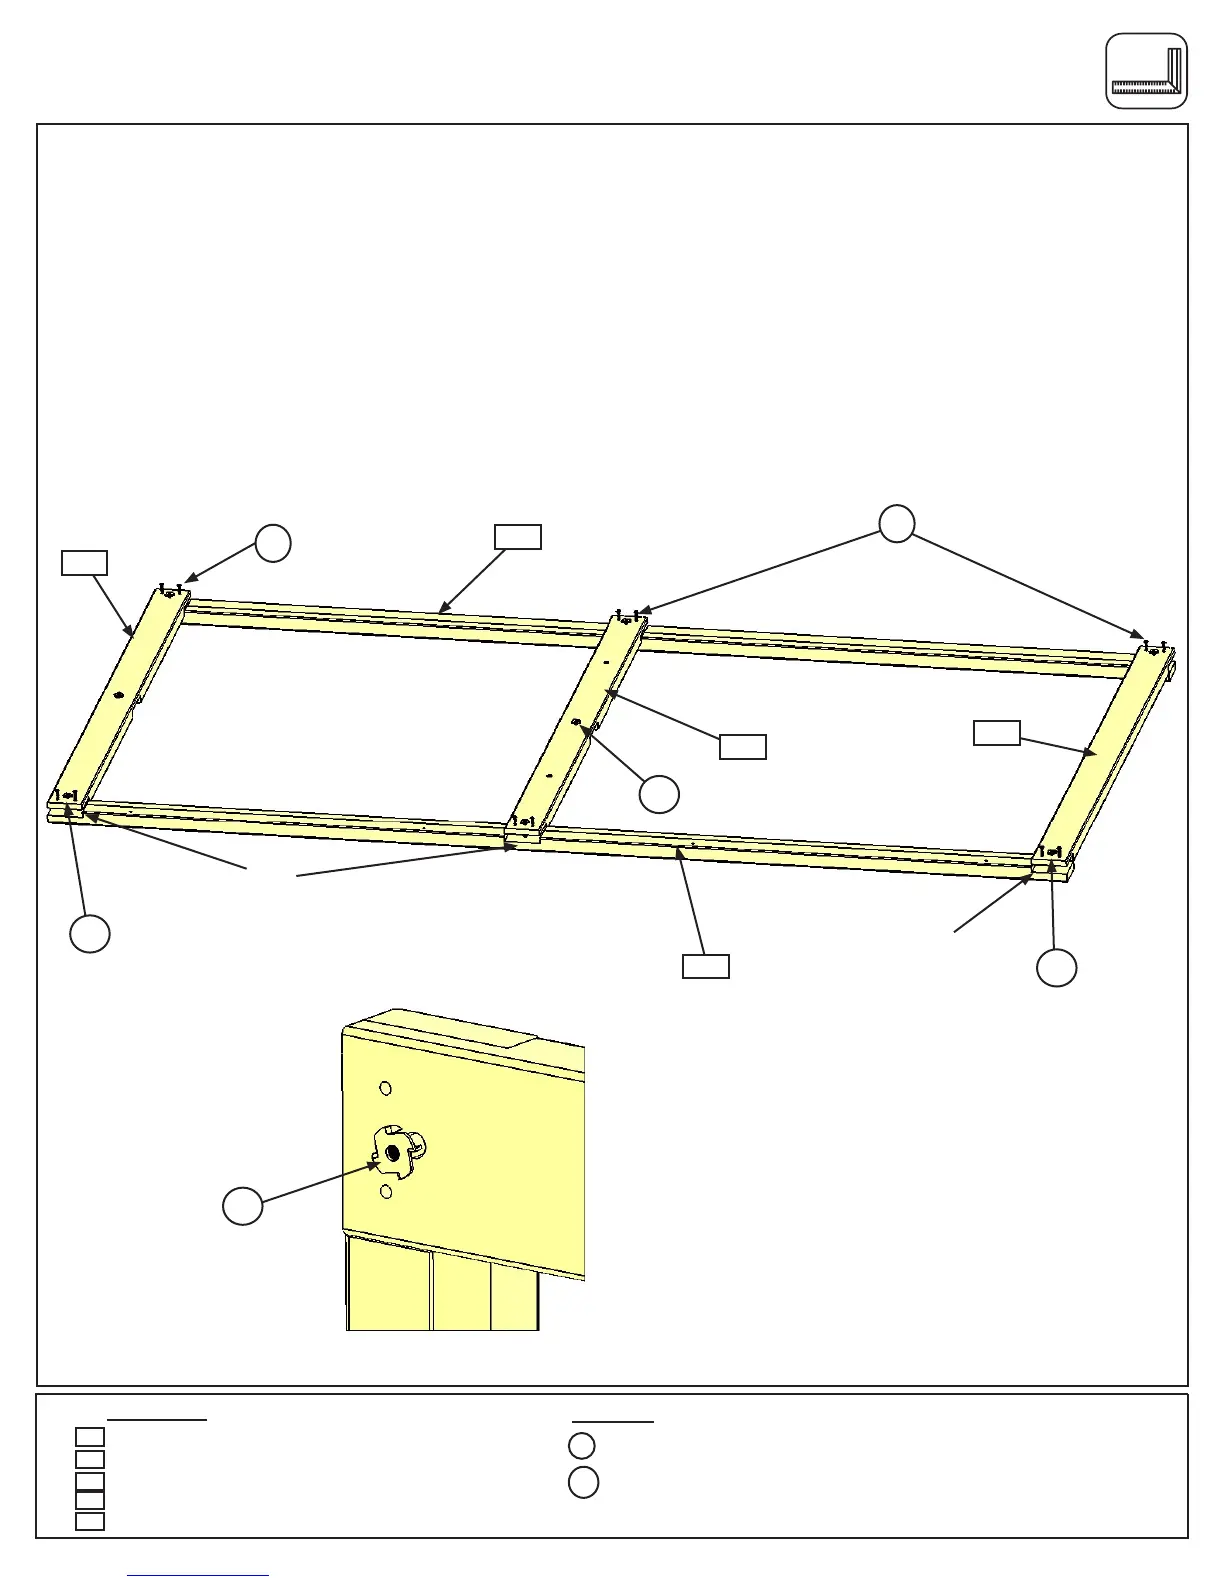
It is important to assemble the frame on a at, smooth surface.
A:Place(2771)EndPostand(2770)EndPostLeftsidebysidewiththegroovesfacingupandin.Put(2770)
EndPostLeftontherighthandside.Place(2775)PanelCrossSupportinthetopgrooves,(2772)PanelFloor
Supportinthemiddlegroovesand(2769)PanelBTFrameinthebottomgrooves.(g.1.1).
B:Makesureassemblyissquarethenattachwith4(S30)WoodScrewsperboard.(g.1.1)
C:Tap3(TN1)T-nutsin(2775)PanelCrossSupportand(2772)PanelFloorSupportand2in(2769)PanelBT
Frame.(g.1.1and1.2)
24 x Wood Screw
16 x T-nut
2 x End Post
2 x End Post Left
2 x Panel Cross Support
2 x Panel Floor Support
2 x Panel BT Frame
S30
2775
Wood Parts
Hardware
2772
2771
2770
2769
Fig. 1.2
Fig. 1.1
Bottom
Top
2772
2775
2770
2771
2769
S30
S30
x3
x3
x2
x4
x4per
board
Flush
Flush
Step 1: Front and Back Wall Prep
Part 1
TN1
TN1
TN1
TN1
TN1