EV Charging Station Installation Guide
8 Rev.201901
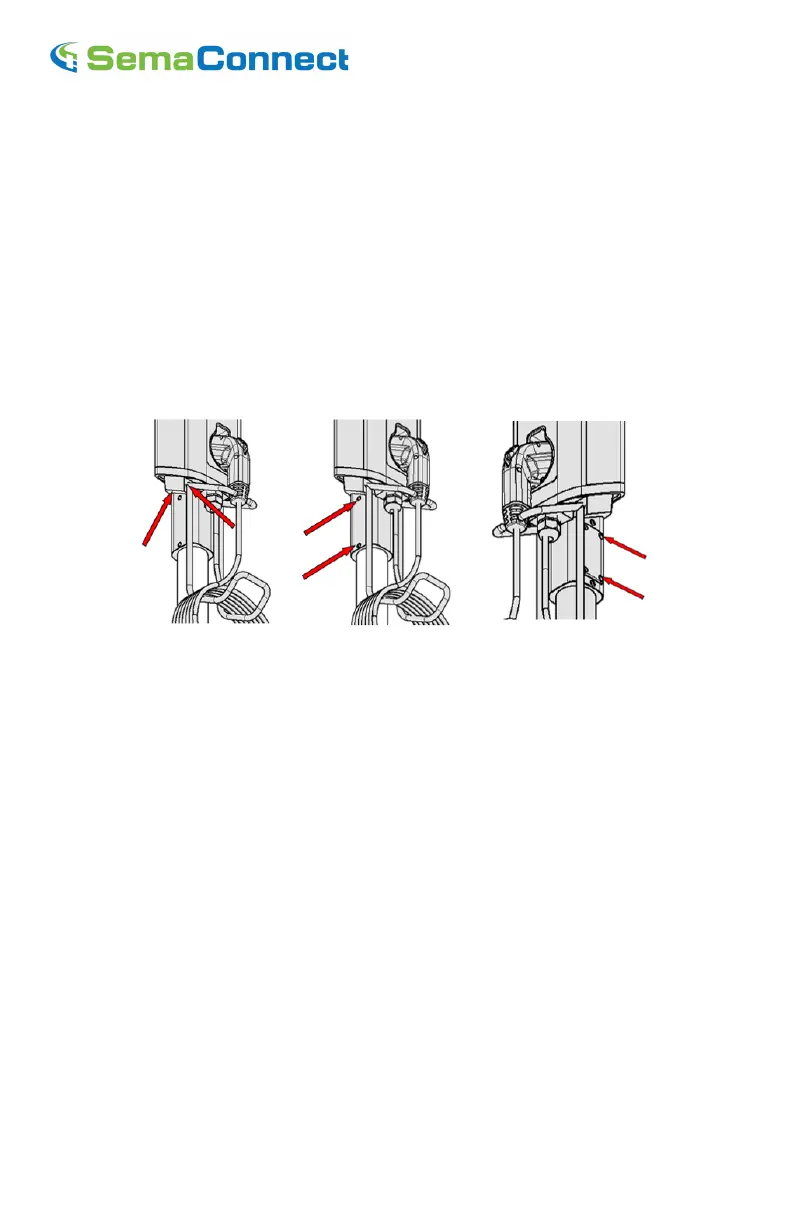
Figure-4 Figure-5 Figure-6
Step-8:- Align Pedestal for plumb with the help of Set screw on the pedestal(Figure-5). Once the
Pedestal is plumb, fully tighten the pedestal mounting screw.
Preparing the SemaConnect
TM
620/520 head Unit
Step-9:- Loosen the Set screws(4 nos) in the head unit(s) and attach Cable rack to charging
Station(Figure-7).
Step-10:- Remove the access panel from the head unit.
Step-11:- Place the J1172 in the holder and hang the cable in the cable rack.
Assembly of SemaConnect
TM
620/520 onto Pedestal
Figure-7 Figure-8 Figure-9
Step-12:- Now Slide the head unit onto pedestal and attach it with four mounting screw(Figure-8).
Note:- Make sure that the wires are not pinched between pedestal and charging station
Step-13:- Connect three electrical supply wires.
Note:- Strictly adhere to the wire color codes to ensure proper installation(Green-Green).
And use wirenut and Insulation tape for safety
Step-14:- Carefully push the wire in and attach the access plate(Figure-9)
Step-15:- Power up Charging Station by turning on circuit breaker(s). Station will automatically
communicate with network and initialize itself (using cellular signal). Successful power-up is
indicated by a steady blue LED light and welcome message on LCD.