- 6 -
05/2021
© 2021
EN
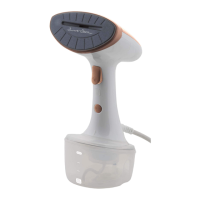
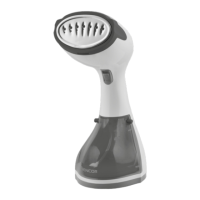
Hand garment steamer
User's manual
■ Prior to using this appliance, please read the user's manual thoroughly, even in
cases, when one has already familiarised themselves with previous use of similar
types of appliances. Only use the appliance in the manner described in this user’s
manual. Keep this user's manual in a safe place where it can be easily retrieved for
future use. In the event that you hand this appliance over to somebody else, make
sure to also include this user's manual.
■ Carefully unpack the appliance and take care not to throw away any part of
the packaging before you find all its parts. We recommend saving the original
cardboard box, packaging material, purchase receipt and responsibility statement
of the vendor or warranty card for at least the duration of the legal liability
for unsatisfactory performance or quality. In the event of transportation, we
recommend that you pack the appliance in the original box from the manufacturer.
DESCRIPTION OF THE APPLIANCE
A1 Garment steamer head
A2 Start steaming button
A3 Operating mode selection button
A4 Water tank (removable)
A5 Display
A6 Handle
A7 Swivel power cord end
Limits twisting and tangling of the
power cord.
A8 Brush attachment
It is suitable for garments, pillows,
drapes, blankets, etc.
A9 Cleaning attachment
It is suitable for removing fibres,
hair, fuzz balls and dirt
A10 Attachment tip
A11 Water tank (not shown)
B1 Automatic shut-off
(stand-by mode)
B2 Strong/intensive steaming
B3 Fine/gentle steaming
B4 Steaming turned off
C1 Filling opening cap
C2 Maximum water level mark
C3 Minimum water level mark
PURPOSE OF USE
■ This hand garment steamer is ideal for quickly smoothing out creases and folds on
garments by the use of steam without the need for an ironing board. Garments can
be smoothed out on a coat hanger.
■ It will handle social attire and hard-to-iron fabrics, but will also find its use
throughout the entire household. It will liven up and smoothen out drapes or
straighten out couch covers. It is also able to eliminate undesirable odours and
certain forms of dirt.
■ Apart from smoothing out/straightening, it can also be used to brush garments or
remove fibres, hair, fuzz balls and dirt.
■ The appliance is not suitable for small business activity or for industrial applications.
BEFORE FIRST USE
■ Before first use, remove all packaging materials including promotional stickers
and labels from the appliance. Wipe the garment steamer head A1 with a lightly
dampened cloth before first use and then wipe dry.
■ Using a dry or lightly dampened cloth, also clean the outer parts of the garment
steamer and then wipe it dry.
Attention:
Never submerge the garment steamer in water or any other liquid!
OPERATION
FILLING THE WATER TANK
■ The garment steamer is intended to be filled with clean tap water. Limescale deposits
may quickly form, if you live in an area with hard or very hard water. Therefore, to
extend the lifetime of the garment steamer, it is recommended to mix the tap water
with distilled water. The ratio of distilled water to tap water is as follows:
– 1:1 for medium hard water
– 2:1 for hard water
– 3:1 for very hard water
Your local water utility will provide information about the water hardness in your
area.
Attention:
Never add water softeners, vinegar, starch, descaling agents,
perfumes or other additives to the water.
Never fill the water tank past the holes in the garment steamer
head. Never submerge the garment steamer in water.
Warning:
Prior to removing, filling and inserting the water tank, the garment
steamer must always be disconnected from the power socket!
■ Turn the water tank towards the open padlock symbol and slide the water tank out
of the body of the garment steamer.
■ Fill the included container with water. Tilt open the cap of the filling opening C1 and
slowly pour the water from the container into the filling opening of the water tank.
Make sure that the water level does not rise above the maximum water level mark
(MAX) on the water tank. To correctly assess the water level height, place the water
tank on a horizontal surface. In the event that you have dripped or poured water on
the tank while filling it, then dry it.
■ Close the filling opening cap and secure the water tank in the body of the garment
steamer by turning it towards the locked padlock symbol.
PREPARING GARMENTS
■ Prior to using the garment steamer, always check the recommendations of the
manufacturer for garment care on the label. The garment steamer can be used
to treat all materials marked with the symbol of the iron, such as synthetic fibres
(viscose, polyester), silk, wool, cotton, flax sheets, etc.
■ In the event that treatment instructions forbid ironing then you must not straighten
out the garment using this garment steamer. Otherwise, you could damage the
garment.
Attention:
Do not treat leather, velvet, impregnated furniture or steam
sensitive materials. This could result in their irreparable damage.
■ It is easier to rid garments of creases when you properly spread them out after
washing them. Hang the garments on coat hangers so that they have the least
amount of creases.
■ In the event that you are not sure whether a garment is suitable for straightening
out using steam, try out the behaviour of the garment steamer on an old piece of
fabric or on a non-visible part of the garment, such as for example an inner seam.
■ Hang the garment on a coat hanger. Ensure that there is sufficient free space behind
the fabric to enable sufficient air circulation, otherwise dampness could develop.
Also check that there are no objects sensitive to heat and humidity in the near
vicinity of the garment, which could be damaged by steam.
■ Check whether the pockets are empty and that cuffs and skirts are turned
downwards.
Warning:
Never attempt to straighten out garments directly on a person!
Always hang the garment on a coat hanger or another suitable
object.
TURNING ON
■ Insert the power cord into a power socket and press button A3. The symbol B3 on
the display will start flashing, indicating that the garment steamer is heating up.
Once the garment steamer's thermostat reaches the correct temperature (after
approx. 25 seconds), the symbol will stop flashing and remain permanently lit. The
garment steamer is now ready for use.
Note:
In the event that you press the steam release button before the inner
water tank reaches optimal temperature, it may happen that instead of
steam, water may come out of the nozzles.
■ In order not to overload the electrical circuit while using the garment steamer,
we recommend that no other appliances are plugged into the same circuit as the
garment steamer.
STARTING AND ENDING STEAMING
Note:
When using this garment steamer for the first time, allow it to steam up
for several minutes. In this way, you will remove all the dirt and odours
that may have potentially remained in the garment steamer during the
manufacturing process.
■ Grasp the garment steamer by the handle so that the steam outlets on the garment
steamer head are pointed away from you.
■ Use button A3 to select the appropriate operating mode. The available modes
are strong/intensive steaming (B2), fine/gentle steaming (B3) or you can turn off
steaming completely (B4).
■ Pressing and holding down button A2 will result in steam being emitted from the
head.
■ It is not necessary to keep button A2 continuously pressed while steaming. For more
comfortable work, it is possible to press the button once. This will lock it in place in
the operating position and it is then not necessary to hold it pressed down. Press
the button again to unlock it.
■ If you want to stop steaming, release button A2.


 To Next Page
 Loading...