Do you have a question about the Sencore POWERITE PR57 and is the answer not in the manual?
Explains the safety check to prevent customer shocks from exposed metal parts on AC-powered devices.
Highlights that technicians avoid the test due to complexity, setup time, and required parts.
Details how to measure resistance between AC plug and exposed metal parts when the unit is unplugged.
Explains measuring voltage across a resistor connected to exposed metal and earth ground while the unit is powered.
Emphasizes that even one leaky chassis can lead to costly damage, lawsuits, and customer harm.
Explains how shorted bypass capacitors can expose antenna terminals to AC voltage.
Discusses how incorrect tuner installation can tie the AC line to exposed metal parts.
Warns that metal or chrome-plated knobs can conduct current from a hot chassis.
Notes that leakage in isolation transformers can cause the entire chassis to become hot.
Describes how failed AC bypass capacitors can create a direct connection between the AC line and chassis.
Explains how bent rabbit ears can touch a hot chassis, energizing the antenna terminals.
Mentions forgetting insulating parts like "fish paper" can create a hazard.
Warns about wires or solder falling onto AC line components.
Indicates a broken ground can cause controls to "float" at line voltage.
States long screws can penetrate mounting tabs and touch the metal chassis.
Highlights the shock hazard of connecting earphones to un-isolated sets.
Mentions metal objects like coins or hairpins falling inside the set can cause a shock hazard.
Warns about wiring accessories to sets without isolation transformers.
Explains the PR57 simplifies the test by referencing all circuits to its isolated output.
Provides a step-by-step guide on how to conduct the leakage test using the PR57.
Discusses the effects of electrical shock and safe leakage current limits.
Explains measuring very low leakage (10-100 microamps) for medical or hospital equipment.
Details how to verify the PR57's leakage test calibration using its built-in resistor.
Explains how the PR57 test works on units with grounded AC cords, maintaining chassis at earth potential.
Covers testing line and extension cords for leakage, which can cause fires.
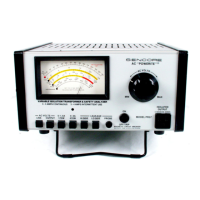
The Sencore PR57 "POWERITE" is a safety analyzer and variable isolation transformer designed for electronic servicing, particularly for performing leakage tests on AC-operated devices. Its primary function is to quickly and accurately check for AC leakage between the AC line and exposed metal parts of a device, ensuring safety for both the user and the customer.
The PR57 facilitates a crucial safety leakage test, which is mandated by manufacturers in their service literature to meet legal obligations for delivering safe products. This test identifies potential electrical shock hazards caused by current leakage from internal circuits to accessible metallic parts of an electronic device. The device is especially important for servicing "hot chassis" units, which lack an isolation transformer and thus present a higher risk of shock.
The leakage test can be performed in two main ways:
The PR57's internal circuitry references all leakage test paths to its isolated output, allowing the test to be performed while the unit under test is still connected to the isolated output. This reduces the risk of shock during testing and eliminates the need to move the AC line cord to a non-isolated outlet. It also negates the requirement for an external earth ground reference, making it possible to perform the test anywhere, even in homes without grounded outlets.
The device also functions as a variable isolation transformer, providing an isolated AC output for safe servicing.
By understanding these potential causes, technicians can more effectively diagnose and repair leakage issues. The PR57 helps technicians meet their legal and ethical obligations to deliver safe products, protecting both customers and their businesses from potential shock hazards and lawsuits.
| Brand | Sencore |
|---|---|
| Model | POWERITE PR57 |
| Category | Test Equipment |
| Language | English |