EasyManuals Logo

Seneca Z109PT2-1 User Manual

Seneca Z109PT2-1
8 pages
To Next Page IconTo Next Page
To Previous Page IconTo Previous Page
Page #6 background imageLoading...
Page #6 background image
ENGLISH 6/8
MI004284-E
LEGENDA
ON
OFF
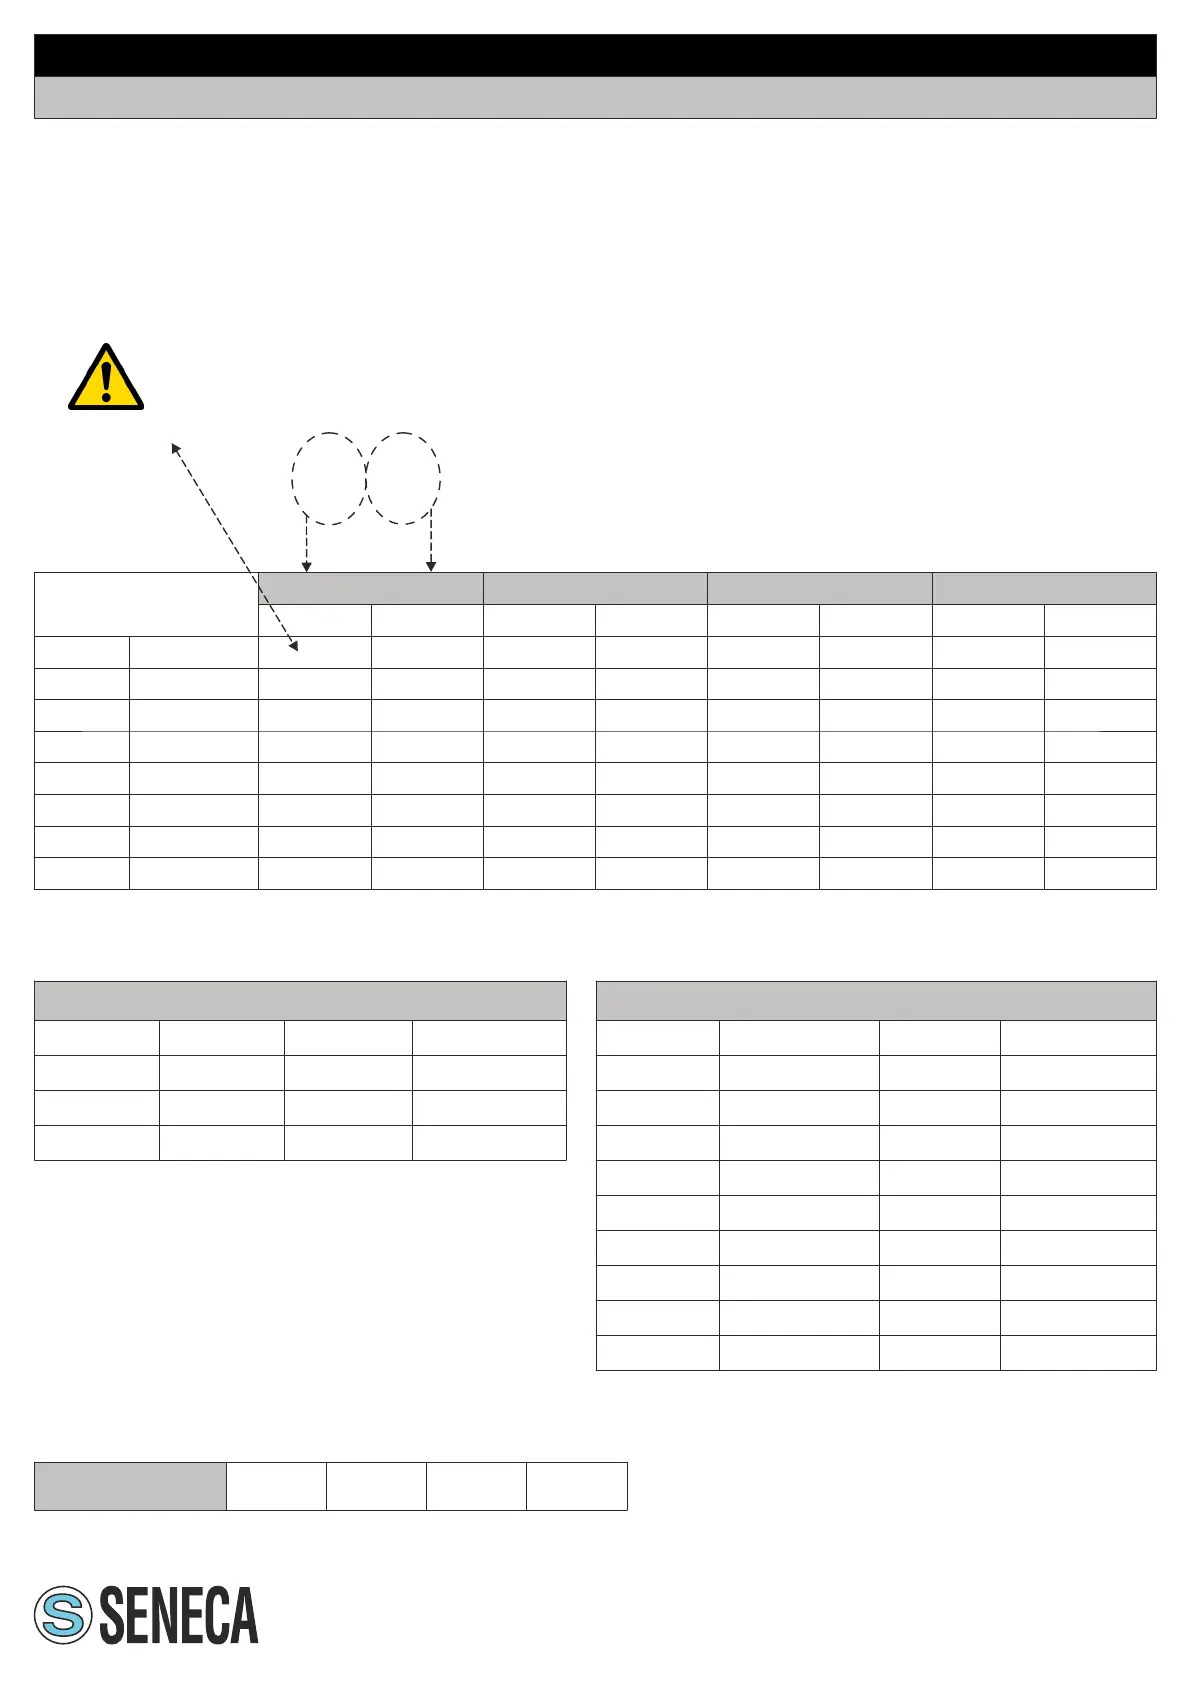
SW2 DIP-switch in OFF position
SCALE
NI100 (RTD)
PT100 (RTD)
PT500 (RTD)
PT1000 (RTD)
START
END
START
END
START
END
START
END
1
(*)
(*)
(*)
(*)
(*)
(*)
(*)
(*)
2
-50 °C
20 °C
-200 °C
50 °C
-200 °C
0 °C
-200 °C
0 °C
3
-30 °C
40 °C
-100 °C
100 °C
-100 °C
50 °C
-100 °C
50 °C

4
-20 °C
50 °C
-50 °C
200 °C
-50 °C
100 °C
-50 °C
100 °C

5
0 °C
80 °C
0 °C
300 °C
0 °C
150 °C
0 °C
150 °C

6
20 °C
100 °C
50 °C
400 °C
50 °C
200 °C
50 °C
200 °C
7
30 °C
150 °C
100 °C
500 °C
100 °C
300 °C
100 °C
300 °C

8
50 °C
200 °C
200 °C
600 °C
150 °C
400 °C
200 °C
400 °C
(*)START and END setted in the memory by a PC or by the programming push-buttons.
Note: DIP-switches must be set while the module is powered down, otherwise,
the module may be damaged.
1 2 3 4 5 6 7 8

6. CONFIGURATION
6.1 INPUT SELECTION / MEASURING SCALE
You can select the type of input by setting SW1 DIP switches placed on the side of the module.
Every type of input is matched to a certain number of beginning and end scale values which can be
selected through SW2 DIP switches.
The following table lists possible START and END values according to the type of input selected.
The left column show the DIP-switches setting in order to select the START and END scale desired.
SW1: INPUT SELECTION
Position
INPUT
Position
INPUT
1 2 3 4
TYPE
1 2 3 4
TYPE
NI100
PT500
PT100
PT1000
SW2: START e END
Position
START
Position
END
1 2 3
SCALE
4 5 6
SCALE
1
1
2
2
3
3
4
4
5
5
6
6
7
7
8
8

Questions and Answers:

Question and Answer IconNeed help?

Do you have a question about the Seneca Z109PT2-1 and is the answer not in the manual?

Seneca Z109PT2-1 Specifications

General IconGeneral
BrandSeneca
ModelZ109PT2-1
CategoryControl Unit
LanguageEnglish