14
WWW.SENIXTOOLS.COM
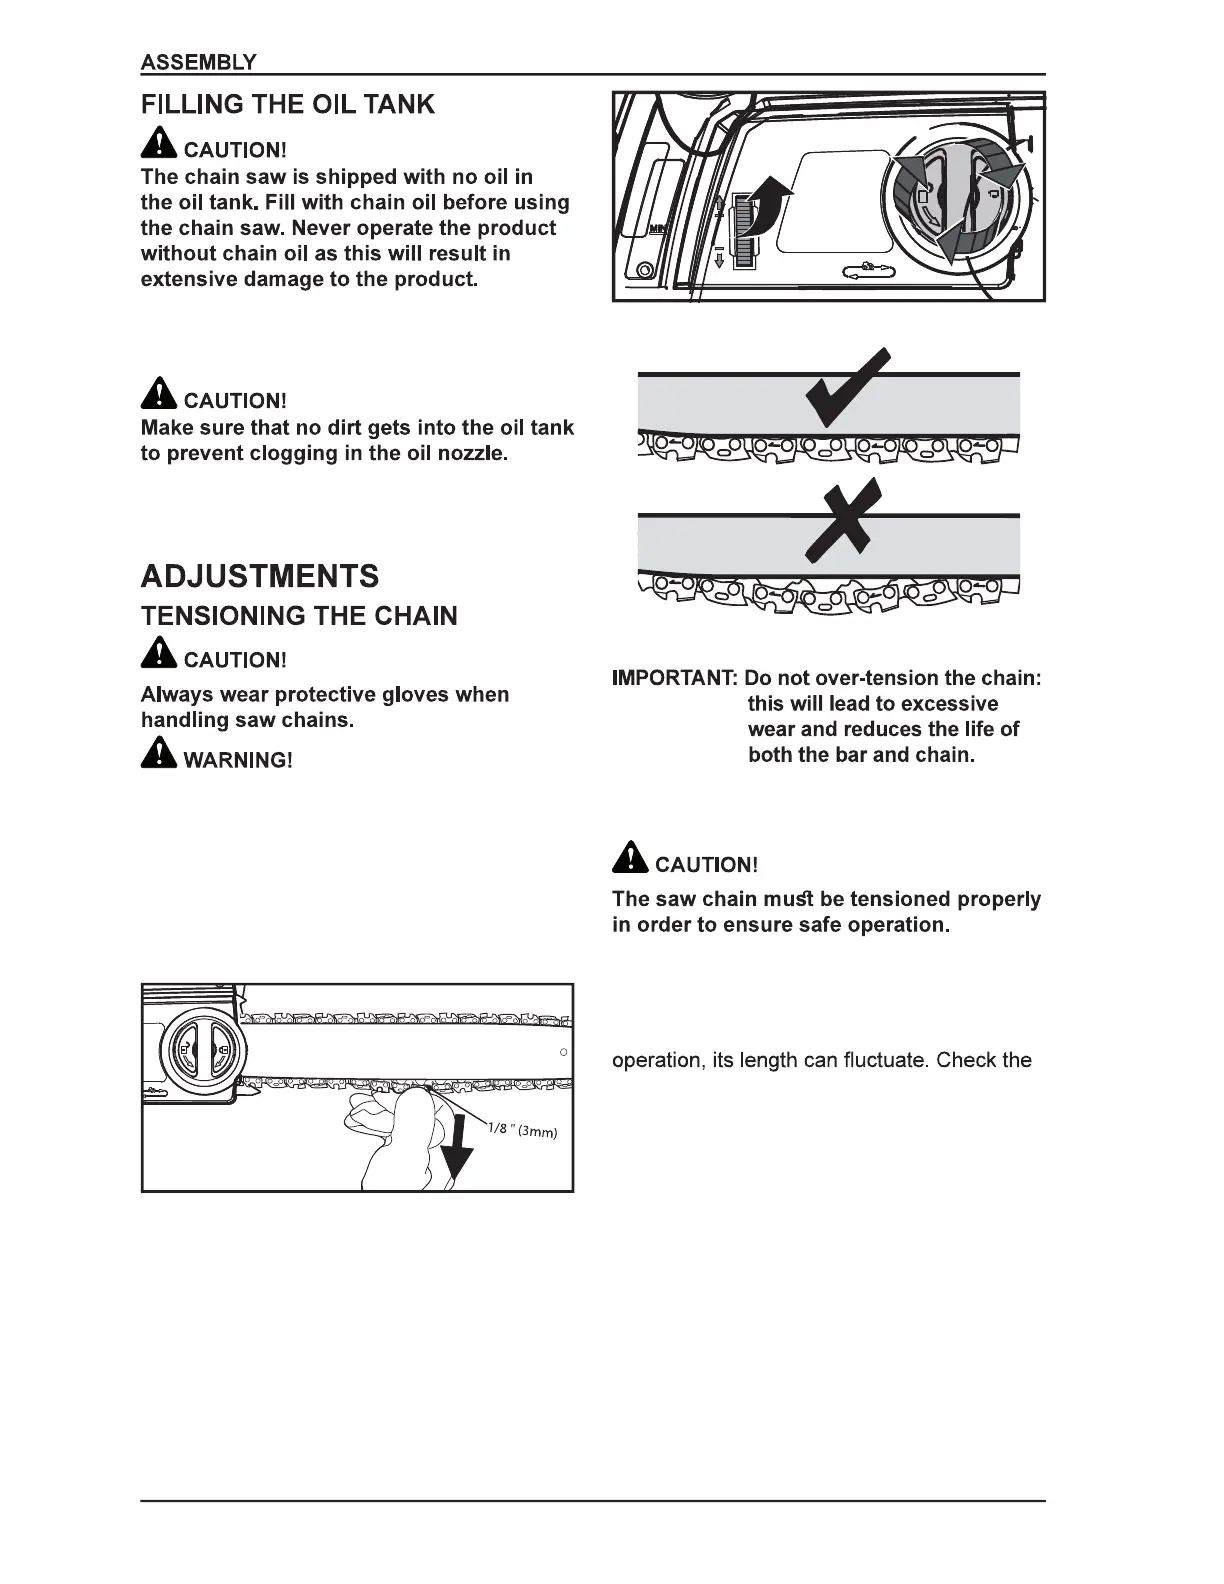
Remove the battery before adjusting the
chain tension.
The chain tension is optimal if the saw chain
can be lifted 1/8 inch (3 mm) from the center
of the guide bar.
Because the saw chain heats up during
chain tension every 10 minutes of operation
and adjust as necessary, particularly for new
saw chains.
TIP: The saw chain shortens when cooling
down. Loosen the saw chain after work
is completed to elongate the chain’s life
and prevent possible damage.
1. Place the saw on a level surface. Clean
the area around the oil tank cap and then
open it.
2. Fill the oil tank with 4.06 oz. (120 ml) of
saw chain oil.
3. Close the oil tank cap.
1. Check the chain tension by pulling the saw
chain away from the guide bar. A properly
tensioned chain should have roughly 1/8
inch (3 mm) of distance between itself and
the bar guide (Figure 12).
2. If saw chain tension adjustment is needed,
loosen the side cover lock one full turn and
rotate the chain tensioning wheel (Figure
13). Rotating the wheel upwards increases
the tension. Rotating it downwards
decreases tension. A properly tensioned
chain should have no sag and should only
be able to be pulled 1/8 inch (3 mm) away
from the guide bar of the saw (Figure 14).
3. Once the chain is properly tensioned,
tighten the side cover lock.
Figure 13 - Adjust chain tension
Figure 14 - Correct chain tension
Figure 12 - Check chain tension