EasyManua.ls Logo

Sensit GOLD User Manual

Sensit GOLD
2 pages
To Next Page IconTo Next Page
Page #1 background imageLoading...
Page #1 background image
Quick-Start Instructions
HINT: As you approach the source of the
leak continue adjusting the wheel without
moving the sensor head to a uniform tick
sound until you locate the exact location of
the leak.
IMPORTANT: When replacing the
gooseneck into the clip on the right side,
wrap the gooseneck in a wide circular
manner counter-clockwise around the back
of the instrument. Bending in the opposite
direction may cause damage over the life of
the product.
WARNINGS:
To prevent ignition of ammable or combustible
atmospheres, disconnect power before servicing.
To reduce the risk of ignition of a ammable
atmosphere, batteries must only be changed in
an area known to be nonammable.
Do not mix batteries of different age or type.
This is not a substitute for the
instruction manual. It is for
reference only.
Read and understand the
instruction manual before use.
MADE IN USA
Distributed by:
851 Transport Drive
Valparaiso, IN 46383-8432
Phone: 219 465 2700
Web: www.gasleaksensors.com
SENSIT
®
CO
SENSIT
®
GOLD
SENSIT
®
GOLD 100
SENSIT
®
GOLD CGI
SENSIT
®
GOLD G2
SENSIT
®
HCN
SENSIT
®
HXG-2
SENSIT
®
HXG-2d (2dr)
SENSIT
®
HXG-3 (3P)
SENSIT
®
P100
SENSIT
®
P400
SENSIT
®
PMD
SENSIT
®
RLD-2
SENSIT
®
TKX
TRAK-IT
®
IIIa
ULTRA-TRAC
®
MJL
GAS-TRAC
®
EX 1000
SMART-CAL
TM
SCAL-100
SCAL-N
TM
Innovative Detection Solutions
Question and Answer IconNeed help?

Do you have a question about the Sensit GOLD and is the answer not in the manual?

Sensit GOLD Specifications

General IconGeneral
DisplayLCD
Sensor TypeElectrochemical
AlarmsAudible and visual alarms
Detection Range0-100% LEL
MountingWall Mount

Summary

Safety Precautions

Preventing Ignition

Disconnect power before servicing to prevent ignition of flammable or combustible atmospheres.

Battery Change Safety

Change batteries only in a nonflammable area to reduce ignition risk in flammable atmospheres. Do not mix battery types or ages.

Quick-Start Guide

Battery Installation

Install batteries by sliding the handle away, ensuring the tab is secure, and replacing the retaining screw.

Powering On and Warm-up

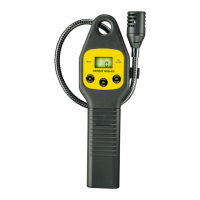
Slide the on/off switch to turn on. Allow up to 60 seconds for the unit to warm up in clean air.

Using the Goose Neck

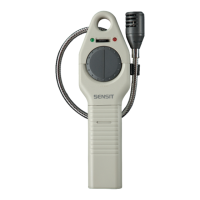
Extend the goose neck with the sensor and cap at the tip for operation.

Detecting Gases

Rotate the center wheel for a uniform ticking sound. Adjust counter-clockwise to slow speed for leak detection.

Completing Investigation

Slide the switch to the off position when your investigation is complete.

Related product manuals