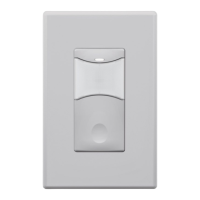
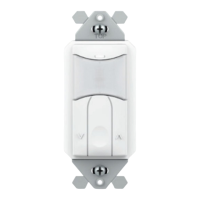
CONFIGURATION SETTINGS CONT.
DETAILED FUNCTION TABLES FOR NON-DIMMING FEATURES
FUNCTION #2 TIME DELAY
CENTER BUTTON
SETTING # DESCRIPTION FUNCTION #
1 Test Mode Temporary 5 sec time delay, reverts after 10 min
2 30 Sec
3 5 Min
4 10 Min Default for all models
5 15 Min
6 20 Min
7 30 Min
FUNCTION #3 OPERATIONAL MODES
CENTER BUTTON
Several pre-programmed operational modes are available to accommodate both
preferences and applicable energy codes.
SETTING # DESCRIPTION NOTES
2
Vacancy Mode (Manual On / Automatic Off)
This mode provides increased energy savings but
requires the user to initially turn on the lights by
pressing the button. Lights can also be switched off
manually.
Default for models
SWX-1x3-D and
SWX-1x4-D.
3
Occupancy Mode (Automatic On / Automatic Off)
Automatic On and Automatic Off operation. If lights are
switched off manually, the Automatic On functionality
is temporarily disabled to allow the occupant a
few seconds to leave the room before returning to
Automatic On operation. However, if the person
remains in the space, the unit will stay in a manual on
state until the switch is pressed again.
Default for SWX-1x1-D
models. Not available
for SWX-1x4-D models.
4
Automatic On w/ Exit Time Mode (Automatic On/
Automatic Off)
If lights are switched off manually, the Automatic On
functionality is disabled for a xed 30 seconds to allow
a person time to leave the room.
Not available for SWX-
1x4-D models.
5
Override Off Mode
Automatic On and Automatic Off operation until lights
are switched off manually, at which point Automatic
On functionality is disabled until the button is pressed
again.
6
Disabled Switch Mode
Automatic On and Automatic Off operation only. Switch
functionality to manually turn on/off lights is disabled.
7
Presentation Mode
If lights are switched off manually, the Automatic
On functionality is disabled until the space becomes
unoccupied and the sensor’s time delay expires.
FUNCTION #5 AUTO ON SENSITIVITY
CENTER BUTTON
This setting indicates the sensor’s PIR sensitivity when the lights are off. Typically, this
setting should be FULL, but if reective surfaces (like windows) are causing false-ons the
REDUCED setting should be used. Note that the unit returns to full sensitivity after initial
detection.
SETTING # DESCRIPTION NOTES
2 Full initial PIR sensitivity Default for all models
3
Reduced PIR sensitivity for initial turn-ons in order to
eliminate false on’s caused by reective surfaces like
windows. Full sensitivity after initial turn-on.
FUNCTION #6 INITIAL ACOUSTIC SENSITIVITY
CENTER BUTTON
Dual technology (i.e. PIR + acoustic) sensors prevent non-occupant sounds from
resetting the time delay by dynamically reducing the microphone’s sensitivity at specic
frequencies. In some environments, decreasing the sensitivity across all frequencies so
that lights go off sooner, may be preferred. A unit’s microphone can also be disabled
(effectively changing sensor to a PIR only version).
SETTING # DESCRIPTION NOTES
2 Normal Default for all models
3 Reduced
4 Disabled
FUNCTION #7 LED FUNCTION
CENTER BUTTON
By default, the sensor’s LED will be solid blue when the unit’s relay is in the open/ off
state. This serves as a switch locator. Once the lights are on, the LED will blink white
whenever the sensor detects PIR motion. A unit with dual technology will also blink
the LED white when it acoustically detects occupancy. The blue and/or white LED
functionality can also be disabled.
SETTING # DESCRIPTION NOTES
2 White LED for occupancy, blue locator LED enabled Default for all models
3 White LED for occupancy, blue locator LED disabled
4 All LED functionality disabled.
5
White LED for PIR, blue LED for acoustic detection.
Blue locator LED enabled.
6
White LED for PIR, blue LED for acoustic detection.
Blue locator LED disabled.
FUNCTION #8 RESTORE FACTORY DEFAULTS
CENTER BUTTON
SETTING # DESCRIPTION
3 Restore Factory Defaults
 Loading...