PLUMBING INSTALLATION
Location
Modern washing machines spin at high speed. To avoid excessive vibration during spinning, install the
appliance on a properly supported floor. Always leave at least 5cm of space on each side of the appliance to
allow for possible vibration during spinning of unbalanced loads.
Space for servicing and fitting
Allow space on either side of the appliance for access and servicing.
Water Board Regulations
These instructions are intended only as a general guide and local by-laws and water board regulations
regarding the water connections and drainage from the appliance must be observed.
Water Pressure
The appliance will operate within a wide range of water pressures.
Hot Water (if fitted) minimum 5 N/cm2 (0.5 bar) (7 psi)
maximum 10 N/cm2 (1 bar) (15 psi)
Cold Water minimum 5 N/cm2 (0.5 bar) (7 psi)
maximum 100 N/cm2 (10 bar) (150 psi)
The height of the storage tank in the house must be a minimum of 8 feet above the top of the appliance to
meet the minimum pressure requirements.
Water Supply
1Most domestic hot water systems are suitable.
2Multi-point gas heaters can be used if sufficient water pressure is available (check with manufacturer).
3Single point instantaneous gas water heaters MUST NOT BE USED.
4 If you are in any doubt about the suitability of your hot water system, consult the manufacturer of the
heating appliance or the Gas or Electricity Board.
Water Connections
All the connections and adaptors mentioned in this section can be purchased from your local builder,
plumber or from large DIY stores and electrical outlets.
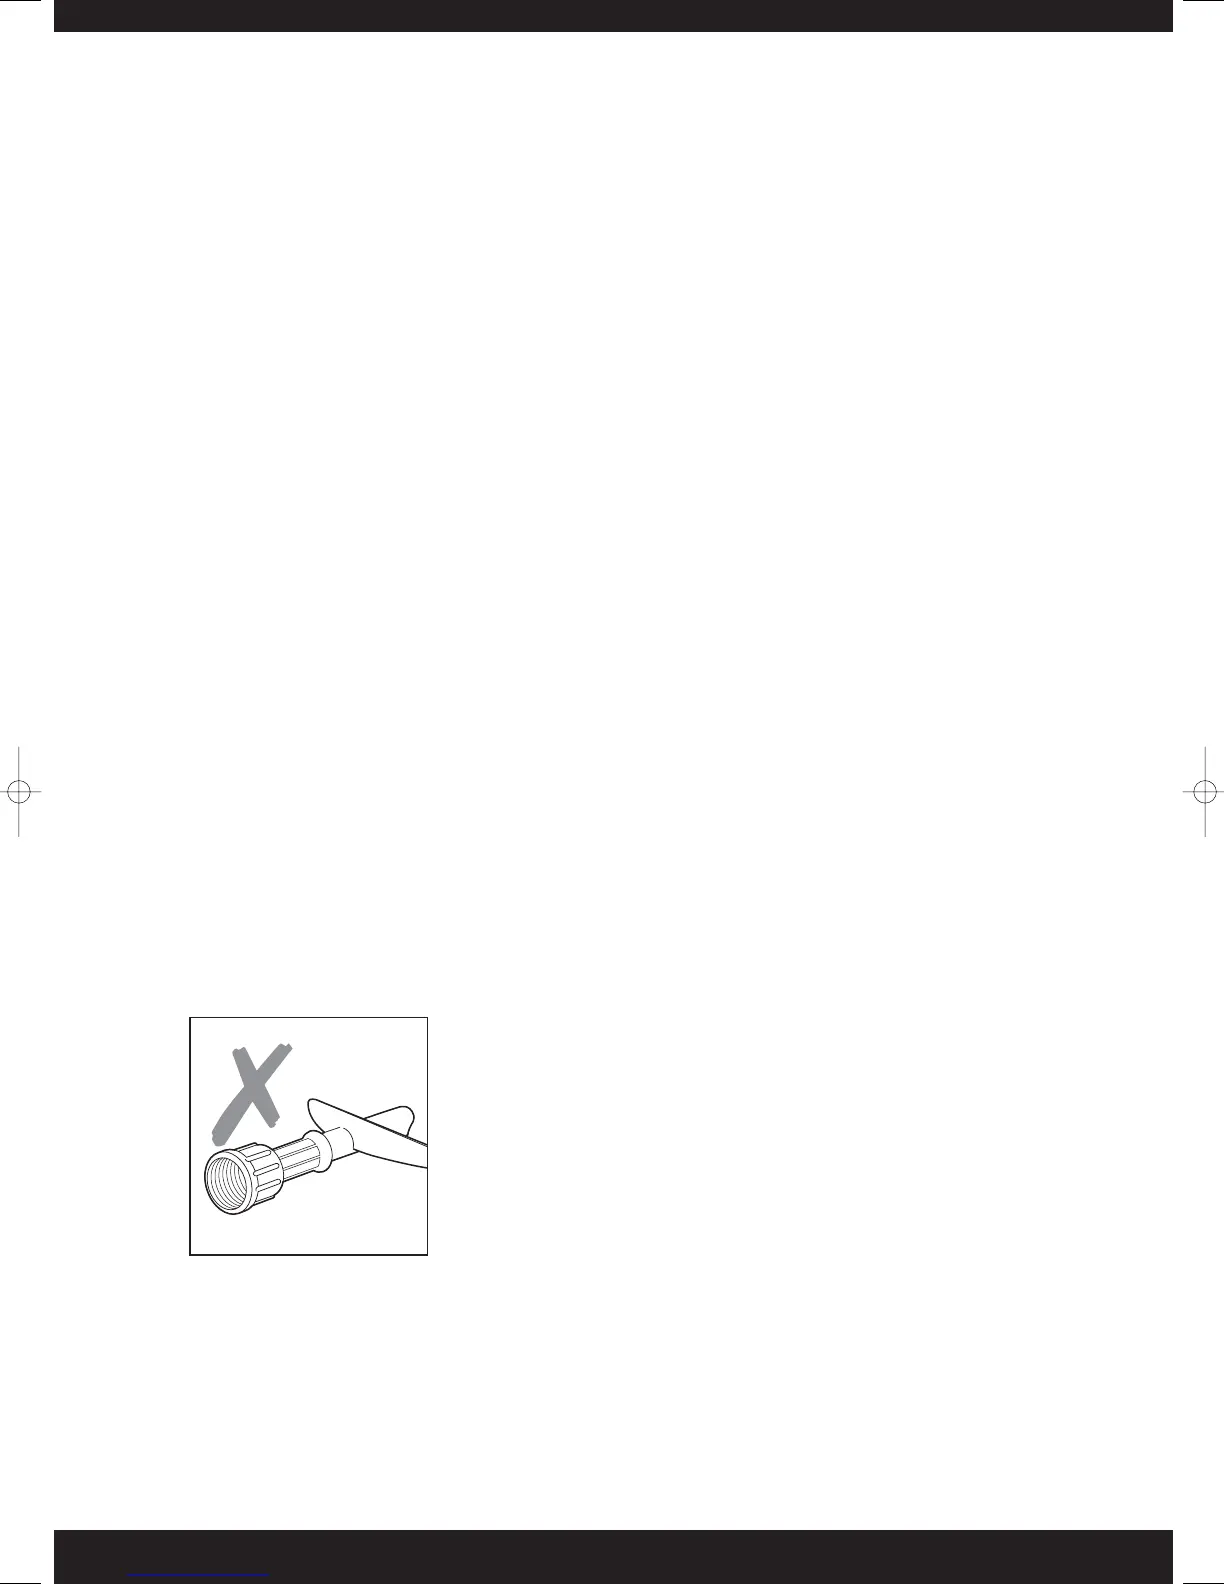
Filling hoses
All our washing machines are supplied with special high pressure filling
hoses complete with a
3
/4" BSP (19mm) female coupling.
Important: Under no circumstances should this coupling be removed from
the hoses (Fig 9).
We will not accept any responsibility for failure of the hoses or water
connections if the factory fitted couplings are removed. The hoses are
designed to be long enough to stay connected while the appliance is pulled
forward for cleaning and servicing.
Fitting the hoses
Important: Remove the hoses from their storage in the drum and fit them to the inlet valves situated on the
rear panel of the appliance. Remember to fit the red hose to the red valve and to insert the rubber washers
into the couplings.
Insert the filter washers (Fig 11/12) in the other end of the filling hoses as shown. Screw the red hose to the
hot tap and the other hose to the cold tap.
W A S H I N G M A C H I N E
7
Fig 9