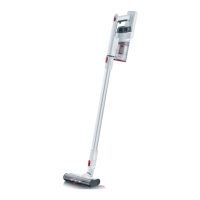
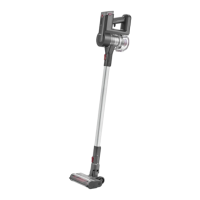
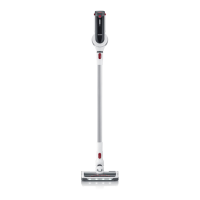
14
142 x 208 mm
TIP: When the battery is low, the LED on the handle flashes orange.
When the battery level is too low, the appliance powers off automatically. Charge the battery (see “3 Installing and
charging the appliance”).
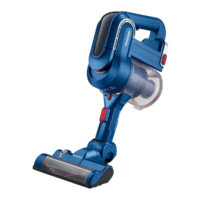
Cleaning and maintaining the appliance
Emptying the dust container
The dust container can hold only a limited amount of dirt. Empty the dust container after each cleaning session when the
suction power seems to be reduced or when the dust container is lled to the MAX mark.
1. Ensure the appliance is switched off and remove the attachments if necessary.
2. Hold the appliance with its suction opening facing downwards.
3. Press the release button on the back of the appliance and pull the dust container out forward (see Fig. I).
4. Remove the lter unit (consisting of the strainer and pleated lter).
5. Empty the dust container.
6. Insert the lter unit into the dust container.
7. Place the dust container on the guide rails at the front end of the appliance and slide it onto the appliance (see Fig. III).
Cleaning the dust container
You should clean the dust container and the lter unit when the suction power drops with the battery fully charged.
1. Unlock the dust container, remove and empty it (see “Emptying the dust container” ).
2. Remove the lter unit from the dust container.
3. Rinse the dust container with clean water.
4. Turn the pleated lter anti-clockwise ( ) to disengage it from the strainer (Fig. II).
5. Tap out the pleated lter and strainer over a dustbin and remove dirt with a soft brush if necessary.
6. Rinse the strainer and pleated lter with lukewarm running water, if necessary, and then let them dry completely (at
least 24 hours).
7. Insert the pleated lter into the strainer and lock it in place by turning it clockwise ( ).
8. Fit the lter unit into the dust container.
9. Place the dust container on the guide rails at the front end of the appliance and push it onto the appliance (see Fig. III).
Cleaning the appliance
1. Make sure that the appliance is switched off and is not on charge.
2. Wipe the housing and handpiece with a slightly damp cloth and then rub them dry.
TIP: Do not use any sharp, abrasive cleaning agents or hard brushes for cleaning.
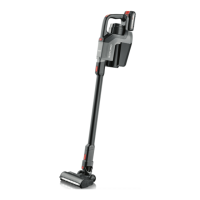
Storing the appliance
∙ Store the appliance and accessories in a cool, dry place out of the reach of children.
∙ You can keep other attachments in the charging base when not in use.
Order number Accessories/spare part
4523-048 HEPA pleated lter
4521-048 Strainer
4443-048 Dust container
4434-048 Crevice tool
0147-048 Furniture brush
0146-048 Charging base with mains adapter
 Loading...