EasyManuals Logo

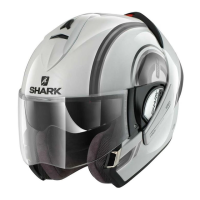
Shark Evoline 3 Series Manual

Shark Evoline 3 Series
31 pages
To Next Page IconTo Next Page
To Previous Page IconTo Previous Page
Page #23 background imageLoading...
Page #23 background image
4544
๎˜ƒ๎˜ƒ๎˜ด๎˜ถ๎˜ต๎˜ป๎˜จ๎˜ฎ๎˜ฌ๎˜ƒ๎˜ซ๎˜ฌ๎˜ƒ๎˜ณ๎šป๎˜ฐ๎˜ต๎˜ป๎™ฉ๎˜น๎˜ฐ๎˜ฌ๎˜ผ๎˜น
๎˜”๎˜ƒ๎˜ซ๎™ด๎™‰๎™œ๎™›๎™Œ๎™ก๎˜ƒ๎™“๎šป๎™–๎™—๎™ด๎™™๎™ˆ๎™›๎™๎™–๎™•๎˜ƒ๎™Œ๎™•๎˜ƒ๎™Œ๎™•๎™๎™๎™“๎™ˆ๎™•๎™›๎˜ƒ๎™“๎™ˆ๎˜ƒ๎™—๎™ˆ๎™™๎™›๎™๎™Œ๎˜ƒ๎™—๎™“๎™ˆ๎™š-
๎™›๎™๎™˜๎™œ๎™Œ๎˜ƒ๎™‹๎™Œ๎˜ƒ๎™“๎šป๎™ˆ๎™๎™ˆ๎™•๎™›๎˜ƒ๎™‹๎™Œ๎˜ƒ๎™“๎™ˆ๎˜ƒ๎™Š๎™–๎™๎™๎™๎™Œ๎˜ƒ๎™‹๎™ˆ๎™•๎™š๎˜ƒ๎™š๎™–๎™•๎˜ƒ๎™“๎™–๎™Ž๎™Œ๎™”๎™Œ๎™•๎™›๎˜ƒ
๎˜๎˜ญ๎™๎™Ž๎˜•๎˜ƒ ๎˜จ๎˜๎˜“๎˜ƒ ๎™Œ๎™•๎˜ƒ ๎™Š๎™–๎™”๎™”๎™Œ๎™•๎™ณ๎™ˆ๎™•๎™›๎˜ƒ ๎™—๎™ˆ๎™™๎˜ƒ ๎™“๎šป๎™œ๎™•๎˜ƒ ๎™‹๎™Œ๎™š๎˜ƒ ๎™Š๎™ฟ๎™›๎™ด๎™š๎˜ƒ
๎˜๎™Š๎™–๎™”๎™”๎™Œ๎˜ƒ๎™๎™•๎™‹๎™๎™˜๎™œ๎™ด๎˜ƒ๎™—๎™ˆ๎™™๎˜ƒ๎™“๎™ˆ๎˜ƒ๎™๎™“๎™ต๎™Š๎™๎™Œ๎˜ƒ๎˜˜๎˜๎˜ƒ๎˜ข
๎˜”๎˜ƒ๎˜ท๎™–๎™š๎™๎™›๎™๎™–๎™•๎™•๎™Œ๎™ก๎˜ƒ๎™“๎™Œ๎˜ƒ๎™›๎™Œ๎™Ÿ๎™›๎™๎™“๎™Œ๎˜ƒ๎™Š๎™–๎™™๎™™๎™Œ๎™Š๎™›๎™Œ๎™”๎™Œ๎™•๎™›๎˜ƒ๎˜ข
๎˜”๎˜ƒ๎˜จ๎™Ž๎™™๎™ˆ๎™๎™Œ๎™ก๎˜ƒ๎™“๎™Œ๎™š๎˜ƒ๎˜™๎˜ƒ๎™—๎™™๎™Œ๎™š๎™š๎™๎™–๎™•๎™š๎˜ƒ๎™‹๎™Œ๎˜ƒ๎™“๎™ˆ๎˜ƒ๎™—๎™ˆ๎™™๎™›๎™๎™Œ๎˜ƒ๎™ˆ๎™™๎™™๎™๎™ต๎™™๎™Œ๎˜ƒ๎™‹๎™Œ๎˜ƒ
๎™“๎™ˆ๎˜ƒ๎™Š๎™–๎™๎™๎™๎™Œ๎˜ƒ๎˜๎˜ญ๎™๎™Ž๎˜•๎˜ƒ๎˜ฉ๎˜”๎˜ช๎˜๎˜ƒ๎˜ข
๎˜”๎˜ƒ๎˜น๎™Œ๎™—๎™–๎™š๎™๎™›๎™๎™–๎™•๎™•๎™Œ๎™ก๎˜ƒ๎™“๎™Œ๎™š๎˜ƒ๎™Š๎™–๎™œ๎™š๎™š๎™๎™•๎™Œ๎™›๎™š๎˜ƒ๎™‹๎™Œ๎˜ƒ๎™‘๎™–๎™œ๎™Œ๎˜ƒ๎™Œ๎™•๎˜ƒ๎™๎™ˆ๎™-
๎™š๎™ˆ๎™•๎™›๎˜ƒ๎™—๎™ˆ๎™š๎™š๎™Œ๎™™๎˜ƒ๎™“๎™ˆ๎˜ƒ๎™š๎™ˆ๎™•๎™Ž๎™“๎™Œ๎˜ƒ๎™‹๎™Œ๎˜ƒ๎™‘๎™œ๎™Ž๎™œ๎™“๎™ˆ๎™๎™™๎™Œ๎˜ƒ๎™‹๎™ˆ๎™•๎™š๎˜ƒ๎™“๎™ˆ๎˜ƒ๎™๎™Œ๎™•๎™›๎™Œ๎˜ƒ
๎™‹๎™Œ๎™š๎˜ƒ๎™”๎™–๎™œ๎™š๎™š๎™Œ๎™š๎˜ƒ๎˜๎˜ญ๎™๎™Ž๎˜•๎˜ƒ๎˜ซ๎˜๎˜ƒ๎˜ข
๎˜”๎˜ƒ ๎˜ญ๎™๎™Ÿ๎™Œ๎™ก๎˜ƒ ๎™“๎™Œ๎™š๎˜ƒ ๎˜š๎˜ƒ ๎™—๎™™๎™Œ๎™š๎™š๎™๎™–๎™•๎™š๎˜ƒ ๎™Œ๎™›๎˜ƒ ๎™Œ๎™•๎™š๎™œ๎™๎™›๎™Œ๎˜ƒ ๎™“๎™ˆ๎˜ƒ ๎™‰๎™ˆ๎™•๎™‹๎™Œ๎˜ƒ
๎™๎™Œ๎™“๎™Š๎™™๎™–๎˜ƒ๎˜ข
๎˜”๎˜ƒ๎˜น๎™Œ๎™”๎™–๎™•๎™›๎™Œ๎™ก๎˜ƒ๎™“๎™Œ๎˜ƒ๎™—๎™ˆ๎™™๎™Œ๎˜”๎™•๎™œ๎™˜๎™œ๎™Œ๎˜ƒ๎™Œ๎™•๎˜ƒ๎™๎™•๎™š๎™ด๎™™๎™ˆ๎™•๎™›๎˜ƒ๎™“๎šป๎™œ๎™•๎™Œ๎˜ƒ๎™‹๎™Œ๎˜ƒ
๎™š๎™Œ๎™š๎˜ƒ๎™—๎™ˆ๎™™๎™›๎™๎™Œ๎™š๎˜ƒ๎™“๎™ˆ๎™›๎™ด๎™™๎™ˆ๎™“๎™Œ๎™š๎˜“๎˜ƒ๎™—๎™œ๎™๎™š๎˜ƒ๎™—๎™–๎™š๎™๎™›๎™๎™–๎™•๎™•๎™Œ๎™ก๎˜”๎™“๎™Œ๎˜ƒ๎™Š๎™–๎™™-
๎™™๎™Œ๎™Š๎™›๎™Œ๎™”๎™Œ๎™•๎™›๎˜ƒ๎™‹๎™ˆ๎™•๎™š๎˜ƒ๎™š๎™–๎™•๎˜ƒ๎™“๎™–๎™Ž๎™Œ๎™”๎™Œ๎™•๎™›๎˜•
REPLACING THE INTERIOR PARTS
- Start the operation by engaging the plastic part
of the front of the head section in its housing
beginning with one side (Fig. A);
- Position the textile part correctly;
- Attach the two press studs on the rear part of the
head section (Figs. B โ€“ C);
- Reposition the cheek pads by passing the chin
straps through the slit in the foam (Fig. D);
- Attach the 3 press studs and then the Velcro
band;
- Replace the neck pad, inserting one of its side
parts, then position it correctly in its housing.
๎˜ƒ๎˜ƒ๎˜ฌ๎˜ฐ๎˜ต๎˜บ๎˜ฌ๎˜ป๎™๎˜ฌ๎˜ต๎˜ƒ๎˜ซ๎˜ฌ๎˜บ๎˜ƒ๎˜ฐ๎˜ต๎˜ต๎˜ฌ๎˜ต๎˜น๎˜จ๎˜ผ๎˜ด๎˜บ
๎˜”๎˜ƒ๎˜ฉ๎™Œ๎™Ž๎™๎™•๎™•๎™Œ๎™•๎˜ƒ๎˜บ๎™๎™Œ๎˜ƒ๎™‹๎™Œ๎™•๎˜ƒ๎˜ฝ๎™–๎™™๎™Ž๎™ˆ๎™•๎™Ž๎˜ƒ๎™”๎™๎™›๎˜ƒ๎™‹๎™Œ๎™”๎˜ƒ๎˜พ๎™๎™Œ๎™‹๎™Œ-
๎™™๎™Œ๎™๎™•๎™š๎™Œ๎™›๎™ก๎™Œ๎™•๎˜ƒ ๎™‹๎™Œ๎™š๎˜ƒ ๎˜ท๎™“๎™ˆ๎™š๎™›๎™๎™’๎™›๎™Œ๎™๎™“๎™š๎˜ƒ ๎™ˆ๎™”๎˜ƒ ๎™๎™–๎™™๎™‹๎™Œ๎™™๎™Œ๎™•๎˜ƒ ๎˜ป๎™Œ๎™๎™“๎˜ƒ
๎™‹๎™Œ๎™š๎˜ƒ ๎˜ถ๎™‰๎™Œ๎™™๎™’๎™–๎™—๎™๎˜”๎˜ท๎™–๎™“๎™š๎™›๎™Œ๎™™๎™š๎˜ƒ ๎™๎™•๎˜ƒ ๎™š๎™Œ๎™๎™•๎™Œ๎˜ƒ ๎˜ญ๎š…๎™๎™™๎™œ๎™•๎™Ž๎™Œ๎™•๎˜“๎˜ƒ
๎™‰๎™Œ๎™Ž๎™๎™•๎™•๎™Œ๎™•๎™‹๎˜ƒ๎™๎™–๎™•๎˜ƒ๎™Œ๎™๎™•๎™Œ๎™™๎˜ƒ๎˜บ๎™Œ๎™๎™›๎™Œ๎˜ƒ๎˜๎˜จ๎™‰๎™‰๎˜•๎˜ƒ๎˜จ๎˜๎˜ข
๎˜”๎˜ƒ๎˜ท๎™–๎™š๎™๎™›๎™๎™–๎™•๎™๎™Œ๎™™๎™Œ๎™•๎˜ƒ๎˜บ๎™๎™Œ๎˜ƒ๎™‹๎™ˆ๎™š๎˜ƒ๎˜ถ๎™‰๎™Œ๎™™๎™’๎™–๎™—๎™๎˜”๎˜ท๎™–๎™“๎™š๎™›๎™Œ๎™™๎˜ƒ๎™’๎™–๎™™-
๎™™๎™Œ๎™’๎™›๎˜ข
๎˜”๎˜ƒ ๎˜ฉ๎™Œ๎™๎™Œ๎™š๎™›๎™๎™Ž๎™Œ๎™•๎˜ƒ ๎˜บ๎™๎™Œ๎˜ƒ ๎™‹๎™๎™Œ๎˜ƒ ๎™‰๎™Œ๎™๎™‹๎™Œ๎™•๎˜ƒ ๎˜ซ๎™™๎™œ๎™Š๎™’๎™’๎™•๎š€๎™—๎™๎™Œ๎˜ƒ ๎™ˆ๎™”๎˜ƒ
๎™๎™๎™•๎™›๎™Œ๎™™๎™Œ๎™•๎˜ƒ๎˜ป๎™Œ๎™๎™“๎˜ƒ๎™‹๎™Œ๎™š๎˜ƒ๎˜ท๎™–๎™“๎™š๎™›๎™Œ๎™™๎™š๎˜ƒ๎˜๎˜จ๎™‰๎™‰๎˜•๎˜ƒ๎˜ฉ๎˜”๎˜ช๎˜๎˜ข
๎˜”๎˜ƒ ๎˜ฉ๎™™๎™๎™•๎™Ž๎™Œ๎™•๎˜ƒ ๎˜บ๎™๎™Œ๎˜ƒ ๎™‹๎™๎™Œ๎˜ƒ ๎˜พ๎™ˆ๎™•๎™Ž๎™Œ๎™•๎™—๎™–๎™“๎™š๎™›๎™Œ๎™™๎˜ƒ ๎™ž๎™๎™Œ๎™‹๎™Œ๎™™๎˜ƒ ๎™๎™•๎˜ƒ
๎˜ท๎™–๎™š๎™๎™›๎™๎™–๎™•๎˜“๎˜ƒ๎™๎™•๎™‹๎™Œ๎™”๎˜ƒ๎˜บ๎™๎™Œ๎˜ƒ๎™‹๎™๎™Œ๎˜ƒ๎˜ฒ๎™๎™•๎™•๎™™๎™๎™Œ๎™”๎™Œ๎™•๎˜ƒ๎™‹๎™œ๎™™๎™Š๎™๎˜ƒ๎™‹๎™๎™Œ๎˜ƒ
๎˜จ๎™œ๎™š๎™š๎™—๎™ˆ๎™™๎™œ๎™•๎™Ž๎™Œ๎™•๎˜ƒ๎™๎™•๎˜ƒ๎™‹๎™Œ๎™•๎˜ƒ๎˜ท๎™–๎™“๎™š๎™›๎™Œ๎™™๎™•๎˜ƒ๎™ก๎™๎™Œ๎™๎™Œ๎™•๎˜ƒ๎˜๎˜จ๎™‰๎™‰๎˜•๎˜ƒ๎˜ซ๎˜๎˜ข
๎˜”๎˜ƒ๎˜ฉ๎™Œ๎™๎™Œ๎™š๎™›๎™๎™Ž๎™Œ๎™•๎˜ƒ๎˜บ๎™๎™Œ๎˜ƒ๎™‘๎™Œ๎™ž๎™Œ๎™๎™“๎™š๎˜ƒ๎™‹๎™๎™Œ๎˜ƒ๎™‹๎™™๎™Œ๎™๎˜ƒ๎˜ซ๎™™๎™œ๎™Š๎™’๎™’๎™•๎š€๎™—๎™๎™Œ๎˜ƒ
๎™š๎™–๎™ž๎™๎™Œ๎˜ƒ๎™‹๎™ˆ๎™š๎˜ƒ๎˜ฝ๎™Œ๎™“๎™Š๎™™๎™–๎˜”๎˜ฉ๎™ˆ๎™•๎™‹๎˜ข
๎˜”๎˜ƒ ๎˜บ๎™Œ๎™›๎™ก๎™Œ๎™•๎˜ƒ ๎˜บ๎™๎™Œ๎˜ƒ ๎™‹๎™ˆ๎™š๎˜ƒ ๎˜ต๎™ˆ๎™Š๎™’๎™Œ๎™•๎™—๎™–๎™“๎™š๎™›๎™Œ๎™™๎˜ƒ ๎™ž๎™๎™Œ๎™‹๎™Œ๎™™๎˜ƒ ๎™Œ๎™๎™•๎˜“๎˜ƒ
๎™‰๎™Œ๎™Ž๎™๎™•๎™•๎™Œ๎™•๎™‹๎˜ƒ ๎™๎™–๎™•๎˜ƒ ๎™Œ๎™๎™•๎™Œ๎™™๎˜ƒ๎˜บ๎™Œ๎™๎™›๎™Œ๎˜“๎˜ƒ ๎™œ๎™•๎™‹๎˜ƒ๎™—๎™–๎™š๎™๎™›๎™๎™–๎™•๎™๎™Œ๎™™๎™Œ๎™•๎˜ƒ
๎˜บ๎™๎™Œ๎˜ƒ๎™Œ๎™š๎˜ƒ๎™’๎™–๎™™๎™™๎™Œ๎™’๎™›๎˜ƒ๎™๎™•๎˜ƒ๎™š๎™Œ๎™๎™•๎™Œ๎™”๎˜ƒ๎˜บ๎™๎™›๎™ก๎˜•๎˜ƒ๎˜ƒ
MONTAGGIO DELLA PARTE INTERNA
- Iniziare infilando la parte plastica anteriore della
cuffia nel proprio alloggiamento, a partire da uno
dei lati (Fig.A);
- Posizionare correttamente il tessuto;
- Agganciare i 2 pulsanti a pressione della parte
posteriore della cuffia (Figg. B-C);
- Riposizionare i cuscinetti delle guance facendo
scorrere la cinghia del cinturino nella scanalatura
delle parti in schiuma (Fig.D);
- Fissare i 3 pulsanti a pressione, quindi in nastro
in velcro;
- Rimontare il paranuca inserendo una delle sue
parti laterali, quindi posizionarlo correttamente
nel proprio alloggiamento.
๎˜ƒ๎˜ƒ๎˜ด๎˜ถ๎˜ต๎˜ป๎˜จ๎˜ฑ๎˜ฌ๎˜ƒ๎˜ซ๎˜ฌ๎˜ณ๎˜ƒ๎˜ฐ๎˜ต๎˜ป๎˜ฌ๎˜น๎˜ฐ๎˜ถ๎˜น
๎˜”๎˜ƒ๎˜ช๎™–๎™”๎™๎™Œ๎™•๎™Š๎™Œ๎˜ƒ๎™“๎™ˆ๎˜ƒ๎™–๎™—๎™Œ๎™™๎™ˆ๎™Š๎™๎™ฝ๎™•๎˜ƒ๎™Š๎™–๎™“๎™–๎™Š๎™ˆ๎™•๎™‹๎™–๎˜ƒ๎™‹๎™Œ๎˜ƒ๎™•๎™œ๎™Œ๎™๎™–๎˜ƒ
๎™“๎™ˆ๎™š๎˜ƒ ๎™ˆ๎™“๎™”๎™–๎™๎™ˆ๎™‹๎™๎™“๎™“๎™ˆ๎™š๎˜ƒ ๎™‹๎™Œ๎˜ƒ ๎™“๎™–๎™š๎˜ƒ๎™—๎™ฝ๎™”๎™œ๎™“๎™–๎™š๎˜ƒ ๎™—๎™ˆ๎™š๎™ˆ๎™•๎™‹๎™–๎˜ƒ ๎™“๎™ˆ๎˜ƒ
๎™Š๎™–๎™™๎™™๎™Œ๎™ˆ๎˜ƒ๎™—๎™–๎™™๎˜ƒ๎™“๎™ˆ๎˜ƒ๎™™๎™ˆ๎™•๎™œ๎™™๎™ˆ๎˜ƒ๎™‹๎™Œ๎˜ƒ๎™“๎™ˆ๎™š๎˜ƒ๎™ˆ๎™“๎™”๎™–๎™๎™ˆ๎™‹๎™๎™“๎™“๎™ˆ๎™š๎˜ƒ๎˜๎˜ญ๎™๎™Ž๎˜•๎˜ƒ
๎˜จ๎˜๎˜ข
๎˜”๎˜ƒ ๎˜ญ๎™๎™‘๎™Œ๎˜ƒ ๎™“๎™–๎™š๎˜ƒ ๎˜š๎˜ƒ ๎™Š๎™“๎™๎™—๎™š๎˜ƒ ๎™ ๎˜ƒ ๎™š๎™Œ๎™Ž๎™œ๎™๎™‹๎™ˆ๎™”๎™Œ๎™•๎™›๎™Œ๎˜ƒ ๎™“๎™ˆ๎˜ƒ ๎™‰๎™ˆ๎™•๎™‹๎™ˆ๎˜ƒ
๎™๎™Œ๎™“๎™Š๎™™๎™–๎˜ข
๎˜”๎˜ƒ๎˜ฐ๎™•๎™›๎™™๎™–๎™‹๎™œ๎™ก๎™Š๎™ˆ๎˜ƒ๎™“๎™ˆ๎˜ƒ๎™—๎™ˆ๎™™๎™›๎™Œ๎˜ƒ๎™‹๎™Œ๎˜ƒ๎™—๎™“๎™ญ๎™š๎™›๎™๎™Š๎™–๎˜ƒ๎™‹๎™Œ๎™“๎™ˆ๎™•๎™›๎™Œ๎™™๎™ˆ๎˜ƒ๎™‹๎™Œ๎˜ƒ
๎™“๎™ˆ๎˜ƒ ๎™Š๎™–๎™๎™๎™ˆ๎˜ƒ ๎™Œ๎™•๎˜ƒ ๎™š๎™œ๎˜ƒ ๎™ˆ๎™“๎™–๎™‘๎™ˆ๎™”๎™๎™Œ๎™•๎™›๎™–๎˜“๎˜ƒ ๎™Š๎™–๎™”๎™Œ๎™•๎™ก๎™ˆ๎™•๎™‹๎™–๎˜ƒ ๎™—๎™–๎™™๎˜ƒ
๎™œ๎™•๎™–๎˜ƒ๎™‹๎™Œ๎˜ƒ๎™“๎™–๎™š๎˜ƒ๎™“๎™ˆ๎™‹๎™–๎™š๎˜ƒ๎˜๎˜ญ๎™๎™Ž๎˜•๎˜ƒ๎˜ฉ๎˜๎˜ข
๎˜”๎˜ƒ๎˜ช๎™–๎™“๎™–๎™˜๎™œ๎™Œ๎˜ƒ๎™Œ๎™“๎˜ƒ๎™›๎™Œ๎™Ÿ๎™›๎™๎™“๎˜ƒ๎™Š๎™–๎™™๎™™๎™Œ๎™Š๎™›๎™ˆ๎™”๎™Œ๎™•๎™›๎™Œ
๎˜”๎˜ƒ๎˜ญ๎™๎™‘๎™Œ๎˜ƒ๎™“๎™–๎™š๎˜ƒ๎˜™๎˜ƒ๎™Š๎™“๎™๎™—๎™š๎˜ƒ๎™‹๎™Œ๎˜ƒ๎™“๎™ˆ๎˜ƒ๎™—๎™ˆ๎™™๎™›๎™Œ๎˜ƒ๎™›๎™™๎™ˆ๎™š๎™Œ๎™™๎™ˆ๎˜ƒ๎™‹๎™Œ๎™“๎˜ƒ๎™“๎™ˆ๎˜ƒ๎™Š๎™–๎™๎™๎™ˆ๎˜ƒ
๎˜๎˜ญ๎™๎™Ž๎˜•๎˜ƒ๎˜ช๎˜”๎˜ซ๎˜๎˜ข
๎˜”๎˜ƒ ๎˜ด๎™–๎™•๎™›๎™Œ๎˜ƒ ๎™“๎™ˆ๎˜ƒ ๎™ˆ๎™“๎™”๎™–๎™๎™ˆ๎™‹๎™๎™“๎™“๎™ˆ๎˜ƒ ๎™‹๎™Œ๎˜ƒ ๎™“๎™ˆ๎˜ƒ ๎™•๎™œ๎™Š๎™ˆ๎˜ƒ ๎™๎™•๎™›๎™™๎™–๎™‹๎™œ-
๎™Š๎™๎™Œ๎™•๎™‹๎™–๎˜ƒ๎™œ๎™•๎™ˆ๎˜ƒ๎™‹๎™Œ๎˜ƒ๎™š๎™œ๎™š๎˜ƒ๎™—๎™ˆ๎™™๎™›๎™Œ๎™š๎˜ƒ๎™“๎™ˆ๎™›๎™Œ๎™™๎™ˆ๎™“๎™Œ๎™š๎˜ƒ๎™ ๎˜ƒ๎™Š๎™–๎™“๎™ฝ๎™˜๎™œ๎™Œ๎™“๎™ˆ๎˜ƒ
๎™Š๎™–๎™™๎™™๎™Œ๎™Š๎™›๎™ˆ๎™”๎™Œ๎™•๎™›๎™Œ๎˜ƒ๎™Œ๎™•๎˜ƒ๎™š๎™œ๎˜ƒ๎™ˆ๎™“๎™–๎™‘๎™ˆ๎™”๎™๎™Œ๎™•๎™›๎™–๎˜•๎˜ƒ
A B
C
D
1
๎˜ด๎˜ฅ๎˜ธ๎˜ด๎˜ฉ๎˜ฌ๎˜ฅ๎˜ณ๎˜€๎™ณ๎˜€๎˜ด๎˜ฅ๎˜ธ๎˜ด๎˜ฉ๎˜ฌ๎˜ฅ๎˜€๎˜ฐ๎˜ก๎˜ฒ๎˜ด๎˜ณ๎˜€๎™ณ๎˜€๎˜ด๎˜ฅ๎˜ธ๎˜ด๎˜ฉ๎˜ฌ๎˜ฉ๎˜ฅ๎˜ฎ๎˜€๎™ณ๎˜€๎˜ด๎˜ฅ๎˜ณ๎˜ต๎˜ด๎˜ฉ๎˜€๎™ณ๎˜€๎˜ฌ๎˜ฏ๎˜ณ๎˜€๎˜ด๎˜ฅ๎˜ธ๎˜ด๎˜ฉ๎˜ฌ๎˜ฅ๎˜ณ ๎˜ด๎˜ฅ๎˜ธ๎˜ด๎˜ฉ๎˜ฌ๎˜ฅ๎˜ณ๎˜€๎™ณ๎˜€๎˜ด๎˜ฅ๎˜ธ๎˜ด๎˜ฉ๎˜ฌ๎˜ฅ๎˜€๎˜ฐ๎˜ก๎˜ฒ๎˜ด๎˜ณ๎˜€๎™ณ๎˜€๎˜ด๎˜ฅ๎˜ธ๎˜ด๎˜ฉ๎˜ฌ๎˜ฉ๎˜ฅ๎˜ฎ๎˜€๎™ณ๎˜€๎˜ด๎˜ฅ๎˜ณ๎˜ต๎˜ด๎˜ฉ๎˜€๎™ณ๎˜€๎˜ฌ๎˜ฏ๎˜ณ๎˜€๎˜ด๎˜ฅ๎˜ธ๎˜ด๎˜ฉ๎˜ฌ๎˜ฅ๎˜ณ
Mise en Place โ€ข rePlace โ€ข einsetzen โ€ข installazione โ€ข Montaje Mise en Place โ€ข rePlace โ€ข einsetzen โ€ข installazione โ€ข Montaje

Other manuals for Shark Evoline 3 Series

Questions and Answers:

Question and Answer IconNeed help?

Do you have a question about the Shark Evoline 3 Series and is the answer not in the manual?

Shark Evoline 3 Series Specifications

General IconGeneral
Helmet TypeModular
CertificationECE 22.05
Sun VisorIntegrated
InteriorRemovable and washable
WeightApprox. 1700g (size M)
Additional Features"SHARKTOOTH" ready

Related product manuals