41
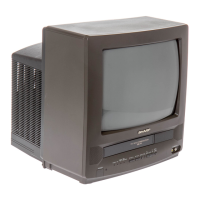
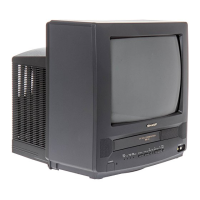
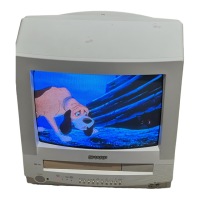
13VT-L200
SERVO CIRCUIT ADJUSTMENT
ADJUSTMENT OF HEAD SWITCHING
POINT
Measuring Dual-trace oscilloscope
instrument
Mode Playback
Cassette Alignment tape (VROATSV)
Test point TP2201 (Video Out) to CH1
TP3302 (Trigger) to CH2
Control Remote Control
Specification 5.5 ± 0.5H (lines)
1. Play the alignment tape.(VROATSV.)
2. Press the CH " (TR —) button and the "0" button of
remote control at the same time to turn the set into the
adjustment mode for head switching point and to set
the tracking to center. (See Notes below) "T" is
displayed on the TV screen.
3. Press the PLAY button of remote control to make the
adjustment of head switching point, then the leading
edge of the head switching pulse is automatically set
5.5H (lines) ahead of the vertical sync as shown Figure
2-1 and the adjustment data is memorized in the E
2
P-
ROM IC.
4. Then press the stop button to stop the tape.
5.5±0.5H(Iines)
V-sync.
CH-2
HEAD
SWITCHING
PULSE
CH-1
VIDEO OUT
CH-1:1V/div 50µsec/div
CH-2:2V/div 50µsec/div
Figure 2-2.
Notes:
1To make this adjustment, disable the AUTO
TRACKING function.
» The AUTO TRACKING function is disable in the
following cases. (In the playback mode only.)
a When the CH " (TR —) button and the "0" button
of the remote control are pressed at the same time.
b When the AC cord is plugged in with making
TP7701 and TP7702 short circuited, after the
cassette housing control ass'y is removed.
(Mechanism operating mode)
» The AUTO TRACKING function becomes available
in the following cases.
a When the CH ' (TR±) button and the CH"
(TR —) button of the remote control are pressed
at the same time.
b When the AC cord is plugged in with the cassette
housing control ass'y put back.
2Pressing both the CH " (TR —) and the "0" button
transmits the test code. When the unit receives this
test code in the playback mode, the unit is turned into
the adjustment mode for the head switching point and
"T" is displayed at the position of CH number on the
screen. This function is available to the remote control
RRMCG1331PESA.
ADJUSTMENT OF SLOW TRACKING
PRESET
Measuring Monitor screen
instrument
Mode SP/EP slow motion playback
Input signal Self-recording tape
Test point Monitor screen
Control Remote control
Specification No noise bar on the monitor screen
1. Play back the SP self-recorded tape in the slow mode.
2. Press the CH " (TR —) button and the "0" button of
remote control at the same time to turn the set into
the adjustment mode for the SP slow tracking preset.
"T" is displayed on the TV screen.
3. Press the SLOW button of remote control to make the
adjustment of the SP slow tracking preset. The SP
slow tracking preset is automatically adjusted so that
there is no noise bar on the screen, then the
adjustment mode is released. "T" disappears on the
screen.
4. Press the PLAY button to return to the SP playback
mode, then press the PAUSE/STILL button to enter
the still mode. Be sure that there is no noise bar on
the screen. (Repeat three times.)
5. Next play back the EP self-recorded tape in the slow
mode.
6. Press the CH " (TR —) button and the "0" button of
remote control at the same time to turn the set into
the adjustment mode for the EP slow tracking preset.
"T" is displayed on the TV screen.
7. Press the SLOW button of remote control to make the
adjustment of the EP slow tracking preset. The EP
slow tracking preset is automatically so that there is
no noise bar on the screen, then the adjustment mode
is released. "T" disappears on the screen.
8. Press the PLAY button to return to the EP playback
mode, then press the PAUSE/STILL button to enter
the still mode. Be sure that there is no noise bar on
the screen. (Repeat three times.)
9. Press the STOP button to stop the tape.