AX1500J(S)
6 – 7
3. How to check sensor (oven thermistor) performance
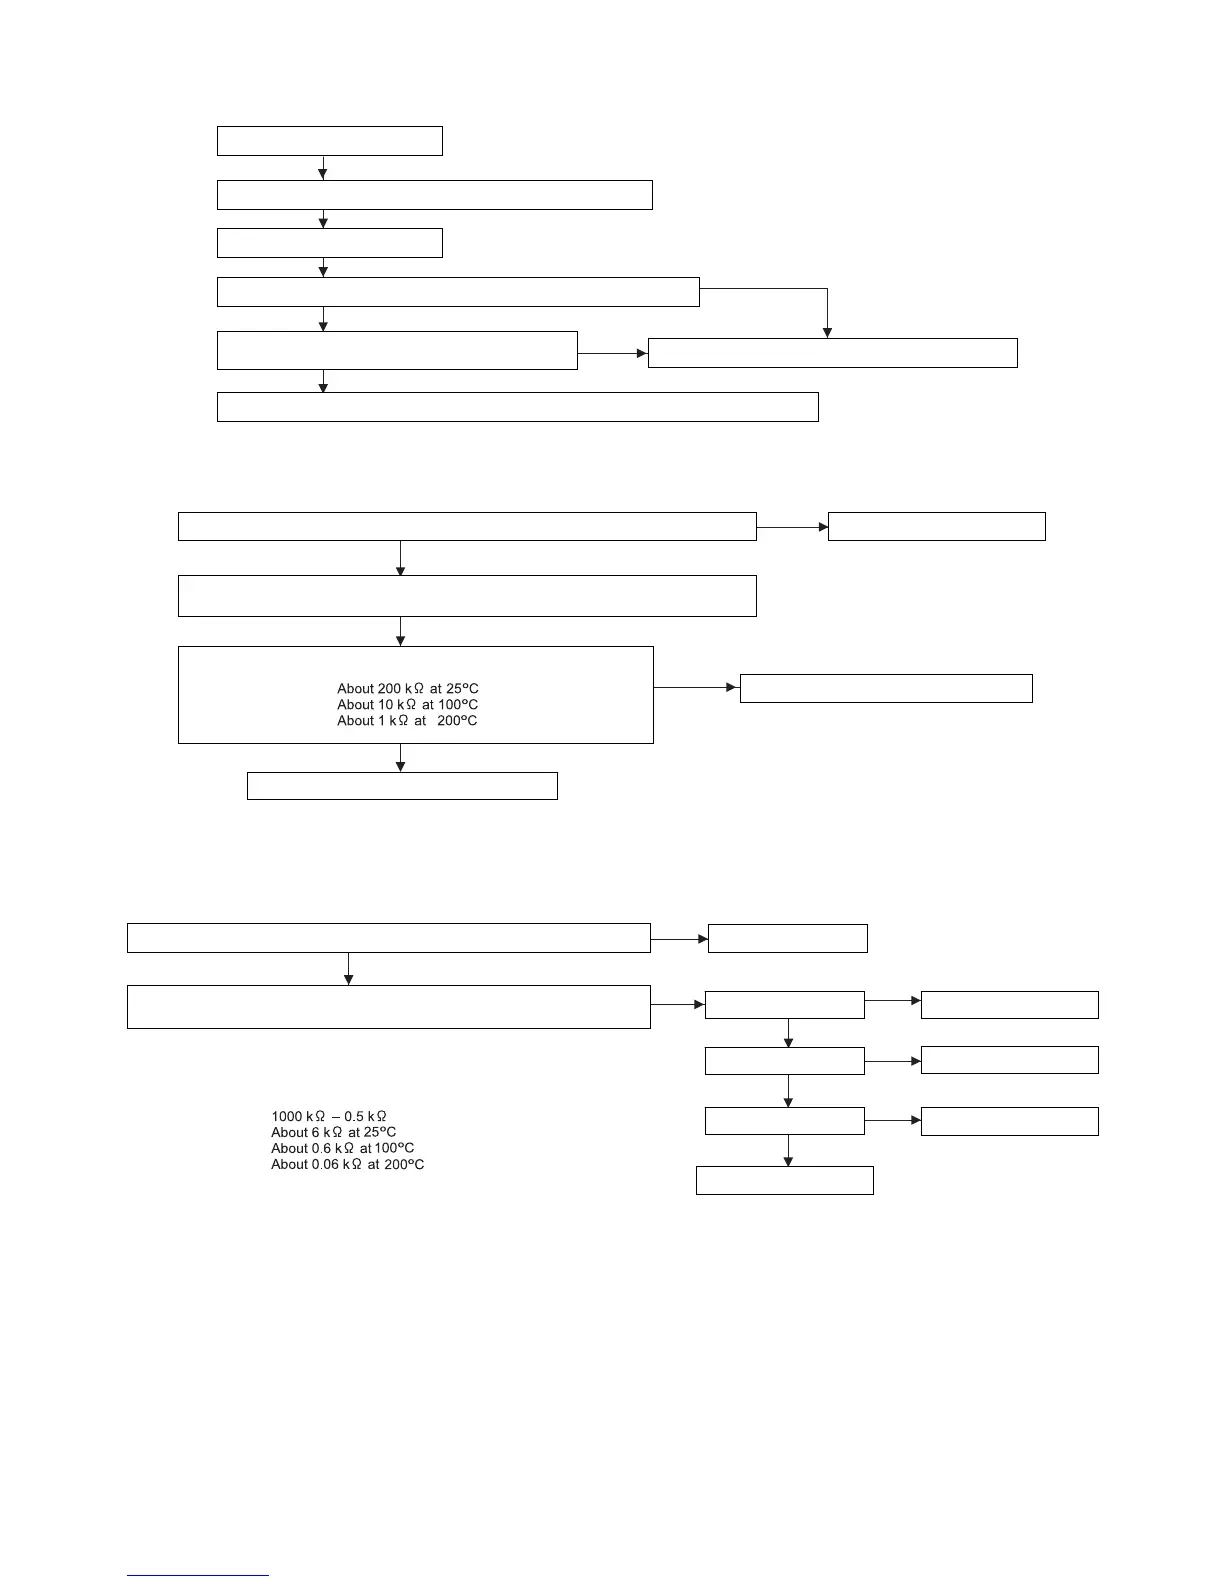
4. EE01 Oven thermistor failure
✩ Before starting the P.W.B. unit replacement, make sure to refer to “Before replacing the Printed Wiring Board” in page 2-2.
5. EE02 AH sensor failure
✩ Before starting the P.W.B. unit replacement, make sure to refer to “Before replacing the Printed Wiring Board” in page 2-2.
YES
NO
YES
NO
EE01: Proceed to checking the oven thermistor for failure.
Power ON the main body.
Press the START key.
Does a measured value for the oven thermistor change as oven heating proceeds?
Is the measured value within ±10 bits with respect to the
reference value after about eight (8) minutes?
Press the STOP/CLEAR key to finish the operation.
(This action is required when everything is OK.)
Set the test mode to 03.
(See How to set test mode on page 6-5)
NO
YES
YES
NO
Measure the oven thermistor resistance using a tester with the thermistor connecting
connector pulled out of the board.
The oven thermistor resistance is within its appropriate range.
Is the connector between the oven thermistor and board either disconnected or shorted?
Connect or repair the connector.
Replace the oven thermistor or the harness.
Replace the control unit or the display unit.
YES
YES
YES
YES
NO
NO
NO
NO
Measure element resistance between the opened and sealed sides of the humid-
ity sensor with the humidity sensor connector disconnected from the board.
Normal resistance of the humidity sensor:
Has the humidity sensor connector been disconnected from the control board?
Connect the connector.
Is the resistance 0?
Replace the humidity sensor.
Replace the humidity sensor.
Replace the humidity sensor.
Is the resistance infinite?
Is the resistance normal?
Replace the control board.