E-7
ON/STAND-BY
DISPLAY
(TV OUT)
DISPLAY
TUNER(BAND)
TAPE
AUDIO IN
USB
X-BASS
TUNING VOL
FOLDER
CLOCK/TIMER
DEMO
MUTE
DIMMER CLEAR SLEEP
MEMORY
PRESET
PRESET
ENTER
PLAY MODE
BASS/TREBLE
MENU
CD
1
2
3
4
5
4
5
3
2
1
MINI COMPONENT SYSTEM
OPEN / CLOSE
TUNING
PRESET
USB
AUDIO IN
TAPE
TUNER
CD
TIMER
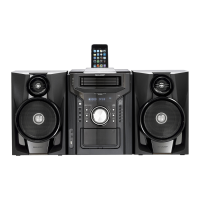
iPod/iPhone
POWER
ON/ STAND-BY
(BAND)
VOL.
VOL.
REMOTE
SENSOR
CD-DHS1050P
CD
POWER
ON/ STAND-BY
DISPLAY
PLAY MODE
4
5
3
2
1
OPEN / CLOSE
Disc playback Q
Press the ON/STAND-BY button to turn the power on.1
Press the CD button.2
Press the 3 1 button and within 5 seconds, press the OPEN/
CLOSE button to open the disc tray 1.
Place the disc on the disc tray 1, label side up.
4
Press OPEN/CLOSE button to close the disc tray 1. 5
You can place discs on the trays 2 - 5 by following steps 6
3 - 5.
Press the
7 button to start playback.
Notes for CD or MP3/WMA discs:
Track up/track down is possible only within individual discs.
O
Playback of the track will begin when its beginning is
O
reached during fast reverse. When the beginning of the fi rst
track is reached during fast reverse, the unit will enter the
playback mode.
Rewritable multi-session discs with unfi nished writing, can
O
still be played.
Various disc functions Q
Function
Main
unit
Remote
control
Operation
Pause
Press in the playback
mode. Press the
button to resume playback
from the paused point.
Track up/
Track
down
Press in the playback or
stop mode. If you press the
button in the stop mode,
press the
button to
start the desired track.
Fast
forward/
Fast
reverse
Press and hold down in the
playback mode. Release
the button to resume
playback.
To specify a disc to play Q
You can play a disc by specifying the disc number.
Press one of the
1 1 - 5
buttons to select the desired
disc.
Selected disc number
Within 5 seconds, press the 2 (CD ) button.
Playback will begin from track 1 on the chosen disc. O
After the last track on the last disc is played, the unit stops O
automatically.
Listening to a CD or MP3/WMA discListening to a CD or MP3/WMA disc
Listening to the iPod or iPhone (continued)
Various iPod or iPhone functions Q
Function
Main
unit
Remote
control
Operation
Play
Press in the pause mode.
Pause
Press in the playback mode.
Track up/
down
Press in the playback or
pause mode. If you press the
button in the pause mode,
press the
button to start
the desired track.
Fast
forward/
reverse
Press and hold down in the
playback mode. Release the
button to resume playback.
Back light/
TV OUT
____
DISPLAY
(TV OUT)
iPod back light ON. Press
and hold this button for more
than 2 seconds until “TV
OUT ON” or “TV OUT OFF”
appear to toggle the video
out display between iPod
or TV.
Repeat
____
PLAY MODE
Press to toggle repeat mode.
Shuffl e
Press and hold down to
toggle shuffl e mode.
Menu
____
MENU
Press to view the iPod menu
during iPod function.
Enter
____
ENTER
Press to confi rm the
selection.
Cursor
Up/Down
____
PRESET
PRESET
Press to select the iPod
menu.
Watching videos on a TV connected to Q
iPod or iPhone
Press and hold the DISPLAY button for more than 2 seconds 1
until “TV OUT ON” appear on display.
Press the ENTER button to start playback.2
Notes:
If the TV Out setting is already turned On at video menu,
O
the video is automatically displayed on the TV screen when
ENTER key is pressed.
To return to watching video on iPod or iPhone screen, press
O
the MENU button to enter video menu. Then press and hold
the DISPLAY button for more than 2 seconds until “TV OUT
OFF” appears.
During iPod or iPhone video playback, pressing the DISPLAY
O
button will not toggle video out display between iPod or iPhone
and TV.
Caution:
Unplug all accessories for the iPod or iPhone before inserting
O
it into the iPod or iPhone dock.
Stop button (
O
) at main unit is invalid during iPod or iPhone
function.
CD-DHS1050P_US_EN.indd 7CD-DHS1050P_US_EN.indd 7 2/10/2011 3:32:22 PM2/10/2011 3:32:22 PM