The following steps should only be performed if there is a
power failure or if this unit is unplugged for more than 1 hour.
Turn on the TV and select the video channel on the TV.
Press
OPERATE, then VCR.
Press
K or L repeatedly to select your desired language.
Press
MENU.
4
3
2
1
Turning on Your VCR/DVD
Press VCR, then MENU.
Press
K or L to select INITIAL, then press B.
Press
K or L to select LANGUAGE, then press B.
Press
K or L repeatedly to select your desired language,
and
MEMU to confirm.
4
3
2
1
Changing the Language
–
12
–
EN
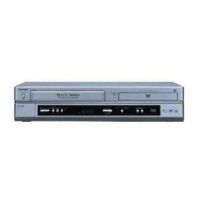
SETTING UP YOUR VCR/DVD COMBINATION
Playing Dolby Digital (5.1 channel), DTS or MPEG audio
Connecting an amplifier with a Dolby Digital, DTS, or MPEG Audio digital surround processor to your VCR/DVD’s coaxial dig-
ital jack provides richer and more powerful audio play.
CC
Digital connection to a processor or amplifier with a coaxial digital input jack
You can make this connection using a coaxial digital cable.
NOTE:
• This connection is not possible if the processor or amplifier to which you want to connect does not have a coaxial digital
input jack.
• ANALOG AUDIO OUT and AV (TV) of the VCR/DVD are not available on the DTS audio.
VCR/DVD SET UP
Video Channel setting will be necessary, if your VCR/DVD is
connected to the TV via the round coaxial cable.
Press
VCR.
Insert a pre-recorded tape into the Cassette compart-
ment.
Playback will start automatically.
If playback does not start, press PLAY.
Select and adjust your TV to channel 36.
• If the playback picture appears on the TV screen, con-
tinue with step .
• If channel 36 is set for broadcasting, or interference
lines appear on the picture, the RF converter must be
set to a different channel between CH22 and CH69.
Continue with step .
Press
MENU.
4
4
10
3
2
1
Video Channel Setting
Press K or L repeatedly to select INITIAL, then press B.
Press K or L repeatedly to select RF OUT, then press B.
The RF OUT CH menu will appear.
Press K or L to select a channel which is not used for
broadcasted between channel 22 and channel 69 in your
area, and
B to confirm.
Press
TAPESPEED/SYSTEM to select G or K according
to your TV’s setting for clearer sound.
Press
MENU to exit.
Set the TV channel to the RF OUT CHANNEL which was
selected on the VCR/DVD. A picture from the VCR/DVD
will appear on the TV screen. If a picture does not
appear, repeat steps to using a different channel
which is not used for broadcasting.
Press
STOP to stop the tape.
NOTES:
• You may also access the RF OUT CH menu by press-
ing and holding MENU on the remote control for 3 sec-
onds during power off until the RF OUT CH menu
appears.
• If this unit and your TV are connected using a SCART
cable, the RF converter may be switched off to avoid
any possibility of interference. To switch off the RF con-
verter, follow steps and to above and press
L repeatedly until “--” appears next to “RF OUT CH”.
Press B, then press MENU to exit.
641
10
94
9
8
7
6
5