Do you have a question about the Sharp Microwave Drawer and is the answer not in the manual?
Installation and service must be performed by a qualified installer.
Save this installation manual for local electrical inspector's use.
Read and save these instructions for future reference.
Do not install in combustible cabinetry not in accord with stated clearances.
Remove all packing materials from inside the microwave drawer.
Do not remove the waveguide cover located on the top.
Check for damage like misaligned seals, guides, or dents.
Read all of the Installation Manual before installing the Microwave Drawer.
Remove all packing material before connecting the electrical supply.
Observe all governing codes and ordinances during installation.
Be sure to leave these instructions with the consumer.
Keep this manual with your Operation Manual for future reference.
Follow safety precautions listed in the Operation Manual.
Ensure drawer is installed and grounded properly by a qualified installer.
Follow instructions exactly to prevent fire, shock, damage, injury, or death.
Secure drawer with a properly installed Anti-Tip block to reduce tipping risk.
Must be electrically grounded in accordance with local codes.
Ensure wall coverings and cabinets withstand heat generated by the drawer.
Never leave children alone or unattended in the area where the drawer is in use.
Avoid stepping, leaning, or sitting on the drawer to prevent injury or damage.
Do not use the Microwave Drawer as a storage space.
Check time-of-day display and touch Stop/Clear to prevent unintended use.
Dimensions shown in figures must be used to provide minimum clearance.
Ensure contact surface is solid and level, especially the floor supporting the oven.
Locate electrical outlet in the shaded area in the upper left-hand corner of the cutout.
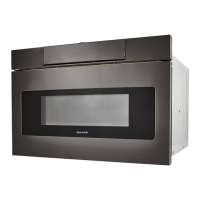
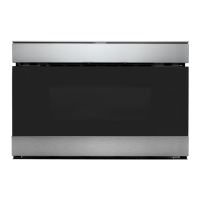
Oven can be built into a cabinet or wall, or under a gas or electric wall oven.
Ensure a minimum of 2-inches clearance between wall oven and microwave drawer.
The microwave interior can accommodate a 9" x 13" oblong dish or popcorn bag.
Diagram showing various measurements for the 24-inch microwave drawer.
Diagram showing various measurements for the 24-inch microwave drawer.
Always allow sufficient power cord length to the electrical outlet to prevent tension.
Diagram showing various measurements for the 30-inch microwave drawer.
Diagram showing various measurements for the 30-inch microwave drawer.
Diagram showing various measurements for the 30-inch microwave drawer.
Always allow sufficient power cord length to the electrical outlet to prevent tension.
The Anti-Tip block prevents serious injury from spilled hot liquids.
Install block 14 13/16-inches above the floor on which the Microwave Drawer will sit.
Ensure screws penetrate drywall and secure into wood or metal for stability.
Be sure screws do not penetrate electrical wiring or plumbing.
If the drawer is moved, the Anti-Tip block must also be moved and reinstalled.
Requires a 120 volt 60 Hz, AC only, 15 amp or more protected electrical supply.
It is recommended that a separate circuit serving only this appliance be provided.
Drawer has a 3-prong grounding plug; must be plugged into a properly installed receptacle.
Outlet can be in adjacent cabinet if cord can reach; check electrical codes.
Grounding reduces risk of electric shock by providing an escape wire for current.
Do not use an extension cord; consult electrician if power cord is too short.
Place drawer adjacent to opening, plug cord into outlet.
Carefully guide drawer into opening, avoid pinching the cord.
Slide drawer until mounting flange is flush with cabinet face.
Open drawer, use holes as template to pre-drill cabinet with 1/16" bit.
Secure the drawer using the 4 supplied screws.
Name plate with model and serial number is inside the microwave cavity.
Refer to the Operation Manual for cleaning instructions.
Read 'BEFORE YOU CALL' and operating sections in Operation Manual to save time.
Refer to warranty for Sharp's service number and address for inquiries or parts.
| Brand | Sharp |
|---|---|
| Capacity | 1.2 cu. ft. |
| Power | 1000 Watts |
| Installation Type | Built-In |
| Sensor Cooking | Yes |
| Color | Stainless Steel |
| Voltage | 120V |
| Type | Microwave Drawer |
| Control Type | Touch |