Do you have a question about the Sharp MX-4112N and is the answer not in the manual?
Details essential conditions for machine installation, including space, power, and environmental factors.
Guidelines for transporting and delivering the machine safely and correctly.
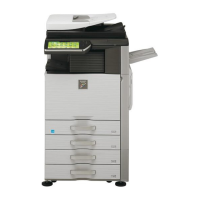
Illustrates the system configuration and component connections.
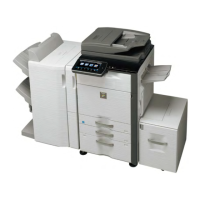
Details available options and their compatibility with different machine models.
Procedures for unpacking the main unit and checking components.
Detailed steps for unit installation, developing, and color calibration.
Procedures to check and adjust print quality.
Lists all parts included in the dehumidifying heater kit.
Step-by-step instructions for installing the dehumidifying heater.
Procedures for unpacking the stand and paper drawer units.
Steps for installing the stand and paper drawer.
Procedures for unpacking the stand unit.
Steps for installing the stand unit.
Procedures for unpacking the large capacity tray.
Steps for connecting and installing the large capacity tray.
Procedures for unpacking the exit tray unit.
Steps for installing the exit tray unit.
Procedures for unpacking the exit tray cabinet.
Steps for installing the exit tray cabinet.
Procedures for unpacking the finisher unit.
Steps for installing the finisher unit.
Procedures for unpacking the punch module.
Steps for installing the punch module.
Procedures for unpacking the paper pass unit.
Steps for installing the paper pass unit.
Procedures for unpacking the saddle stitch finisher.
Steps for installing the saddle stitch finisher.
Procedures for unpacking the punch module.
Steps for installing the punch module.
Procedures for unpacking the finisher.
Steps for installing the finisher.
Procedures for unpacking the saddle stitch finisher.
Steps for installing the saddle stitch finisher.
Procedures for unpacking the punch module.
Steps for installing the punch module.
Details of items included in the PS3 expansion kit.
Steps for installing and enabling the PS3 expansion kit.
Details of items included in the XPS expansion kit.
Steps for installing and enabling the XPS expansion kit.
Details of items included in the barcode font kit.
Steps for installing and enabling the barcode font kit.
Details of items included in the facsimile expansion kit.
Steps for installing the facsimile expansion kit.
Procedures for unpacking the stamp unit.
Steps for installing the stamp unit for RSPF models.
Steps for installing the stamp unit for DSPF models.
Details of items included in the internet fax expansion kit.
Steps for installing and enabling the internet fax expansion kit.
Details of items included in the integration module.
Steps for installing and enabling the integration module.
Details of items included in the compression kit.
Steps for installing the enhanced compression kit.
Details of items included in the data security kit.
Steps for installing and updating firmware for the data security kit.
Details of items included in the communication module.
Steps for installing and enabling the communication module.
Details of items included in the external account module.
Steps for installing and enabling the external account module.
Procedures for unpacking the keyboard unit.
Steps for installing the keyboard unit.
Procedures for unpacking the mirroring kit.
Procedures for backing up HDD data before installation.
Steps for installing the mirroring kit.
Details of items included in the web browsing kit.
Steps for installing and enabling the web browsing kit.
Procedures for unpacking the expansion memory board.
Steps for installing the expansion memory board.
Lists supported IC card readers and necessary parts.
Steps for installing the IC card reader and its holder.
Overview of enabling the remote operation panel function.
Steps for setting a password for the remote operation panel.
Procedures to check and update firmware versions.
Verifies that all machine functions operate correctly.
Instructions to print and save configuration and adjustment data.
Steps to remove optional units and consumables before moving.
Guidance on locking sensitive sections before transit.
Recommendations for using lead-free solder thread for repairs.
Precautions for soldering with lead-free solder.
Warnings and instructions for battery replacement.
Guidelines for proper battery disposal.
| Brand | Sharp |
|---|---|
| Model | MX-4112N |
| Category | All in One Printer |
| Language | English |