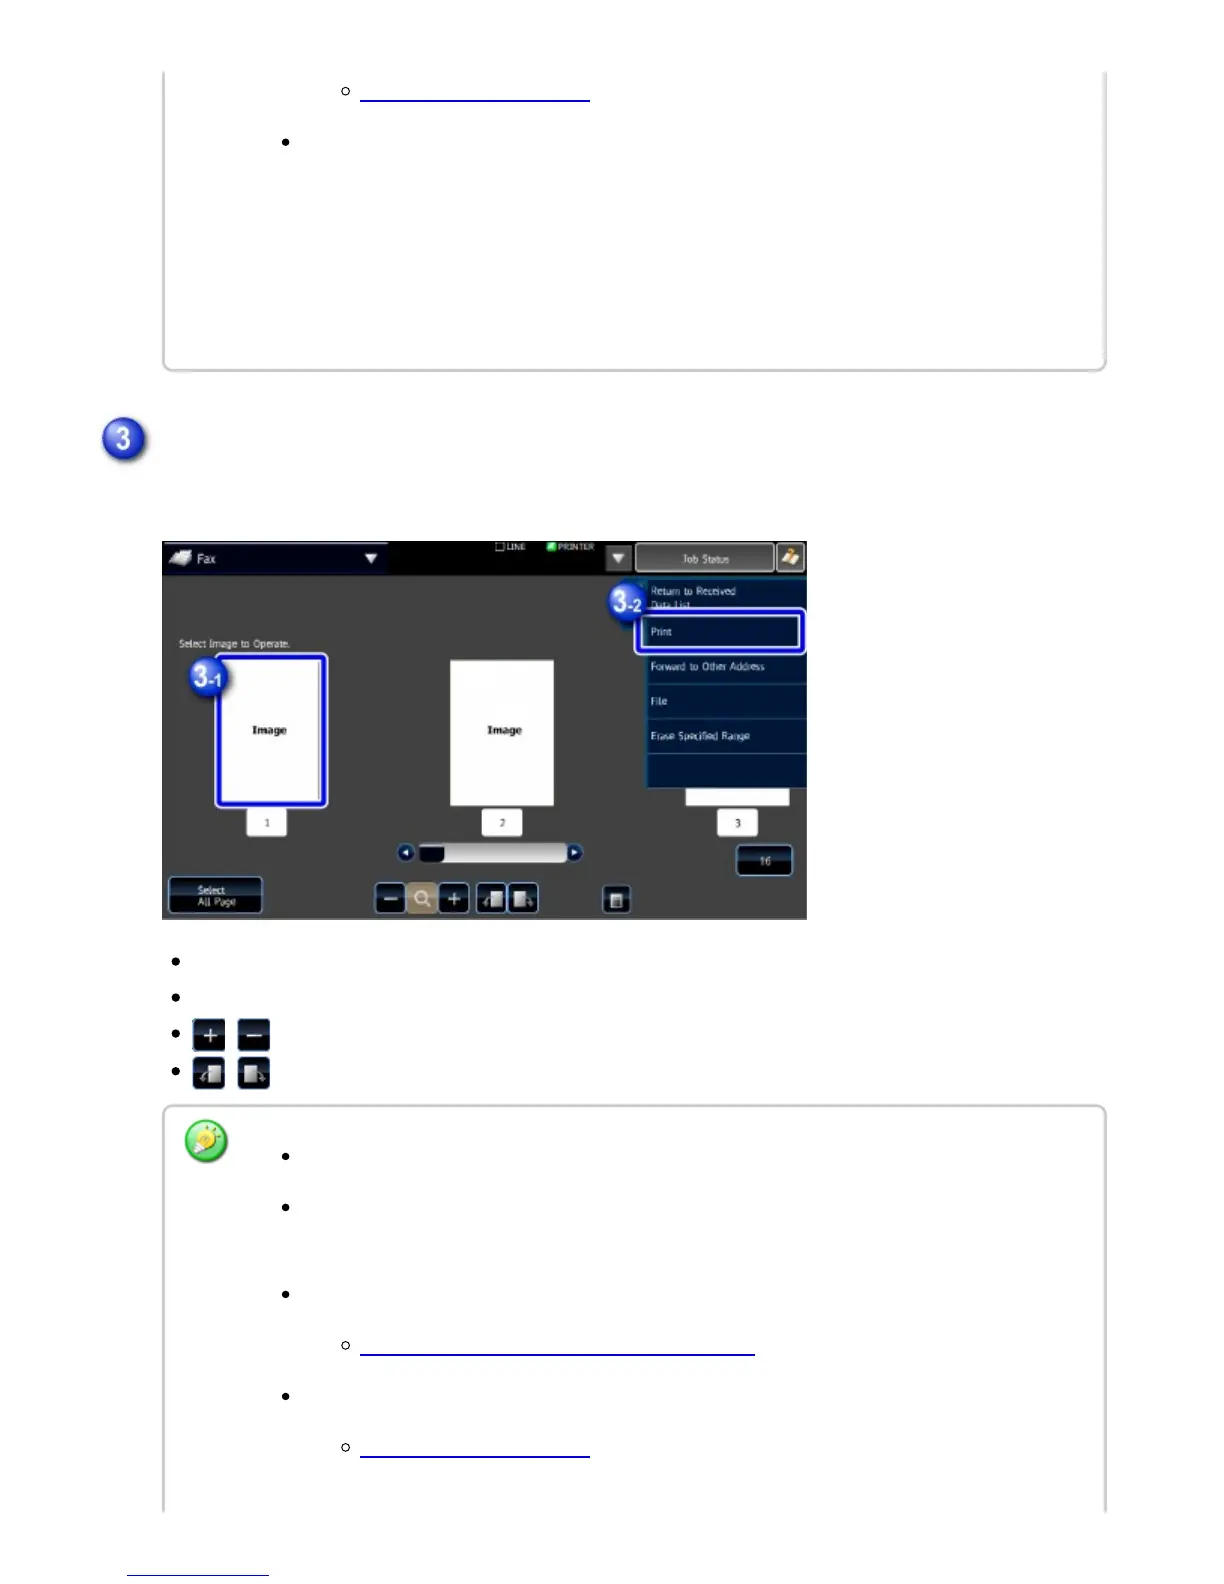
The machine starts printing the image.
[Select All]: Selects all displayed images.
[Release All Page]: Cancels all images that have been selected by "Select All".
/ : Use these keys to enlarge or reduce an image.
/ : Rotates image counterclockwise or clockwise.
SAVING RECEIVED DATA
To store the sender fax number as a number for "Allow/Reject Number Setting", tap
the [Store to Unwanted Fax] key and, in the confirmation message screen, tap the
[Store] key.
Specify a sender fax number as a number for "Allow/Reject Number Setting" by
selecting, in "Setting mode (administrator)", select [System Settings] → [Image Send
Settings] → [Fax Settings] → [Receive Settings] → [Allow/Reject Number Setting].
Tap the image you wish to print, and tap the [Print] key on the action panel
A preview image is an image for the touch panel. It will differ from the actual print result.
Tap the [Erase Specified Range] key to delete unwanted area of the image. Specify the
image area you wish to delete in the Erase Specified Range screen.
To forward the selected image, tap the [Forward to Other Address] key.
FORWARDING RECEIVED DATA MANUALLY
To save the selected image, tap the [File] key.
SAVING RECEIVED DATA
USER'S MANUAL | MX-M365N/MX-M465N/MX-M565N USER'S ... http://siica.sharpusa.com/portals/0/downloads/Manuals/MX-M365N-M...
603 of 1441 3/17/2016 7:14 AM


 To Next Page