Tap the [Start] key, and scan the front side.
Place a card face up on the document glass, and tap the [Start] key to scan
the reverse side.
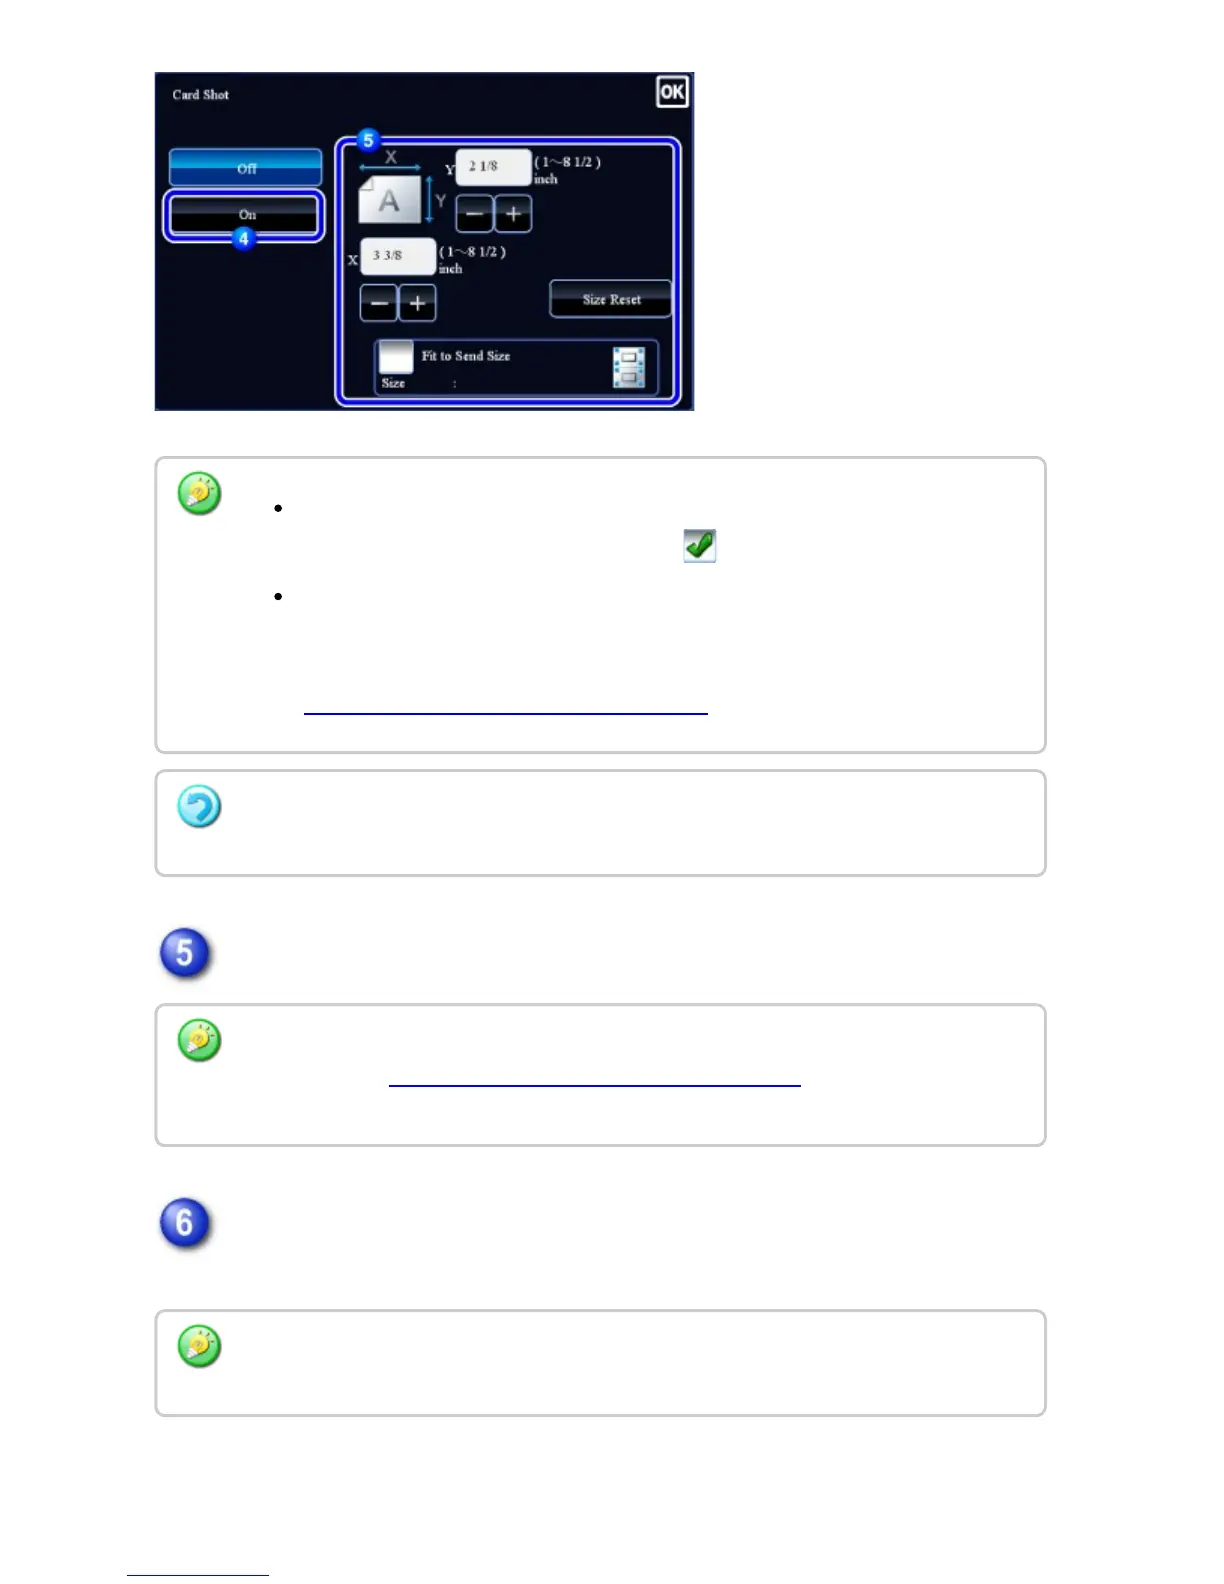
To enlarge or reduce the images to fit the paper based on the entered original
size, set the [Fit to Send Size] checkbox to .
After selecting Card Shot, tap the [Original] key in the base screen to change the
original scan size or the send size. In this case, the screen of this step appears
when you tap the scan size key. For the procedure for setting the send size, see
"SPECIFYING THE SEND SIZE OF THE IMAGE".
To cancel the Card Shot settings:
Tap the [Off] key.
Tap the [Preview] key to check the preview of an image before sending a fax. For more
information, see "CHECKING THE IMAGE TO BE TRANSMITTED".
However, settings for this function cannot be changed in the preview screen.
Before scanning the back of the card, tap the [Change Setting] key on the touch panel to
change the exposure.
USER'S MANUAL | MX-M365N/MX-M465N/MX-M565N USER'S ... http://siica.sharpusa.com/portals/0/downloads/Manuals/MX-M365N-M...
627 of 1441 3/17/2016 7:14 AM


 To Next Page