6
Connections
Caution
• Be sure to turn off the main power switch and disconnect the plug from the power outlet before connecting/disconnecting
cables. Also, read the manual of the equipment to be connected.
• Be careful not to confuse the input terminal with the output terminal when connecting cables. Accidentally reversing cables
connected to the input and output terminals may cause malfunctions and other problems.
n
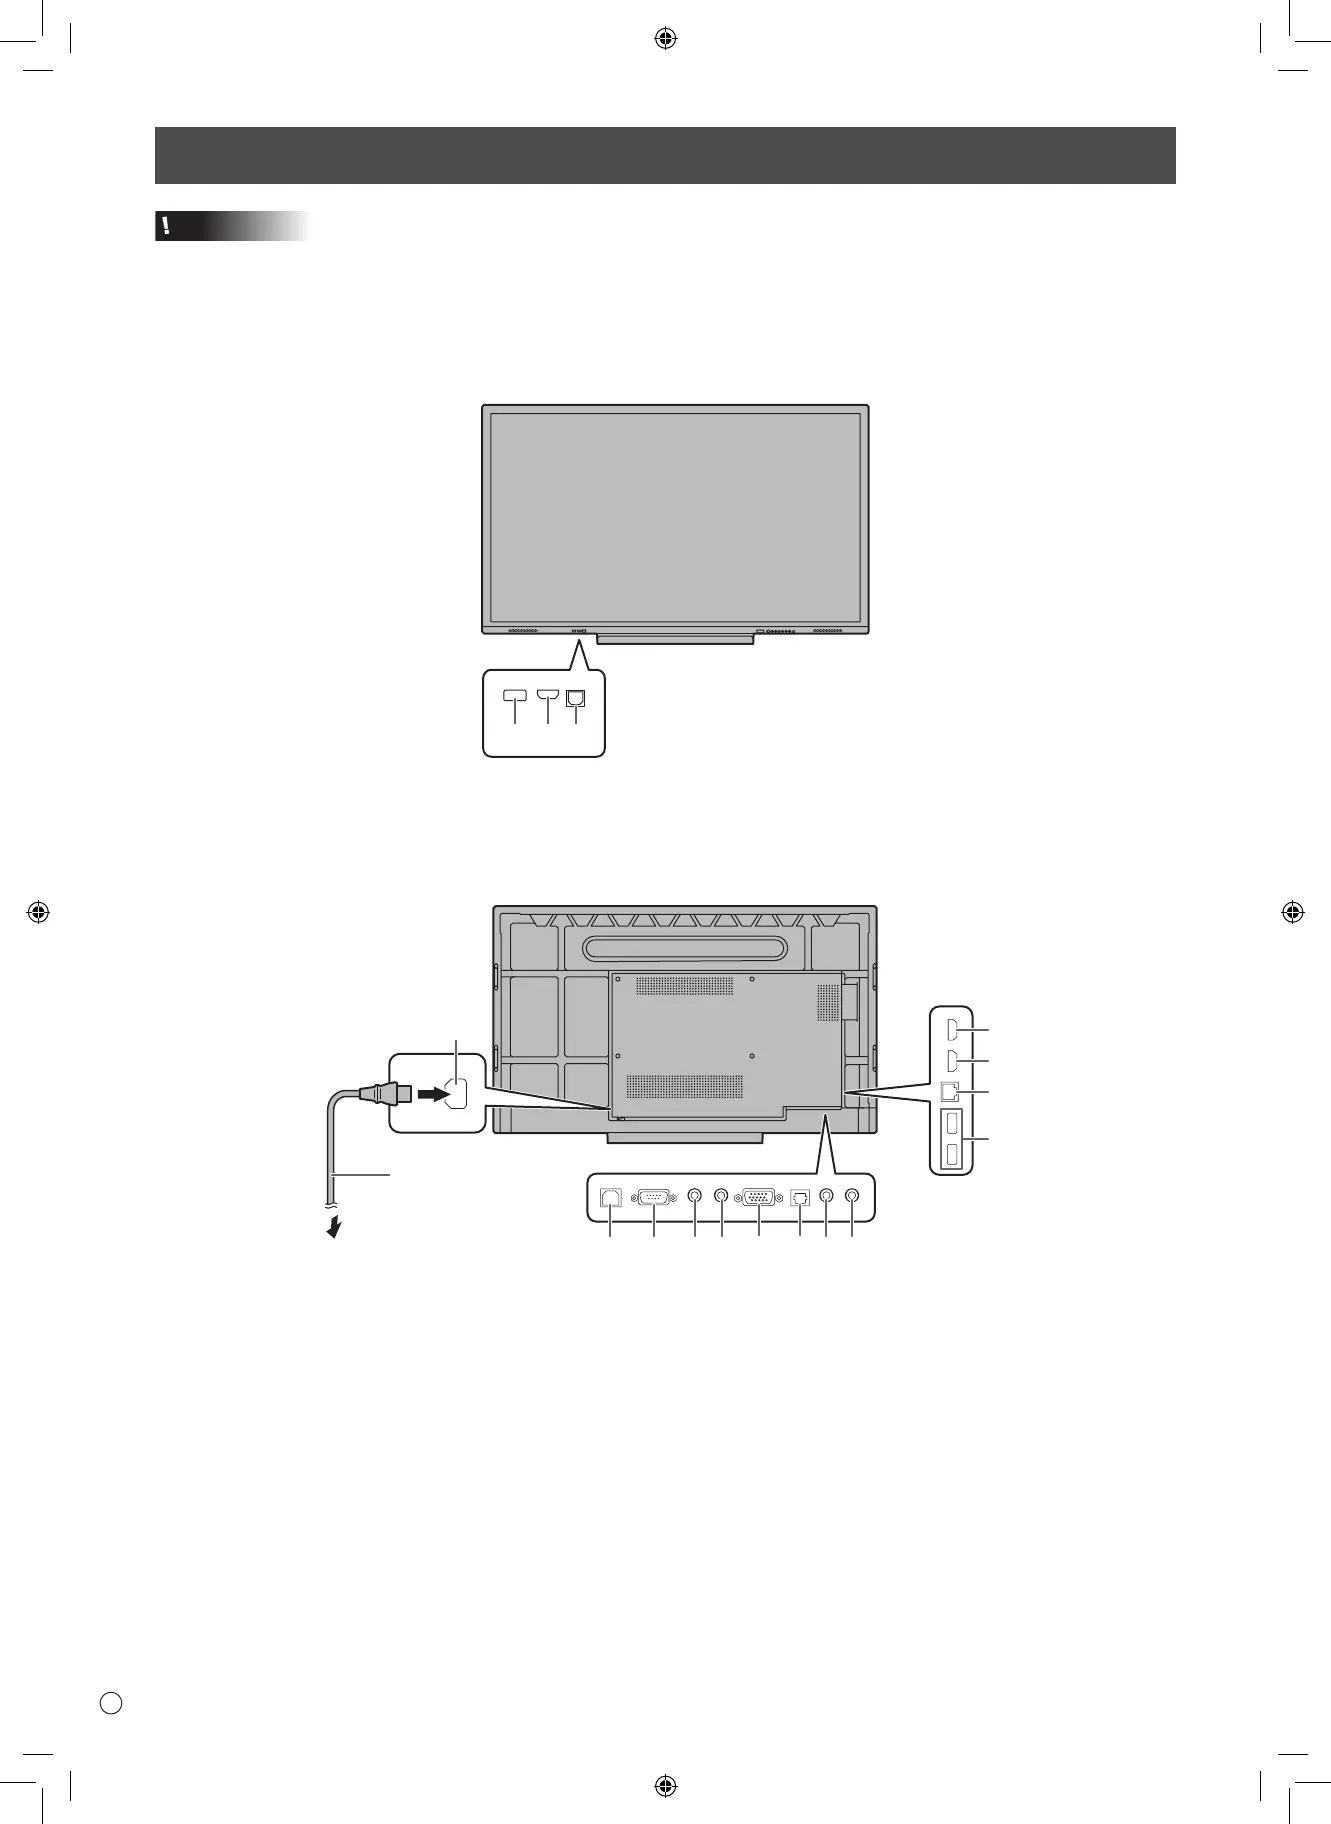
Front view
123
4. HDMI 3 input terminal
5. HDMI 2 input terminal
6. LAN terminal
7. TOUCH PANEL terminal 2 (for touch panel)
8. RS-232C input terminal
9. Audio output terminal
10. Audio input terminal
11. D-sub input terminal (VGA)
12. Digital audio output (optical) terminal
13. Mini AV input terminal
14. Mini Component input terminal (YPBPR)
15. AC input terminal
n
Rear view
15
For power outlet
Power cord (Supplied)
1. USB port (USB 2.0 compliant)
2. HDMI 1 input terminal
3. TOUCH PANEL terminal 1 (for touch panel)

 Loading...