PN-L803C/80TC3 INSTALLATION, ADJUSTMENT, SETTING, OPERATION 2 - 6
■ CONTROLLING THE MONITOR WITH A PC (RS-232C)
RS-232C cable (commercially available, crossover) is directly connected to the PC
You can control this monitor from a PC via RS-232C (COM port) on the PC.
(MEMO)
- To control the monitor via RS-232C, set RS-232C/LAN SELECT to RS-232C.
- When STANDBY MODE is set to LOW POWER, control is not possible in standby mode.
- You cannot use RS-232C and LAN control simultaneously.
■
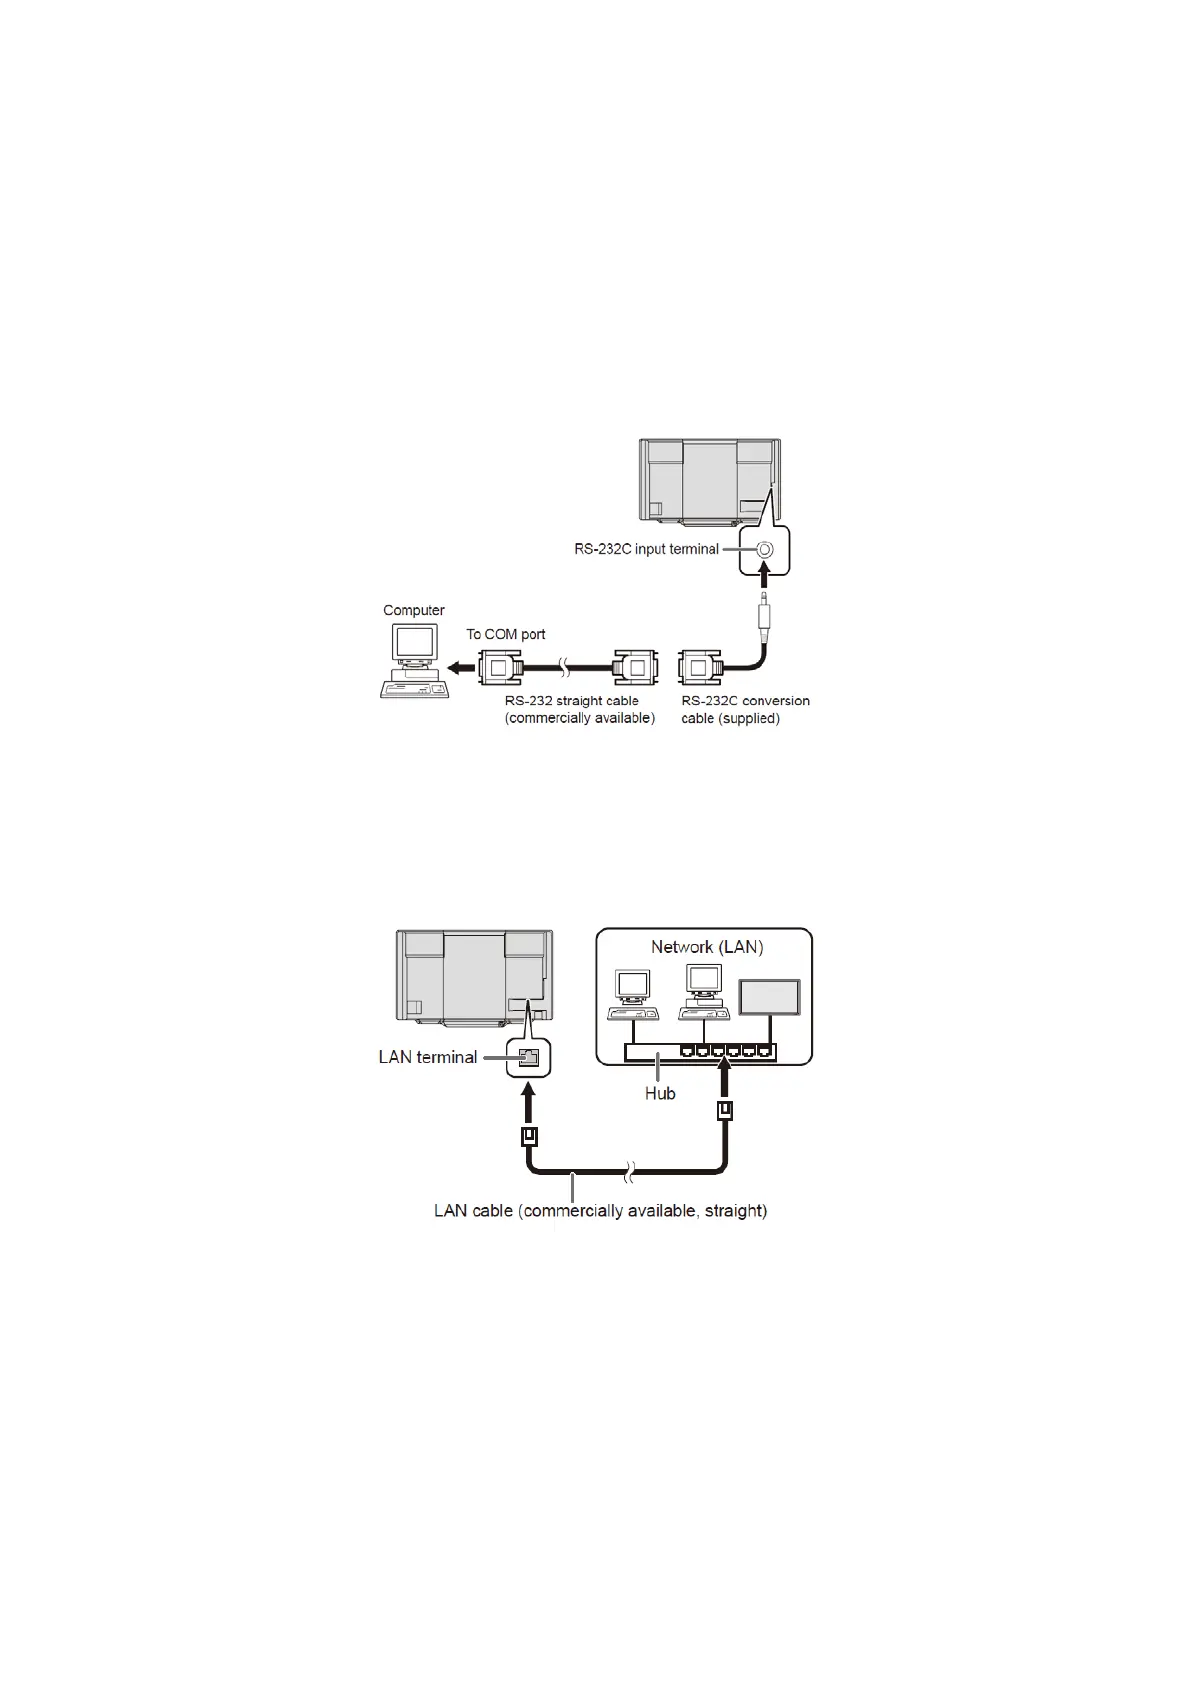
PC connection
Connect the RS-232C conversion cable (supplied) to the RS-232C input terminal on the monitor. Connect the RS-232C conversion cable
(supplied) to the COM port (RS-232C port) on your computer with an RS-232 cable (straight).
■ CONTROLLING THE MONITOR WITH A PC (LAN)
LAN cable (commercially available, crossover) is directly connected to the PC
Your monitor can be connected to a LAN allowing you to control it from a PC on the LAN.
You can also configure the monitor to send e-mail notification when it has a problem.
The connection requires a commercially available LAN cable (UTP cable, Category 5, straight through).
(MEMO)
- You must assign an IP address to the monitor by following the procedures in “Settings to connect to a LAN”. (See the description on the
right.)
- Your PC must be installed with Internet Explorer (version 7.0 or later).
- Version 7, 8, or 9 of Internet Explorer is recommended.
- When STANDBY MODE is set to LOW POWER, control is not possible in standby mode.
- To control the monitor via LAN, set RS-232C/LAN SELECT to LAN.
- You cannot use RS-232C and LAN control simultaneously.