10
E
n
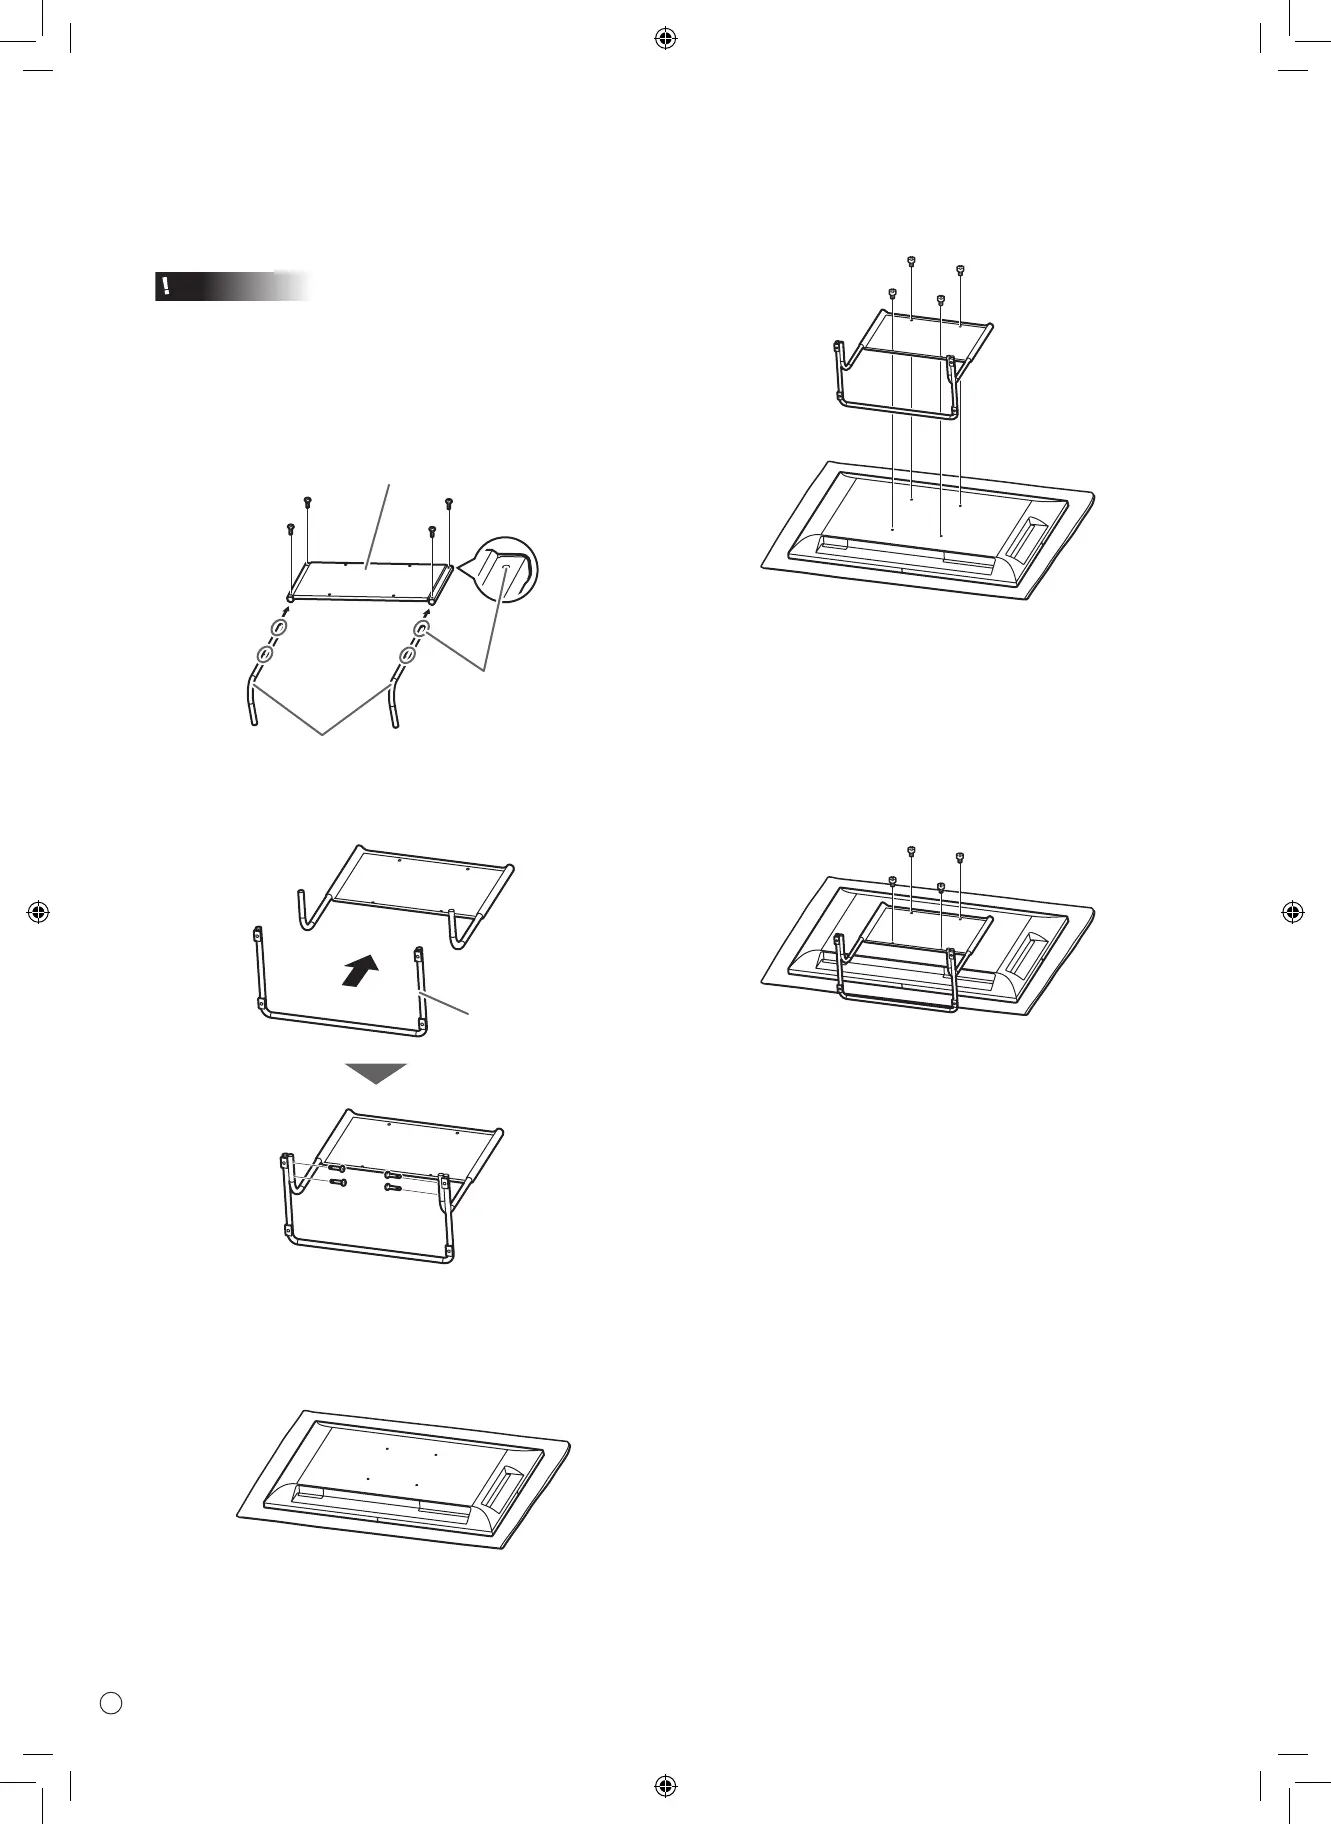
Attach the stand to the monitor
Caution
• Thestandisforuseinlandscapeorientation.Itcannotbe
usedforportraitorientation.
1. Attach the stand rods (x2) to the VESA angle.
PuttheVESAanglewiththescrewholesfaceupasbelow.
AttachthestandrodstotheVESAangle,andsecureitwith
4standmountingscrews(M3).
Stand rods
Screw holes
2. Attach the stand leg to the stand rods.
FliptheVESAangleandsecurethestandrodsandthe
endsofstandlegwith4standmountingscrews(M4).
Stand leg
3. Spread a thick, soft cloth (blanket, etc.) that will prevent
damage to the LCD panel on a stable at surface where
the entire monitor can be placed, and place the monitor
with the LCD panel face down on the cloth.
Placesothatthebottomofthemonitorcomestotheedge
ofthetable.
4. Attach the stand to the monitor.
Securefromthebackwith4standmountingscrews(M6).
n
Disassembling the stand
1. Spread a thick, soft cloth (blanket, etc.) that will prevent
damage to the LCD panel on a stable at surface where
the entire monitor can be placed, and place the monitor
with the LCD panel face down on the cloth.
2. Remove the screws(x4) that fasten the attachment
plate, and remove the attachment plate.
3. Reverse the stand assembly procedure to disassemble
the stand.