E-29
Operation
Adjusting the Computer Image
When displaying computer patterns which are very
detailed (tiling, vertical stripes, etc.), interference may
occur between the LCD pixels, causing flickering,
vertical stripes, or contrast irregularities in portions of
the screen. Should this occur, adjust “Clock”, “Phase”,
“H-Pos” and “V-Pos” for the optimum computer image.
• Computer image adjustments can be made easily by
pressing AUTO SYNC (
). See page 32 for details.
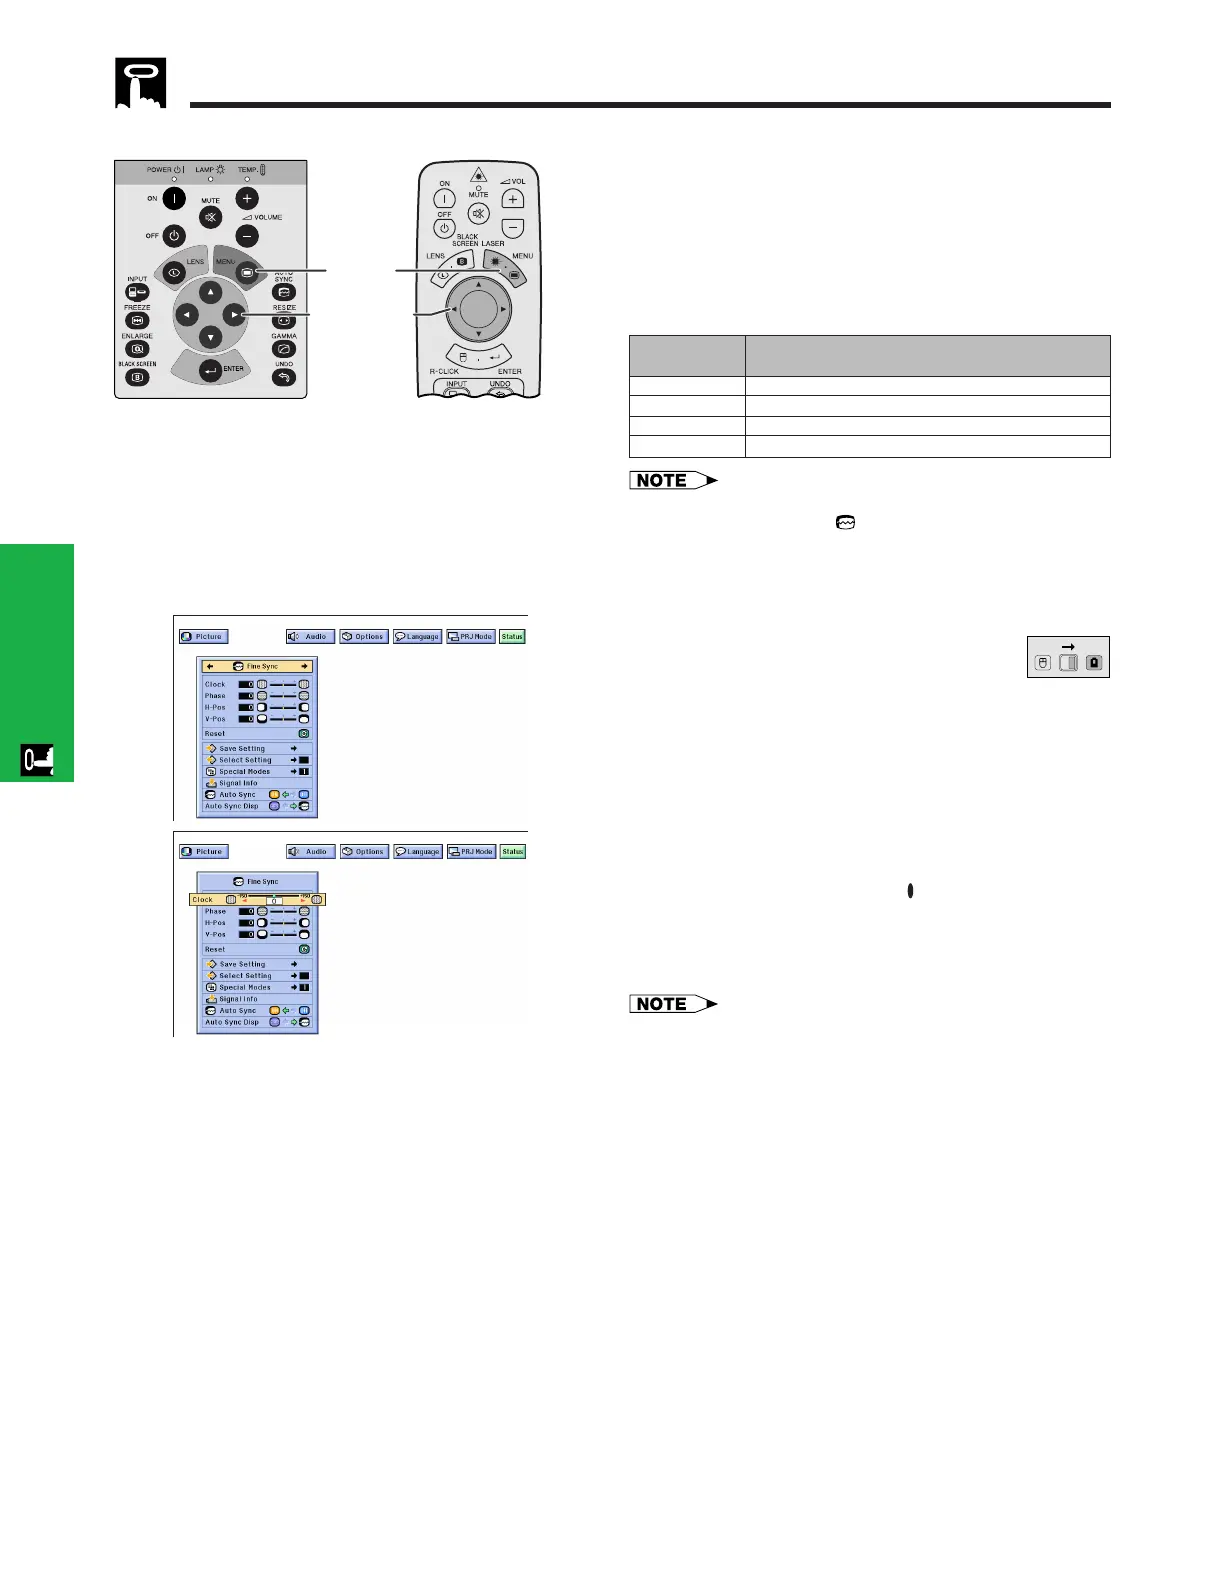
(GUI) On-screen Display
2, 3, 4
1, 5
Projector
Adjusts vertical noise.
Adjusts horizontal noise (similar to tracking on your VCR).
Centers the on-screen image by moving it to the left or right.
Centers the on-screen image by moving it up or down.
Clock
Phase
H-Pos
V-Pos
Description of Adjustment Items
(Select the desired computer input mode with INPUT.)
(Slide the MOUSE/ADJUSTMENT switch
on the remote control to the ADJ. position.)
1 Press MENU. Menu bar and “Picture” menu
screen appear. GUI operation guide is also
displayed.
2 Press ß/© to select “Fine Sync”.
3 Press ∂/ƒ to select a specific adjustment item.
4 Press ß/© to move the mark of the selected
adjustment item to the desired setting.
5 To exit from the GUI, press MENU.
• To reset all adjustment items, select “Reset” on the “Fine
Sync” menu screen and press ENTER.
2
3
DescriptionSelected item
MOUSE
ADJ.
Remote control
Computer Image Adjustments (INPUT 1 or 2 mode Only)