18
XG-MB50X
XR-11XC
XR-10X/S
XR-20X/S
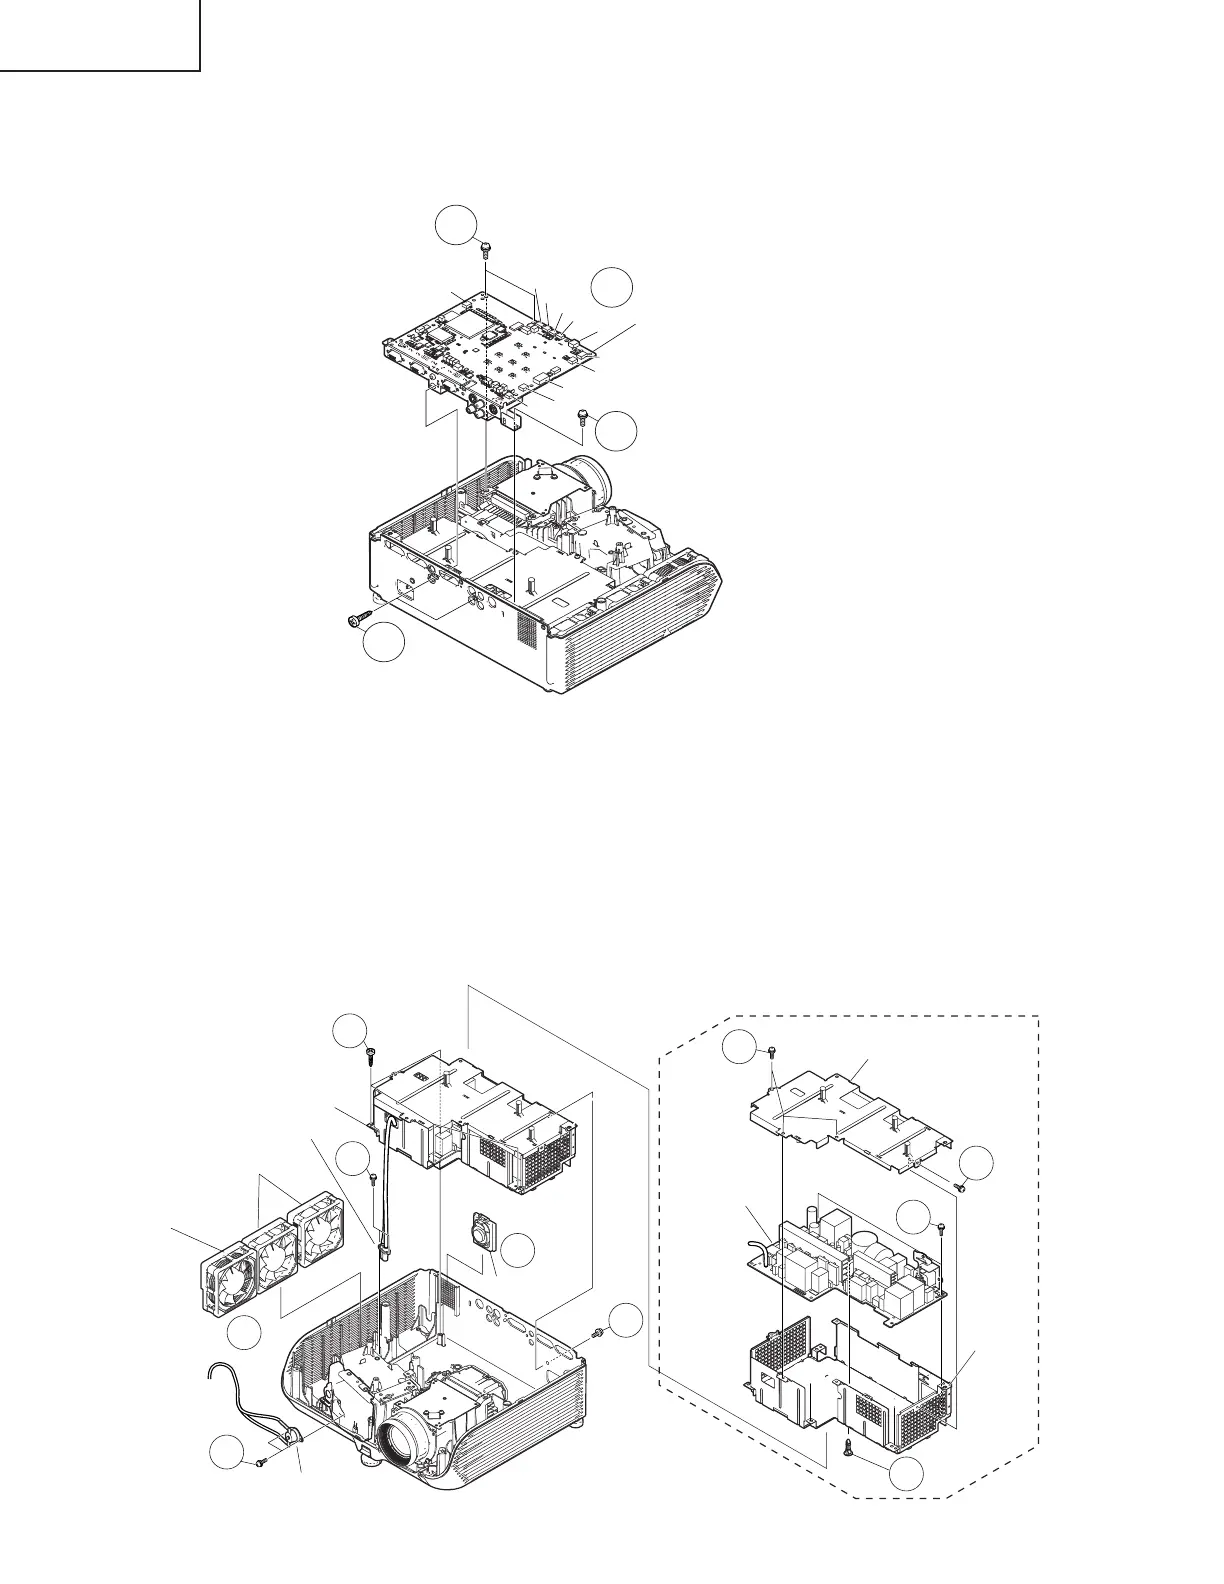
3. Removing the main PWB unit
3-1. Remove all connectors from the main PWB unit.
3-2. Remove 2 terminal fixing screws.
3-3. Remove 3 main PWB fixing screws to detach the main PWB unit.
4. Removing the speaker, fan, and power supply ballast unit
4-1. Remove the speaker.
4-2. Remove 2 fans for the power supply ballast unit and 1 fan for the optical mechanism unit.
4-3. Remove 2 bimetal fixing screws to detach the bimetal.
4-4. Remove 2 lamp socket fixing screws to detach the lamp socket.
4-5. Remove 1 inlet fixing screw.
4-6. Remove 4 ballast unit fixing screws to detach the power supply ballast unit.
4-7. Remove 4 ballast shield (upper) fixing screws to detach the ballast shield (upper).
4-8. Remove 2 ballast PWB fixing screws and 1 clip to detach the power supply PWB unit from the ballast shield
(lower).
[RC]
[CW]
[FA]
[MO]
[LF]
[SO]
[FB]
[EA]
[FC]
[FD]
3-3
3-1
MAIN PWB Unit
3-3
3-2
[BB]
4-8
4-7
4-7
4-8
Ballast shield (upper)
Ballast
shield
(lower)
POWER SUPPLY
BALLAST PWB
Unit
4-2
4-1
4-5
4-4
4-6
4-3
Speaker
Bimetal
Fan for
optical
mechanism
unit
Fans for power supply
ballast unit
Lamp Socket
POWER SUPPLY BALLAST Unit