- 4 -
BATTERY INSTALLATION
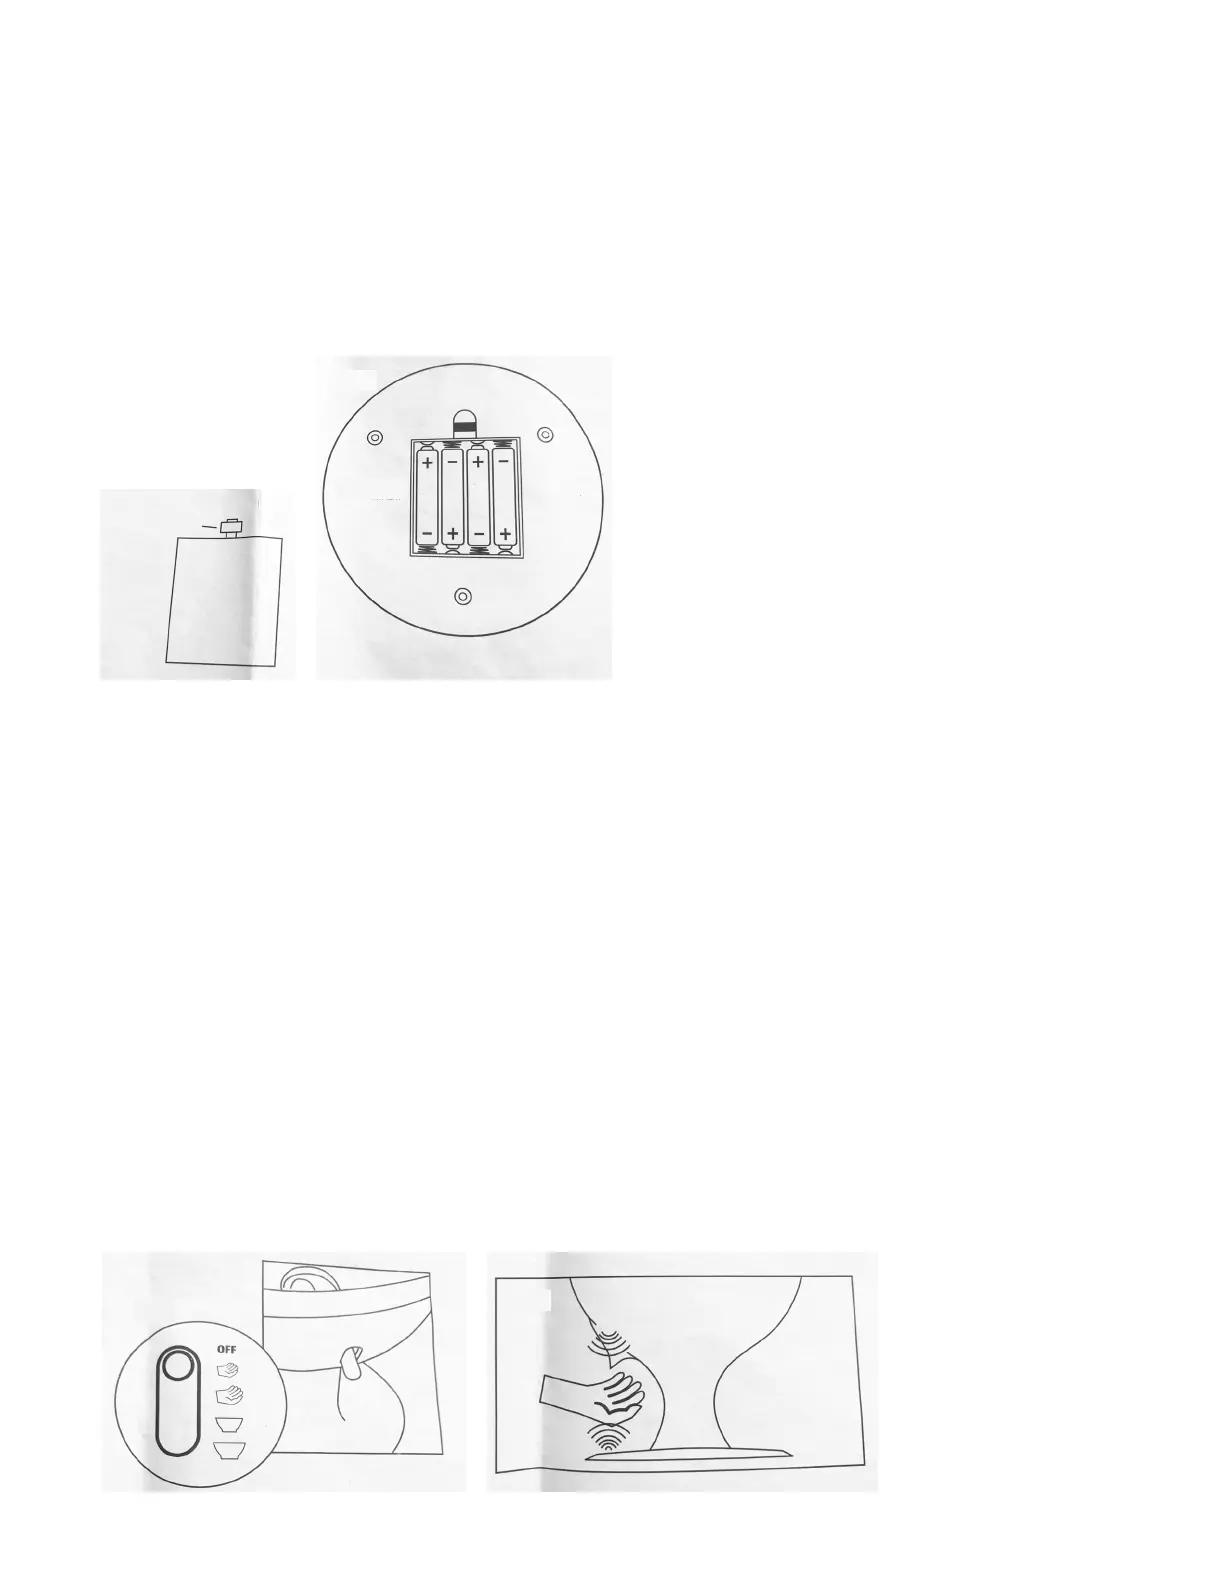
1. Locate the battery compartment on the bottom of the base.
2. Remove the battery cover by pulling the release tab.
3. Load 4 “AA” 1.5V batteries according to their polarity markings (Dia. G). Always replace
batteries with new batteries. Brand-name alkaline batteries are recommended.
4. Replace the battery cover.
OPERATING INSTRUCTIONS
1. Disassemble and clean prior to use (see Cleaning and Disassembly instructions).
2. Once completely dry, reassemble components (see Reassembly instructions).
3. Install batteries (see Battery Installation instructions).
4. Remove the filler cap.
5. Load treats by pouring the desired amount into the reservoir through the filler hole.
6. Replace the filler cap.
7. Move the power/serving size switch (Dia. H) to the desired serving size: small, medium,
small bowl, or power fill for party bowls.
8. Cup your hand(s) or bowl under the spout and over the motion sensor on the base. Make
sure to cup your hand(s) completely so that the beam between the sensors in the spout
and base is broken. This will cause the device to activate and dispense treats (Dia. J).
9. Repeat step 5 when additional treats are desired.
10. Set the power/serving size switch to the OFF position to conserve battery life.
DIA. G
BATTERY
COMPARTMENT
BATTERY
COVER
RELEASE
TAB
DIA. J
DIA. H