EasyManua.ls Logo

Sharper Image SA251 - User Manual

Sharper Image SA251
24 pages
Print Icon
To Next Page IconTo Next Page
Loading...
Powered
Subwoofer
SA251 Instructions
Read and save these instructions.
Question and Answer IconNeed help?

Do you have a question about the Sharper Image SA251 and is the answer not in the manual?

Summary

SA251 Powered Subwoofer Instructions

Safety Information

Electrical Hazard & Servicing Warnings

Warnings about electrical shock, high voltage, and user-serviceable parts.

Moisture & Plug Safety Precautions

Precautions against moisture and ensuring correct plug insertion for electrical safety.

Safety Information

Safe & Efficient Operation

Guidelines for safe and efficient use of the subwoofer, including cord handling and environmental conditions.

Safety Certification

Information regarding the unit's compliance with safety standards like CSA and UL.

Key Safety Instructions

Key instructions for safe operation, including reading, retaining, heeding, and following all warnings.

Cleaning, Attachments & Environment Safety

Safety guidelines for cleaning, using attachments, and avoiding water/moisture.

Accessory and Cart Usage Safety

Precautions for using accessories, unstable surfaces, and moving units with carts.

Ventilation & Power Source Guidelines

Guidance on proper ventilation and operating the unit from the correct power source.

Grounding and Polarization Safety

Explanation of grounding and polarized plugs for preventing electric shock.

Grounding Plug & Cord Protection

Details on grounding plugs and protecting the power cord from damage.

Lightning and Antenna Grounding

Recommendations for protection during lightning storms and proper outdoor antenna grounding.

Antenna Grounding Standards

Explanation of antenna grounding requirements according to the National Electrical Code.

Power Lines & Overloading Hazards

Warnings about proximity to power lines and avoiding outlet overloading.

Object Entry and Servicing Precautions

Instructions on preventing object/liquid entry and the importance of professional servicing.

Damage Requiring Service

Conditions under which the unit requires professional servicing due to damage or malfunction.

Replacement Parts Guidelines

Guidelines for ensuring correct replacement parts are used by service technicians.

Location of Controls

Front Panel Controls & Indicators

Identification of controls and indicators on the front panel of the subwoofer.

Rear Panel Connections & Inputs

Overview of input and output connections located on the rear panel.

Control Descriptions

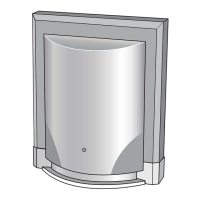
Detailed descriptions of the subwoofer's inputs, volume control, design, and power indicator.

Installation and Wiring

RCA Subwoofer Connection

Diagram and instructions for connecting the subwoofer using RCA cables to stereo systems with subwoofer output.

RCA Connection Steps

Step-by-step guide for connecting the subwoofer via RCA cables to the stereo system.

Speaker Terminal Connection

Instructions for connecting the subwoofer using speaker wires to systems without a subwoofer output.

Speaker Wire Connection Steps

Step-by-step guide for connecting the subwoofer using speaker wires to the stereo system.

Operation

Initial Setup & Volume Adjustment

Steps for powering on, setting initial volume, and adjusting bass levels for optimal sound.

Output Balancing & Placement

Guidance on achieving sound balance and recommendations for subwoofer placement.

Troubleshooting

No Operation Issues

Common causes and solutions for the subwoofer not powering on or functioning.

No;Low Output Issues

Troubleshooting steps for when the subwoofer produces no sound or very low sound.

Noisy;Distorted Output Troubleshooting

Steps to minimize noise or distortion in the subwoofer's audio output.

Volume Control Troubleshooting

Diagnosing problems where the subwoofer volume does not adjust with the source device's volume.

Specifications

Warranty Information

Warranty Coverage & Exclusions

Information on what defects are covered, duration, and what is not covered by the warranty.

Service & Contact Information

Instructions on how to obtain warranty service, including return address and contact information.

Overview

This document describes the Sharper Image SA251 Powered Subwoofer, a device designed to enhance audio systems by providing extended low-frequency sound. The subwoofer features a bass reflex design, which helps in achieving extended low-frequency response and low distortion. It is compatible with various stereo systems, offering both low-level (RCA) input for systems with dedicated subwoofer outputs and universal (speaker level) input for systems without.

Function Description:

The SA251 Powered Subwoofer is an active subwoofer, meaning it has its own built-in amplifier. Its primary function is to reproduce low-frequency sounds (bass) that main speakers might not be able to handle effectively, thereby enriching the overall audio experience. It integrates into an existing stereo system, either by connecting to a dedicated subwoofer output (RCA) or by tapping into the main speaker outputs (speaker level). The unit includes a volume control to adjust the bass output, allowing users to balance it with the high and midrange output of their stereo system. Once an initial adjustment is made, the subwoofer's output automatically tracks the volume adjustments of the stereo system. For optimal bass output, it is recommended to place the subwoofer in a corner of the room.

Important Technical Specifications:

  • Driver: 5 1/4" high excursion woofer
  • Enclosure Type: Plastic bass reflex design
  • Dimensions: 13 1/2" x 11" x 6 1/4"
  • Power: 20 WRMS into 4 Ohms, 40 Watts peak
  • Frequency Response: 25Hz - 110Hz
  • Low-level (RCA) Input: >15 KOhms
  • Universal Input: >15 KOhms
  • Power Source: ~110VAC, 60Hz

Usage Features:

  • Input Flexibility: The subwoofer offers two types of inputs for broad compatibility:
    • Low-level (RCA) input: For stereo systems that have a dedicated subwoofer output. An RCA cable is included for this connection.
    • Universal input (speaker level): For stereo systems that do not have a subwoofer output but have easily accessible speaker output terminals. Speaker wires (purchased separately) are used for this connection, connecting in parallel to the stereo system's speaker outputs.
  • Volume Control: A dedicated level control allows users to adjust the subwoofer's output to achieve a balanced sound with their main stereo speakers.
  • Power Indicator: A blue LED on the front of the unit illuminates when the subwoofer is powered on, providing a visual cue of its operational status.
  • Automatic Volume Tracking: After an initial volume adjustment, the subwoofer's output automatically adjusts with the stereo system's master volume, ensuring consistent bass levels.
  • Placement Recommendation: For maximizing bass output, placing the subwoofer in a room corner is suggested.

Maintenance Features:

  • Cleaning: The unit should be unplugged from the wall outlet before cleaning. A damp cloth should be used; liquid or aerosol cleansers are not recommended.
  • Safety Guidelines: The manual emphasizes several safety precautions to ensure safe and efficient operation and to prevent damage or injury:
    • Power Cord: Do not damage the power cord. Always grasp the plug, not the cord, when disconnecting from the outlet.
    • Moisture: Avoid exposing the unit to rain or other moisture. If water enters the unit, electrical shock or malfunction may occur. Use in areas with low humidity and minimal dust.
    • Disassembly/Alteration: Do not disassemble or alter the unit.
    • Temperature Extremes/Direct Sunlight: Do not use the unit in areas below 40°F/5°C or exceeding 95°F/35°C, or where it may be exposed to direct sunlight.
    • Ventilation: Ensure proper ventilation by not blocking cabinet openings. Do not place the unit on soft surfaces like beds or sofas, or in built-in installations without adequate ventilation.
    • Power Source: Operate only from the specified power source.
    • Grounding/Polarization: For electric shock prevention, match the wide blade of the plug to the wide slot of the outlet. If the plug doesn't fit, contact an electrician. For three-wire grounding plugs, do not defeat the safety purpose of the grounding pin.
    • Power Cord Protection: Route power cords to prevent them from being walked on or pinched.
    • Lightning: During lightning storms or long periods of disuse, unplug the unit and disconnect any antenna/cable system to prevent damage from lightning and power surges.
    • Outdoor Antenna Grounding: If an outdoor antenna or cable system is connected, ensure it is grounded according to the National Electric Code (ANSI/NFPA 70) to protect against voltage surges and static charges.
    • Power Lines: Avoid installing outdoor antenna systems near overhead power lines or circuits.
    • Overloading: Do not overload wall outlets, extension cords, or integral convenience receptacles.
    • Object/Liquid Entry: Never push objects into the unit's openings or spill liquids on it.
    • Servicing: Do not attempt to service the product yourself. Refer all servicing to qualified service personnel.
    • Damage Requiring Service: Unplug the unit and refer to qualified service personnel if the power cord/plug is damaged, liquid is spilled, objects fall into the product, it's exposed to rain/water, it doesn't operate normally, it's dropped/damaged, or its performance changes distinctly.
    • Replacement Parts: When replacement parts are needed, ensure the service technician uses parts specified by the manufacturer or those with the same characteristics as the original part to prevent fire, electric shock, or other hazards.
    • Safety Check: After any service or repair, have a service technician perform safety checks to confirm proper operating condition.
    • Heat: Position the product away from heat sources like radiators, heat registers, stoves, or other heat-producing products (including amplifiers).
  • Troubleshooting: The manual provides guidance for common issues:
    • No operation: Check AC plug connection and ensure the unit is turned on (blue LED illuminated).
    • No output or low output: Check RCA cable connection and speaker wire connections (paying attention to polarity).
    • Noisy or distorted output: Adjust volume control to minimize distortion. Ensure adequate clearance around the subwoofer, vent, and floor/carpet, and remove any blocking objects.
    • Volume not tracking sound source: Ensure the subwoofer is connected to the subwoofer output of the system, not to a Line Out or AUX Out, as these typically have a constant level output unaffected by the main volume control. If no subwoofer output is available, refer to the speaker level input connection instructions.

California Proposition 65 Warning: The product's power cord may expose users to lead, a chemical known to cause birth defects or other reproductive harm. Users are advised to wash hands after handling.

Sharper Image SA251 Specifications

General IconGeneral
BrandSharper Image
ModelSA251
CategorySubwoofer
LanguageEnglish