Settings
Power On Default Mode - This sets the default output state
when Shelly is powered.
• ON: Congure Shelly to turn ON, when it has power.
• OFF: Congure Shelly to turn OFF, when it has power.
• Restore Last Mode: Congure Shelly to return to last state
it was in, when it has power.
Firmware Update - Update the rmware of Shelly, when a new
version is released.
Button Type
• One Button mode: the device is controlled with a single
switch.
• Dual button mode: the device is controlled dual switch.
• Toggle switch one button: the device is controlled by a sin-
gle toggle switch.
• Edge switch: the device is controlled with an edge on/off.
Button Debounce - Adjust the sensitivity (time of reaction)
of the connected switch. If there are any interferences in the
power grid, this will prevent undesired status change (on/off)
of the device. The range is 60 - 200 ms.
Calibration - Shelly Dimmer needs callibration based on the
type of light that you are going to use it with. To make a cali-
bration, press Start Calibration.
Transition Time - Set the time (in miliseconds), for which
Shelly Dimmer goes from 0% to 100%. The value can be from
0 to 5000 ms.
Fade rate - Set the speed of dimming, when the switch is
pressed and held. Range: 1x - 5x
Minimum Brightness - If the connected light is not working
below a certain percentage, you can set the minimum per-
cent at which Shelly Dimmer will turn on. Once set, you can
not dim the light below the minimum. Range: 0 - 50%
Warm up - Some lights require a certain power impulse, in
order to start below 100% brightness. You can set the bright-
ness level and time at which Shelly Dimmer will turn on.
Brightness range: 10 - 100%. Time range: 20 - 200 ms
Night Mode - With this mode you can set a period of time
and level of brightness, in which any turning on will set the
brightness to the predened level.
Time Zone and Geo-location - Enable or Disable the automat-
ic detection of Time Zone and Geo-location.
Factory Reset - Return Shelly to its factory default settings.
Device Information - here you can see the device ID(Unique
ID of Shelly) and device IP(the IP of Shelly in your Wi-Fi net-
work)
THE EMBEDDED WEB INTERFACE
Еven without the mobile app, Shelly can be set and controlled
through a browser and WiFi connection of a mobile phone,
tablet or PC.
Abbreviations used
• Shelly-ID – the unique name of the Device. It consists of
6 or more characters. It may include numbers and letters, for
example 35FA58.
• SSID – the name of the WiFi network, created by the De-
vice, for example shellydimmer2-35FA58
• Access Point (AP) – the mode in which the Device cre-
ates its own WiFi connection point with the respective name
(SSID).
• Client Mode (CM) – the mode in which the Device is con-
nected to another WiFi network.
Initial inclusion
Step 1
Install Shelly to the power grid following the schemes de-
scribed above and place it into the console. After turning the
power on Shelly will create its own WiFi network (AP).
⚠WARNING! If you don’t see the WiFi please fallow the step 1
from the device inclusion section of the guide.
Step 2
When Shelly has created an own WiFi network (own AP), with
name (SSID) such as shellydimmer2-35FA58. Connect to it
with your phone, tablet or PC.
Step 3
Type 192.168.33.1 into the address eld of your browser to
load the web interface of Shelly.
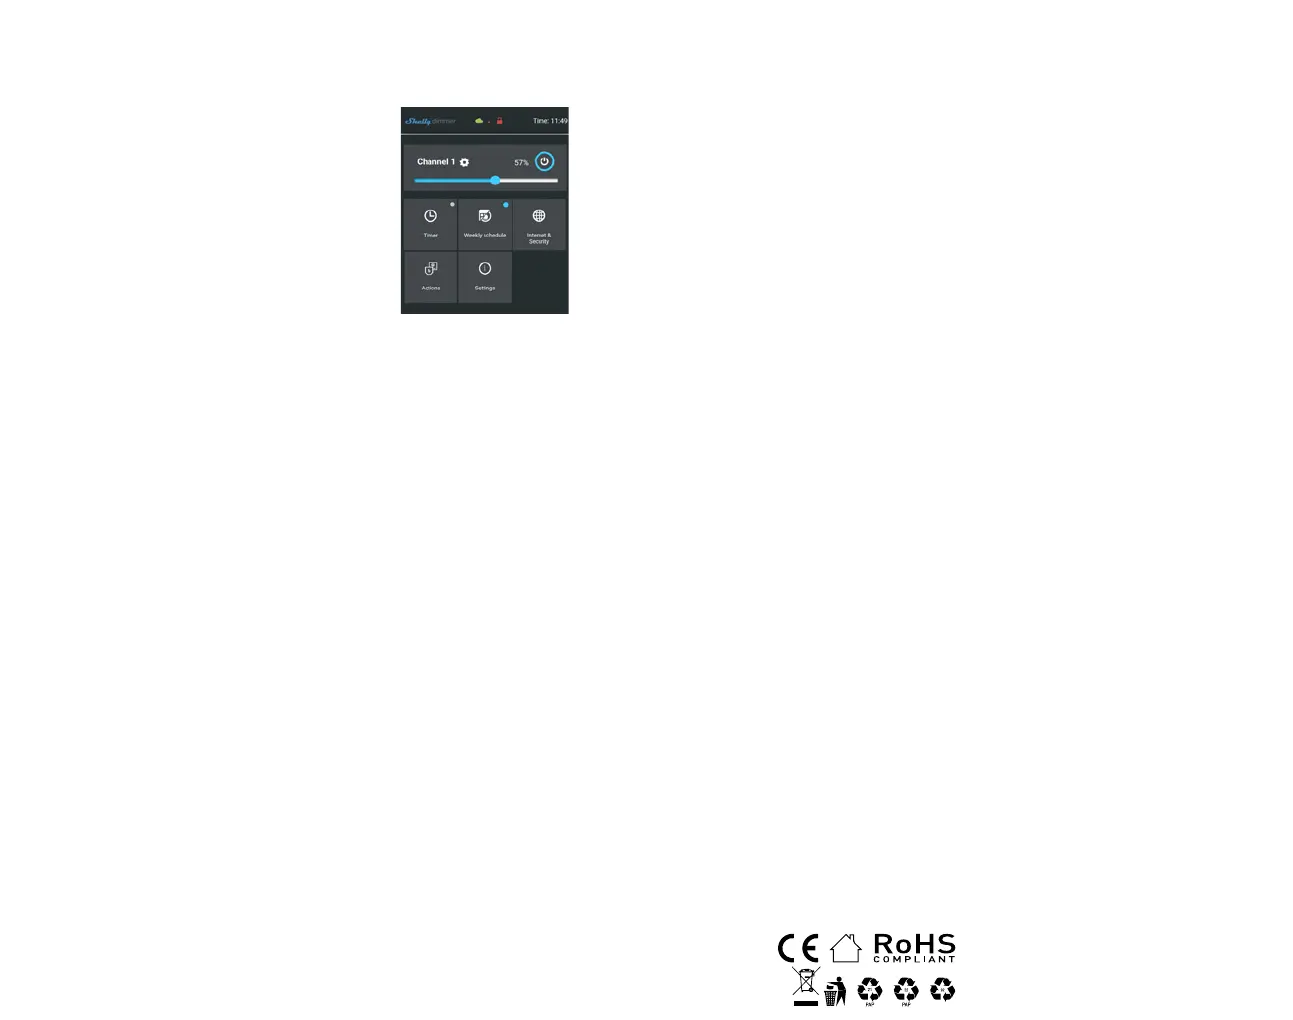
GENERAL - HOME PAGE
This is the home page of the embedded web interface. If it
has been set up is correctly, you will see information about
Current state (on/off), Current brightness level, Power button
Connection to Cloud, Present time, Settings
Timer - Тo manage the power supply automatically, you may
use:
• Auto OFF: After turning on, the power supply will automat-
ically shutdown after a predened time (in seconds). A value
of 0 will cancel the automatic shutdown.
• Auto ON: After turning off, the power supply will be auto-
matically turned on after a predened time (in seconds). A
value of 0 will cancel the automatic power-on.
Weekly Schedule - This function requires an Internet connec-
tion. To use Internet, a Shelly Device has to be connected to
a local WiFi network with working internet connection. Shelly
may turn on/off automatically at a predened time, at sun-
rise/sunset, or at a specied time before or after sunrise/
sunset. Multiple schedules are possible.
Internet/Security
• WiFi Mode - Client - Allows the device to connect to an
available WiFi network. After typing the details in the elds,
press Connect.
• WiFi Client Backup - Add a backup WiFi network, in case
your primary one becomes unavailable.
• WiFi Mode - Acess Point - Congure Shelly to create a Wi-
Fi Access point. After typing the details in the elds, press
Create Access Point.
• Cloud - Enable or Disable connection to the Cloud service.
• Restrict Login - Restrict the web interface of Shely with a
Username and Password. After typing the details in the elds,
press Restrict Shelly.
• SNTP Server - You can set a custom SNTP Server. Type the
URL address and press Save.
⚠ATTENTION! If you have entered incorrect information
(wrong settings, usernames, passwords etc.), you will not be
able to connect to Shelly and you have to reset the Device.
⚠WARNING! If you don’t see the WiFi please fallow the step 1
from the device inclusion section of the guide.
Advanced - Developer Settings - Here you can change the
action execution via CoAP (CoIOT) or Via MQTT
Firmware Upgrade - Shows present rmware version. If a
newer version is available, ocially announced and published
by the Manufacturer, you can update your Shelly Device. Click
Upload to install it to your Shelly Device.
Settings
Power On Default Mode - This sets the default output state
when Shelly is powered.
• ON: Congure Shelly to turn ON, when it has power.
• OFF: Congure Shelly to turn OFF, when it has power.
Restore Last Mode - Congure Shelly to return to last state it
was in, when it has power.
SWITCH - Congure Shelly to operate accordingly to the state
of the switch (button).
Time Zone and Geo-location - Enable or Disable the automat-
ic detection of Time Zone and Geo-location.
Firmware Update - Update the rmware of Shelly, when a new
version is released.
Button Type
• One Button mode: the device is controlled with a single
switch.
• Dual button mode: the device is controlled dual switch.
• Toggle switch one button: the device is controlled by a sin-
gle toggle switch.
• Edge switch: the device is controlled with an edge on/off.
Button Debounce - Adjust the sensitivity (time of reaction)
of the connected switch. If there are any interferences in the
power grid, this will prevent undesired status change (on/off)
of the device. Range: 60 - 200 ms
Calibration - Shelly Dimmer needs callibration based on the
type of light that you are going to use it with. To make a cali-
bration, press Start Calibration.
Transition Time - Set the time (in miliseconds), for which
Shelly Dimmer goes from 0% to 100%. The value can be from
0 to 5000 ms.
Fade Rate - Set the speed of dimming, when the switch is
pressed and held. Range: 1x - 5x
Minimum Brightness - If the connected light is not working
below a certain percentage, you can set the minimum per-
cent at which Shelly Dimmer will turn on. Once set, you can
not dim the light below the minimum. Range: 0 - 50%
Warm up - Some lights require a certain power impulse, in
order to start below 100% brightness. You can set the bright-
ness level and time at which Shelly Dimmer will turn on.
Brightness range: 10 - 100%. Time range: 20 - 200 ms
Night Mode - With this mode you can set a period of time
and level of brightness, in which any turning on will set the
brightness to the predened level.
Factory Reset - Return Shelly to its factory default settings.
Device Reboot - Reboots the device.
Device Information - Here you can see the unique ID of Shelly.
Additional Features - Shelly allows control via HTTP from
any other device, home automation controller, mobile app
or server.
For more information about the REST control protocol, please
visit: https://shelly.cloud/developers/ or send a request to:
developers@shelly.cloud

 Loading...