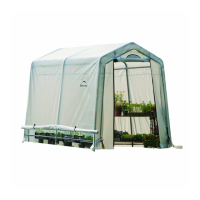
Do you have a question about the ShelterLogic Grow-It Greenhouse-in-a-Box and is the answer not in the manual?
Read instructions fully, wear safety equipment, and use caution during assembly.
Fabric flammability, site dangers like utilities, overhead hazards, and no hanging objects.
Structure must be anchored; consumer responsibility for stability and security.
Hotline for questions, claims, and replacement parts in the USA, Canada, and International.
One-year limited warranty against defects for cover, panels, and framework.
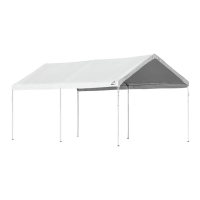
Detailed list of all parts and their respective quantities required for assembly.
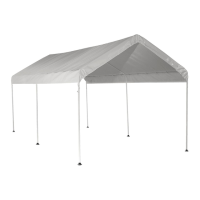
Assemble main frame arches using specified connectors and pipes.
Install supports for the mid-span of the greenhouse frame.
Attach diagonal braces to the frame for structural integrity and stability.
Add further support elements to strengthen the greenhouse frame.
Connect the base frame components for overall stability.
Anchor the greenhouse using provided stakes or additional anchors for security.
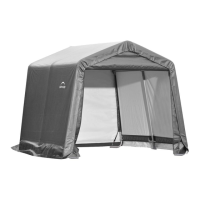
Attach one of the end panels to the assembled frame structure.
Secure the end panel using the provided straps and fasteners.
Use ratchet straps to apply tension and secure the frame structure.
Carefully drape the main cover over the assembled frame.
Secure the cover to the frame using specific connectors and fasteners.
Attach and tighten the straps along the bottom edge of the cover.
Position and secure the adjustable vent flaps on the roof.
Ensure all bungee cords and zippers are properly fastened for a tight fit.
Read instructions fully, wear safety equipment, and use caution during assembly.
Fabric flammability, site dangers like utilities, overhead hazards, and no hanging objects.
Structure must be anchored; consumer responsibility for stability and security.
Hotline for questions, claims, and replacement parts in the USA, Canada, and International.
One-year limited warranty against defects for cover, panels, and framework.
Detailed list of all parts and their respective quantities required for assembly.
Assemble main frame arches using specified connectors and pipes.
Install supports for the mid-span of the greenhouse frame.
Attach diagonal braces to the frame for structural integrity and stability.
Add further support elements to strengthen the greenhouse frame.
Connect the base frame components for overall stability.
Anchor the greenhouse using provided stakes or additional anchors for security.
Attach one of the end panels to the assembled frame structure.
Secure the end panel using the provided straps and fasteners.
Use ratchet straps to apply tension and secure the frame structure.
Carefully drape the main cover over the assembled frame.
Secure the cover to the frame using specific connectors and fasteners.
Attach and tighten the straps along the bottom edge of the cover.
Position and secure the adjustable vent flaps on the roof.
Ensure all bungee cords and zippers are properly fastened for a tight fit.
| Frame Material | Steel |
|---|---|
| Cover Material | Polyethylene |
| UV Protection | Yes |
| Water Resistant | Yes |
| Assembly | Tool-free |