......
..
..
....
.-
'
.
.:
Procedure Page
General Repair Notes
.........................................
19
ONIOFF S~tch
Power Supply Cord
20
................................................
Circuit Breaker
.................................................
21
Circuit Board
22
Bridge Rectifier
21
Calibration
24
Pressure Control
23
Motor Brush
....................................................
25
Displacement Pump
...........................................
26
Bearing Housing
Et
Connecting Rod
......................
28
Drive Housing
..................................................
30
Motor
.............................................................
31
Parts Drawing
&
List, Ultimate Novam
1000
............
32
Parts Drawing
8
List, Pressure Control
...................
34
P,arts Drawing
&
List,
Displacement Pump
..............
36
...........................................
.................................................
....................................................
...............................................
.......................................................
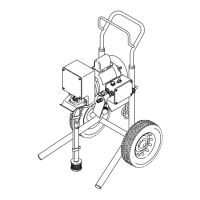
The following tools are needed when repairing this
sprayer.
Phillips screwdriier
Small flatblade screwdriver
Needle nose pliers
Adjustable wrench
Plastic mallet
2"
adjustable, open-end wrench
Torque wrench
114"
hex key wrench
3/16"
hex key wrench
518"
socket wrench
318"
open end wrench
112"
open end .wrench
314"
open end .'wrench
718"
open end wrench
Bearing grease
High quality motor oil
For
cafibration
procedure
only:
318"
ignition wrench
0.015"
spray tip
5
gallon pail
High pressure, oil-filled
test
gauge,
Part
No.
820-455
Clean water
NEW
3000
p
7
bar) high pressure spray hose
Mineral spirit!
GENERAL
REPAlR
MOTES
Before repairing any part of the sprayer, read the follow-
ing general repair notes and the repair procedure. Be
sure you have the necessary tools and parts available.
1.
When disconnecting wires in the pressure control
assembly, use needle nose pliers to separate mating
connectors.
When reconnecting the wires, be sure the flat blade
wrap-around blade of the female connector when
of the insulated male connector is centered in the
the connection is made.
tion,
.be
sure
to
properly mate connectors,
and
wire could loosen the connector from the wire.
never
pull on
a
wire
to
disconnect
it.
Pulling on
a
2.
Route wires in the pressure control assembly
carefully through the legs of the U-shaped bourdon
tube, where appropriate,
to
avoid interfering with
the bourdon tube which moves as the pressure
set-
ting changes and to avoid pinching the wires bet-
ween the pressure control box and cover.
CAUTION
performance or damage to the pressure control.
Improper wire routing can result in poor sprayer
3.
Keep
all
screws, nuts, washers, gaskets, and elec-
trical fittings removed during repair procedures.
These parts are not normally provided with replace-
ment assemblies.
4.
Test your repair before regular operation
of
.the
sprayer
to
be sure the problem
is
corrected.
..
repair procedure again to verify that everything was
If
the sprayer does not operate properly, review the
done correctly. If necessary, refer
to
the
Troubleshooting Guide
to
help identify other possi-
ble' problems and solutions.
including electric
ing parts or elec-
or
a
tool while
inspecting the repair.
Shut
off
the sprayer and unplug
it
as soon
as
you
complete the inspection.
before operating the sprayer.
Reinstall
all
covers, gaskets, screws and
CAUTION
-.
Do-not run the sprayer dry for.. more !han
30
seconds to avoid damaging the pump packings.
5.
Reinstall the motor cover.before regular operation
:
of the sprayer and replace
it
if
it
is damaged.
The
cover directs cooling air around the motor to help
prevent overheating.
It
can also help prevent bums,
fire or explosion; see
the
WARNING, below.
..
820-408
19
':
,.
 Loading...