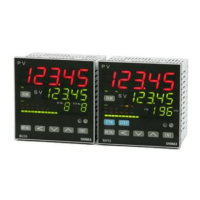
(4) Mode 1 screens
Mode 1 lead screen
Press key for 3 seconds on basic screen, then displayed
key No setting on this screen. Press the key, then it shifts to the first setting screen,
keylock setting screen.
Keylock setting screen
Initial value:
Setting range:、、、、
key
Only change of Execution SV (basic screen) and keylock is possible.
Possible to change numerical value value manualy ,and key lock level
Only change of a keylock is possible.
Only change of a keylock is possible It can be locked key
Notes: Even when keylock is set as 1 and 2, manual output value is possible to change.
SV limiter lower limit setting screen
Initial value: measuring range lower limit
Setting range: measuring range lower limit value~measuring range upper limit value-1
key And (SV display turn off)
Lower limit value of target value is set .
When upper limit value is smaller than lower limit value, the value compulsorily becomes
lower limit value +1.
When you choose pressing at lower limit value ,the SV display turn off at
basic screen. But it will turn on at the setting screen.
SV limiter upper limit value setting screen
Initial value: measuring range upper limit
Setting range:SV limiter lower limit value +1~ measuring range upper limit value
key
Setting upper limit value of target value is set.
Return to mode1 lead screen.
(5) Mode 2 screens
Mode 2 lead screen
Press key in mode1 lead screen, or press key in mode3 lead screen,
then being displayed.
key If key is pressed, it shifts to the first setting screen PV offset correction screen.
PV offset correction (PV bias) setting screen
Initial value:0
S etting range:-500~500 Digits
key
Used for correction of input errors such as sensor.
If offset correction is performed, control is also performed with the corrected value
PV gain correction setting screen
Initial value:0.00
Setting range: ±5.00%
key Maximum input value is corrected within limit of ±5.00% of measuring range.
If corrected, inclination of spang changes in straight line which connects zero point and
correction maximum value.
PV filter setting screen
Initial value:0
Setting range: 0 ~ 9999 seconds
key When input change is violent or noise is overlapped, used in order to ease the influences.
In 0 second setting, filter does not function.
Mesuring range setting screen
Initial value: multi , voltage , current
Setting range: Chosen from 5-5.measuring range code table.
key
Combination of input type and measuring range is set by code.
Temperature unit setting screen
Initial value:
Setting range:、
key
The temperature unit at the time of a sensor input is set up from
(℃) , ()
.
Not displayed when the linear input is chosen.
Input scaling lower limit value setting screen
Initial value:0.0
Setting range: -1999 ~ 9989 digits
key
Scaling lower limit value at the time of linear input is set up.
Input scaling upper limit value setting screen
Initial value:100.0
Setting range: -1989 ~ 9999 digits
key Scaling upper limit value at the time of linear input is set up.
NOTE:Suppose that the difference between a lower limit value and upper limit value is 10
or less,or over 10,000. In this setting, upper limit value is compulsorily changed
into that of +10 or ± 10000 count. Upper limit value cannot be set as lower limit
value of +10 count or less,or that of over 10,000 count.
Input scaling Decimal point position Setting screen
Initial value: the first place after decimal point (0.0)
Setting range: no decimal point 0~the third place after decimal point(0.000)
Decimal point position of input scaling is set .
key
NOTE: The screen of input scaling serves as a monitor at the time of a sensor input.
Setting change cannot be performed.
Return to mode 2 lead screen.
(6) Mode 3 screens
Mode 3 lead screen
No setup
If key is pressed, it shifts to the first setting screen, output 1 proportional band
key setting screen. In this screens, PID which can be used in output 1, 1~3 related Items
and soft start of output 1,and proportional period output characteristics are set up.
Output 1 PID1 proportional-band (P) setting screen
Initial value:3.0%
Setting range:OFF, 0.1 ~ 999.9%
key
When performing auto tuning, no necessity for a setting basically.
If OFF is chosen, it becomes ON-OFF (two positions) operation.
Output 1 PID1 Integral time (I) setting screen
Initial value: 120 seconds
Setting range: 0FF, 1~6000 seconds
key
When performing auto tuning, no necessity for a setting basically.
This screen is not displayed at the time of ON-OFF operation.
Becomes P operation or PD operation in I=OFF setting.
Output 1 PID1 Derivative time (D) setting screen
Initial value: 30 second
Setting range: 0FF, 1~3600 seconds
key
When performing auto tuning, no necessity for a setting basically.
This screen is not displayed at the time of ON-OFF operation.
Becomes P operation or PI operation in D=OFF setting.
Output1 PID1 manual reset setting screen
Initial value:0.0
Setting range: -50.0~50.0%
key
The offset correction at the time of I=OFF ( P operation,PD operation]) is performed.
This screen is not displayed at the time of ON-OFF operation.
Output 1 PID1 differential-gap setting screen
Initial value: 5
Setting range: 1 ~999 unit
key
The differential gap at the time of ON-OFF operation is set.
Displayed at the time of P=OFF ( ON-OFF operation) setup.
 Loading...