Assembly
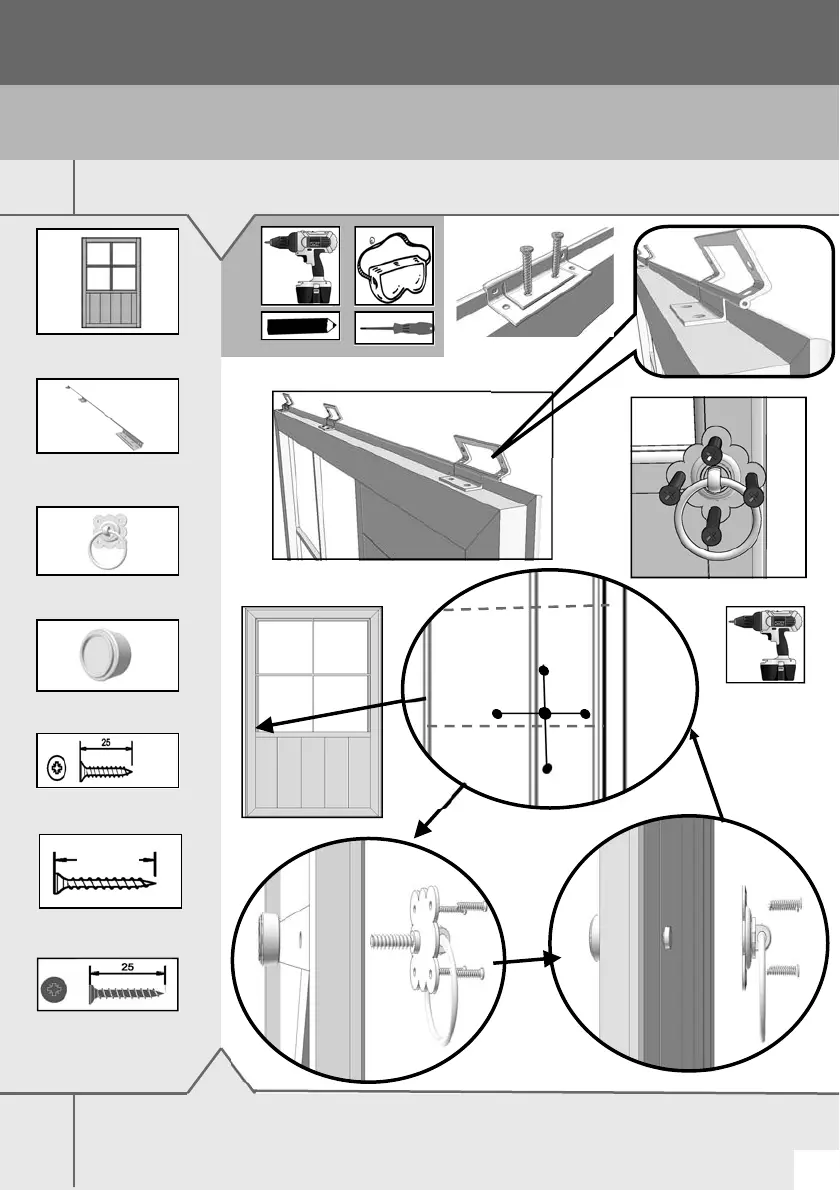
GB-IE Attach the smaller inner part of the 3 point hinges on the long edge of the door.
01
Door
(B0018)x01
3 Point hinge
(A2964)x01
25mm Screw
(A0032)x06
Wooden Knob
(A1143)x01
Black ring handle
(A0508)x01
25mmBlack screw
(A0031 )x04
GB-IE Position the "black ring handle A0508" on the outside over the door frame work, (not on the in fill boards)
mark the screw holes as shown, drill the middle hole only for the "wooden knob A1143 attach the wood-
en knob on the inside of the door first with the 45mm screw and then attach the ring handle on the
outside of the door over the flat head screw.
5mm
5mm
These instructions are for your safety. Please read through them thoroughly before use .
Treat all the parts before assembly –see page 5
KEEP CHILDREN AWAY FROM WORK AREA UNTIL BUILDING IS FINISHED AND CHECKED
13
45mmScrew
(A0034)x01
45