Alignment and
Adjustment
Template Centers
Alignment
Align the template centers according
to the
following
procedures:
1.
Align the left·hand template center
with
the drive center. Move the table
assembly next to the headstock and
lock
the
carriage. Table height should
be previously adjusted so the top
of
the
cutter
is level with drive center.
Loosen the template bracket screw
(11)
with
a 5/16" Allen wrench and
the
two
template clamp screws
(8)
with a
1/4" Allen wrench.
Position an accurate combination
square so that its front edge
just
con-
tacts the
tip
of
the drive center. Care·
fully move the template support
assembly forward on the channel until
the
tip
of
the
template
center
just
contacts
the front edge
of
the square.
Tighten screw
(11).
(See Figure
5.)
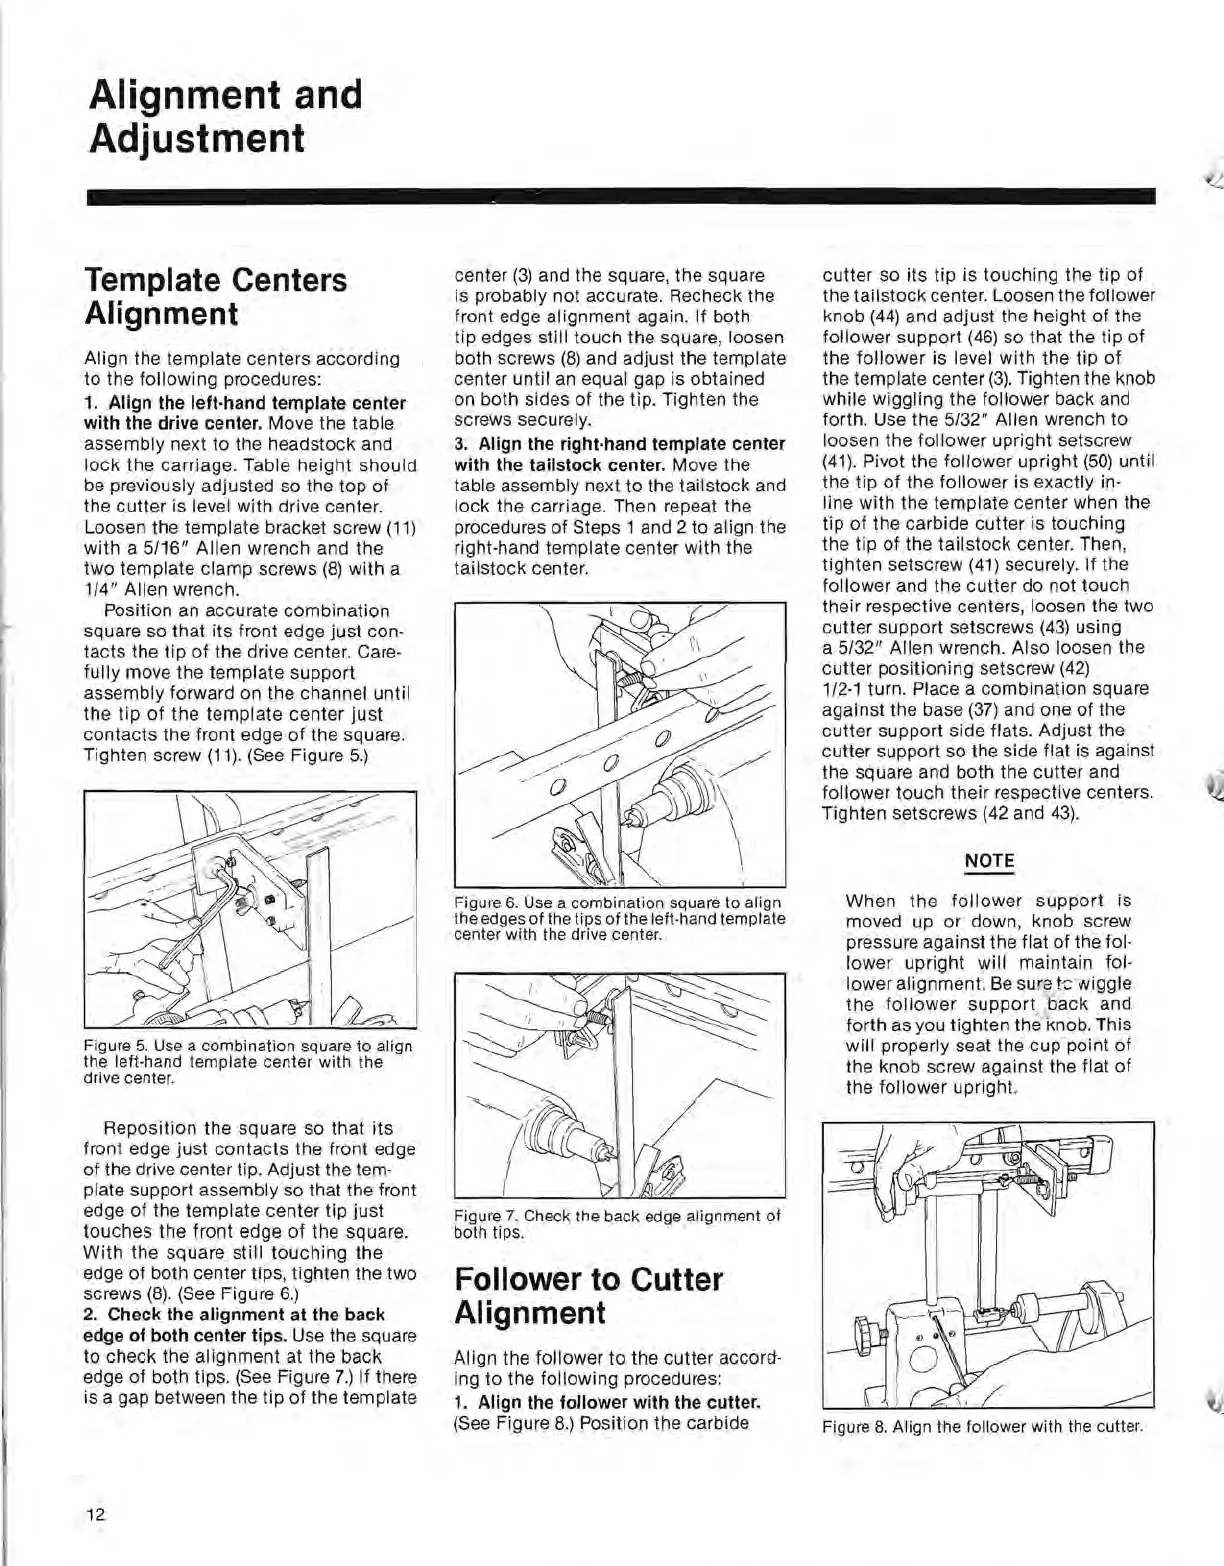
Figure
5.
Use a combination square
to
align
the left·hand
template
center
with
the
drive center.
Reposition
the
square so
that
its
front edge just
contacts
the front edge
of
the drive center tip. Adjust the tem·
plate support assembly so that the front
edge
of
the template center
tip
just
touches
the
front edge
of
the square.
With
the square still
touching
the
edge
of
both center tips, tighten the two
screws
(8)
.
(See
Figure
6.)
2.
Check the alignment at the back
edge
of
both center tips. Use the square
to
check the alignment at the back
edge
of
both tips.
(See
Figure
7.)
If there
is a gap between the tip
of
the template
center
(3)
and the square, the square
is probably not accurate. Recheck the
front edge
al
ignment again. If both
tip edges still touch the square, loosen
both screws
(8)
and adjust the template
center until
an
equal gap is obtained
on both sides
of
the tip. Tighten the
screws securely.
3.
Align the right·hand template center
with
the tailstock center. Move the
table assembly next to the tail stock and
lock
the carriage. Then repeat the
procedures
of
Steps 1 and 2 to align the
right·hand template center with the
tailstock center.
Figure
6.
Use a combination square
to
align
the edges
of
the tips
of
the left-hand template
center with the drive center.
Figure
7.
Check the back edge alignment
of
both tips.
Follower to Cutter
Alignment
AI
ign the follower
to
the cutter accora-
ing to the following procedures:
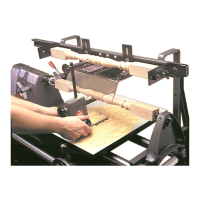
1.
Align the follower
with
the cutter.
(See Figure
8.)
Position the carbide
cutter so
its
tip is touching the
tip
of
the
tailstock
center. Loosen the follower
knob
(44)
and adjust the height
of
the
follower support
(46)
so that the tip
of
the
follower
is level
with
the tip
of
the template center
(3).
Tighten the knob
while wiggling the follower back and
forth. Use the
5/32"
Allen wrench to
loosen the follower upright setscrew
(41).
Pivot the follower upright
(50)
until
the tip
of
the follower is exactly in-
line with the template center when the
tip
of
the carbide
cutter
is touching
the tip
of
the
tailstock
center. Then,
tighten setscrew
(41)
securely. If the
follower and the
cutter
do not touch
their respective centers, loosen the two
cutter
support setscrews
(43)
using
a
5/32"
Allen wrench. Also loosen the
cutter
positioning setscrew
(42)
1/2·1 turn. Place a combination square
against the base
(37)
and one
of
the
cutter
support side flats. Adjust the
cutter support so the side flat is against
the square and both the cutter and
follower touch their respective centers.
Tighten setscrews (42 and
43).
NOTE
When
the
follower
support
is
moved up or down, knob screw
pressure against the flat
of
the fol-
lower upright will maintain fol-
lower alignment.
Be
sura t-c-wiggle
the
follower
support
back and
forth as you tighten the knob. This
will properly seat the cup point
of
the knob screw against the flat
of
the follower upright.
Figure 8. Align the follower with the cutter.
12
 Loading...